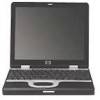
HP Nc4010 Software Guide - Page 40
Removing DriveLock Protection
 |
View all HP Nc4010 manuals
Add to My Manuals
Save this manual to your list of manuals |
Page 40 highlights
Security Removing DriveLock Protection To access the DriveLock settings in Computer Setup, you must shut down, then turn on the notebook. If you open Computer Setup from a Windows restart, DriveLock settings are not accessible. 1. Save your work, exit all applications, and shut down the notebook. If you are not sure whether the notebook is off or in Hibernation, briefly press the power button. If your work returns to the screen, save your work, exit all applications, and then shut down the notebook. 2. Be sure that the hard drive is inserted into the notebook (not an optional Port Replicator or External MultiBay). 3. Open Computer Setup by turning on (not restarting) the notebook. Press F10 while the F10 = ROM Based Setup message is displayed in the lower left of the screen. ❏ To change the language, press F2. ❏ For navigation instructions, press F1. 4. Use the arrow keys to select the Security Menu > DriveLock passwords, then press enter. 5. Use the arrow keys to select the location of the hard drive, then press F10. 6. Toggle the Protection field to Disable, then press F10. 7. Type your master password in the Old Password field, then press F10. 8. To save your preferences, use arrow keys to select File > Save Changes and Exit, then follow the instructions on the screen. Your preferences are set when you exit Computer Setup and take effect when the notebook restarts. 3-14 Software Guide
-
 1
1 -
2
-
3
-
4
-
5
-
6
-
7
-
8
-
9
-
10
-
11
-
12
-
13
-
14
-
15
-
16
-
17
-
18
-
19
-
20
-
21
-
22
-
23
-
24
-
25
-
26
-
27
-
28
-
29
-
30
-
31
-
32
-
33
-
34
-
 35
35 -
 36
36 -
 37
37 -
 38
38 -
 39
39 -
 40
40 -
 41
41 -
 42
42 -
 43
43 -
 44
44 -
 45
45 -
46
-
47
-
48
-
49
-
50
-
51
-
52
-
53
-
54
-
55
-
56
-
57
-
58
-
59
-
60
-
61
-
62
-
63
-
64
-
65
-
66
-
67
-
68
-
69
-
70
-
71
-
72
-
73
-
74
-
75
-
76
-
77
-
78
-
79
-
80
-
81
-
82
-
83
-
84
-
85
-
86
-
87
-
88
-
89
-
90
-
91
 |
 |
