HP Notebook 100 Armada 100S Series Reference Guide - Page 18
Manually Releasing a CD-ROM, the eject button, you can manually release the tray as follows
 |
View all HP Notebook 100 manuals
Add to My Manuals
Save this manual to your list of manuals |
Page 18 highlights
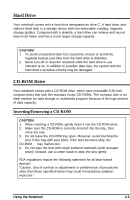
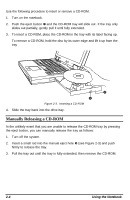
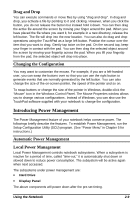
Use the following procedure to insert or remove a CD-ROM. 1. Turn on the notebook. 2. Push the eject button Ê and the CD-ROM tray will slide out. If the tray only slides out partially, gently pull it until fully extended. 3. To insert a CD-ROM, place the CD-ROM in the tray with its label facing up. To remove a CD-ROM, hold the disc by its outer edge and lift it up from the tray 2 1 Figure 2-3. Inserting a CD-ROM 4. Slide the tray back into the drive bay. Manually Releasing a CD-ROM In the unlikely event that you are unable to release the CD-ROM tray by pressing the eject button, you can manually release the tray as follows: 1. Turn off the system. 2. Insert a small rod into the manual eject hole Ë (see Figure 2-3) and push firmly to release the tray. 3. Pull the tray out until the tray is fully extended, then remove the CD-ROM. 2-4 Using the Notebook
-
 1
1 -
2
-
3
-
4
-
5
-
6
-
7
-
8
-
9
-
10
-
11
-
12
-
 13
13 -
 14
14 -
 15
15 -
 16
16 -
 17
17 -
 18
18 -
 19
19 -
 20
20 -
 21
21 -
 22
22 -
 23
23 -
24
-
25
-
26
-
27
-
28
-
29
-
30
-
31
-
32
-
33
-
34
-
35
-
36
-
37
-
38
-
39
-
40
-
41
-
42
-
43
-
44
-
45
-
46
-
47
-
48
-
49
-
50
-
51
-
52
-
53
-
54
-
55
-
56
-
57
-
58
-
59
-
60
-
61
-
62
-
63
-
64
-
65
 |
 |
