HP Officejet 6100 HP Officejet 6100 series all-in-one - (English) Reference Gu - Page 29
use the scan features - installation
 |
View all HP Officejet 6100 manuals
Add to My Manuals
Save this manual to your list of manuals |
Page 29 highlights
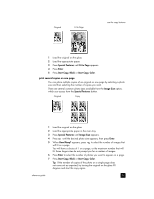
use the scan features 5 Scanning is the process of converting text and pictures into an electronic format for your computer. You can scan just about anything: • Text documents • Photos • Magazine articles • 3D objects (be careful not to scratch the glass) to put into catalogs and flyers Because the scanned image or text is in an electronic format, you can bring it into your word processor or graphics program and modify it to suit your needs. You can do the following: • Scan text from an article into your word processor and quote it in a report, saving you a lot of retyping. • Scan in a logo and use it in your publishing software, allowing you to print business cards and brochures for yourself. • Scan in photos and e-mail them to coworkers and friends, create a photographic inventory of your office or home, or create an electronic scrapbook. Tip: To use the scan features, your HP OfficeJet and computer must be connected and turned on. The HP OfficeJet software must also be installed and running on your computer prior to scanning. To verify that the HP OfficeJet software is running on Windows, look for a status icon in the system tray. On a Macintosh, the HP OfficeJet software is always running. For more information about scanning your documents or pictures from the HP OfficeJet software, see scan pictures and documents in the HP Photo & Imaging Help for more information. scan an original You can start a scan from your computer or from your HP OfficeJet. to scan an original from your Windows computer 1 Load your original either on the glass or in the automatic document feeder (ADF). For more information, see load originals on page 9. 2 Press Start Scan. A scan of the original appears in the HP Preview window. 3 In the HP Preview, you can edit the scanned image. When you have finished, click Accept. 25
-
 1
1 -
2
-
3
-
4
-
5
-
6
-
7
-
8
-
9
-
10
-
11
-
12
-
13
-
14
-
15
-
16
-
17
-
18
-
19
-
20
-
21
-
22
-
23
-
 24
24 -
 25
25 -
 26
26 -
 27
27 -
 28
28 -
 29
29 -
 30
30 -
 31
31 -
 32
32 -
 33
33 -
 34
34 -
35
-
36
-
37
-
38
-
39
-
40
-
41
-
42
-
43
-
44
-
45
-
46
-
47
-
48
-
49
-
50
-
51
-
52
-
53
-
54
-
55
-
56
-
57
-
58
-
59
-
60
-
61
-
62
-
63
-
64
-
65
-
66
-
67
-
68
-
69
-
70
-
71
-
72
-
73
-
74
-
75
-
76
-
77
-
78
-
79
-
80
-
81
-
82
-
83
-
84
-
85
-
86
-
87
-
88
 |
 |
