HP Pavilion dv7-4200 Notebook PC User Guide - Windows 7 - Page 79
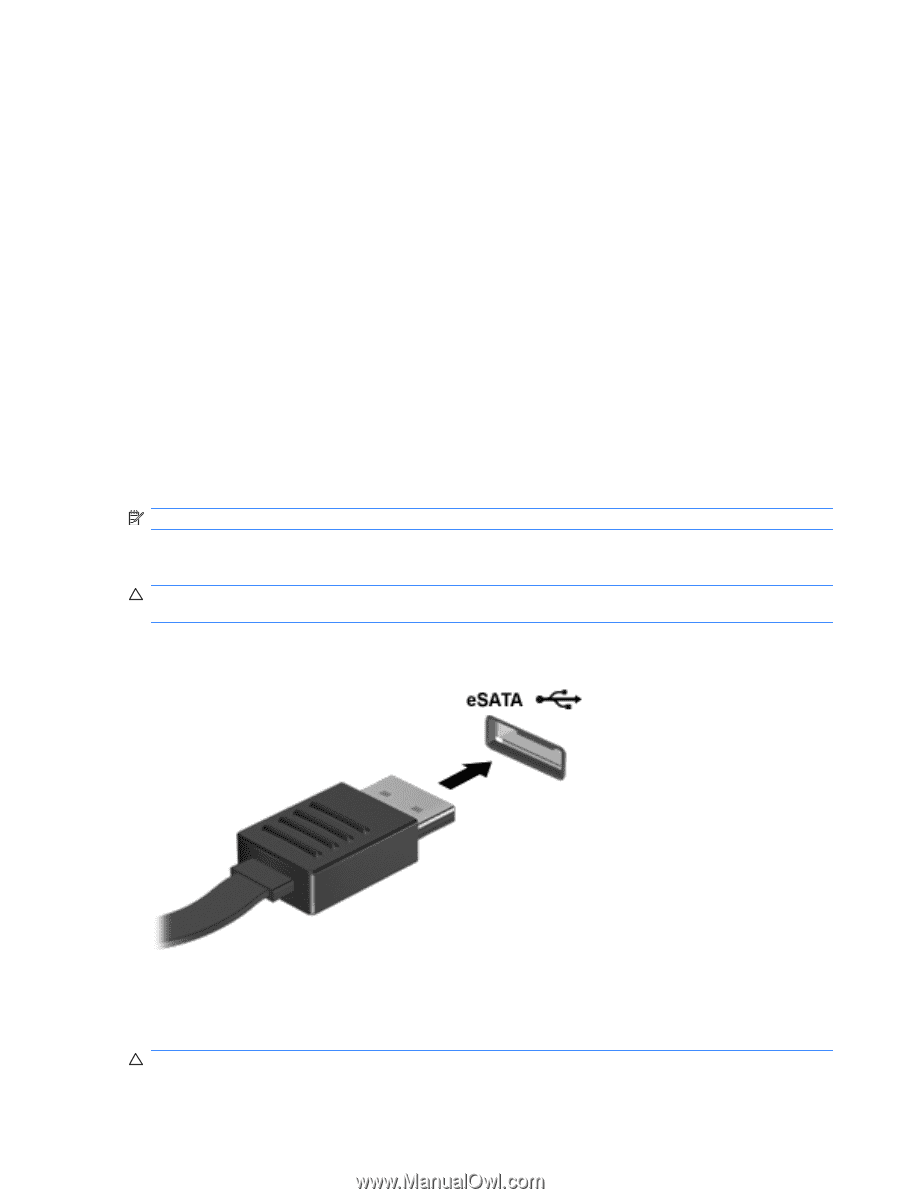
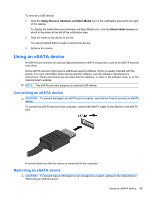
Using an eSATA device
 |
View all HP Pavilion dv7-4200 manuals
Add to My Manuals
Save this manual to your list of manuals |
Page 79 highlights
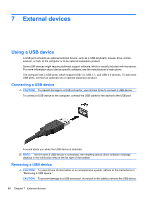
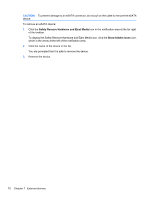
To remove a USB device: 1. Click the Safely Remove Hardware and Eject Media icon in the notification area at the far right of the taskbar. To display the Safely Remove Hardware and Eject Media icon, click the Show hidden icons icon, which is the arrow at the left of the notification area. 2. Click the name of the device in the list. You are prompted that it is safe to remove the device. 3. Remove the device. Using an eSATA device An eSATA port connects an optional high-performance eSATA component, such as an eSATA external hard drive. Some eSATA devices might require additional support software, which is usually included with the device. For more information about device-specific software, see the software manufacturer's instructions. These instructions are provided with the software, on disk, in the software Help, or on the manufacturer's website. NOTE: The eSATA port also supports an optional USB device. Connecting an eSATA device CAUTION: To prevent damage to an eSATA port connector, use minimal force to connect an eSATA device. To connect an eSATA device to the computer, connect the eSATA cable for the device to the eSATA port. A sounds alerts you that the device is connected to the computer. Removing an eSATA device CAUTION: To prevent loss of information or an unresponsive system, adhere to the instructions in "Removing an eSATA device." Using an eSATA device 69
-
 1
1 -
2
-
3
-
4
-
5
-
6
-
7
-
8
-
9
-
10
-
11
-
12
-
13
-
14
-
15
-
16
-
17
-
18
-
19
-
20
-
21
-
22
-
23
-
24
-
25
-
26
-
27
-
28
-
29
-
30
-
31
-
32
-
33
-
34
-
35
-
36
-
37
-
38
-
39
-
40
-
41
-
42
-
43
-
44
-
45
-
46
-
47
-
48
-
49
-
50
-
51
-
52
-
53
-
54
-
55
-
56
-
57
-
58
-
59
-
60
-
61
-
62
-
63
-
64
-
65
-
66
-
67
-
68
-
69
-
70
-
71
-
72
-
73
-
 74
74 -
 75
75 -
 76
76 -
 77
77 -
 78
78 -
 79
79 -
 80
80 -
 81
81 -
 82
82 -
 83
83 -
 84
84 -
85
-
86
-
87
-
88
-
89
-
90
-
91
-
92
-
93
-
94
-
95
-
96
-
97
-
98
-
99
-
100
-
101
-
102
-
103
-
104
-
105
-
106
-
107
-
108
-
109
-
110
-
111
-
112
-
113
-
114
-
115
-
116
-
117
-
118
-
119
-
120
-
121
 |
 |