HP Photosmart R930 User Guide - Page 14
Taking pictures, Recording video clips, Instant Review, Auto focus and exposure, Picture Capture
 |
View all HP Photosmart R930 manuals
Add to My Manuals
Save this manual to your list of manuals |
Page 14 highlights
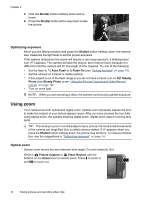
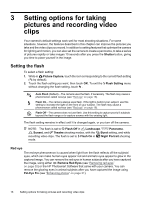
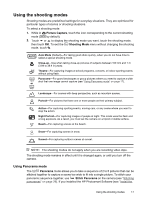
Chapter 2 For the icons you may see displayed on additional buttons, see the entries for camera features in "Using the Picture Capture and Video Record menus" on page 18. Taking pictures You can take a picture when the camera is set to Picture Capture. 1. Slide to . 2. Frame the subject for your picture in the Image Display. 3. Press the Shutter button halfway down to measure and lock the focus and exposure. The focus brackets in the Image Display turn solid green when focus is locked (see "Auto focus and exposure" on page 12). 4. Press the Shutter button all the way down to take the picture. Recording video clips You can record a video clip when the camera is set to Video Record. 1. Slide to . 2. Frame the subject in the Image Display. 3. Press the Shutter button halfway down to measure focus and exposure. The focus brackets in the Image Display turn solid green when focus is locked (see "Auto focus and exposure" on page 12). 4. Press the Shutter button all the way down and release to begin recording video. 5. To stop recording video, press and release the Shutter button again. Instant Review After you have taken a picture or recorded a video clip, the camera displays it briefly in Instant Review. If you want to delete the image or video clip, touch , then touch This Image in the Delete menu. To exit Instant Review, touch . Auto focus and exposure When you press the Shutter button halfway down, the camera automatically measures and locks the focus (for pictures and video clips) and exposure (for pictures only). When you auto focus: Indicator Green focus brackets Red focus brackets (shaking hand icon) Description Focus found. Focus not found (see "Optimizing focus" on page 13). (Pictures only) Long exposure required (see "Optimizing exposure" on page 14). 12 Taking pictures and recording video clips
-
 1
1 -
2
-
3
-
4
-
5
-
6
-
7
-
8
-
 9
9 -
 10
10 -
 11
11 -
 12
12 -
 13
13 -
 14
14 -
 15
15 -
 16
16 -
 17
17 -
 18
18 -
 19
19 -
20
-
21
-
22
-
23
-
24
-
25
-
26
-
27
-
28
-
29
-
30
-
31
-
32
-
33
-
34
-
35
-
36
-
37
-
38
-
39
-
40
-
41
-
42
-
43
-
44
-
45
-
46
-
47
-
48
-
49
-
50
-
51
-
52
-
53
-
54
-
55
-
56
-
57
-
58
-
59
-
60
-
61
-
62
-
63
-
64
 |
 |
