HP Photosmart R930 User Guide - Page 23
Using the Self-Timer settings, Using the Burst setting, Steady Photo, Self-Timer, Picture Capture
 |
View all HP Photosmart R930 manuals
Add to My Manuals
Save this manual to your list of manuals |
Page 23 highlights
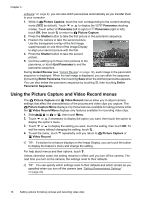
Using the Self-Timer settings The Self-Timer allows you to take one or two pictures or one video clip after a 10second delay. 1. While in the Picture Capture or Video Record Menu, touch Self-Timer. 2. In the Self-Timer menu, touch On (for one shot) or On-2 Shots ( only), touch OK, then touch to return to Picture Capture or Video Record. For more details on selecting options in the Picture Capture and Video Record menus, see "Using the Picture Capture and Video Record menus" on page 18. 3. Set the camera on a tripod or stable surface. 4. Frame the subject in the Image Display. 5. Press the Shutter button halfway down to lock focus and exposure. When the focus brackets turn green, press the Shutter button all the way down. The camera begins the 10-second countdown, then takes the picture or begins recording the video clip. If you chose On-2 Shots, the camera takes the second picture a few seconds after the first. 6. If you are recording a video clip, press the Shutter button to stop recording. TIP: If you want to include yourself in the picture, place the camera on a tripod or stable surface, then press the Shutter button all the way down. The camera locks focus and exposure just before the end of the countdown, allowing you time to place yourself in the scene. The Self-Timer setting resets to the default Off setting after the picture or video clip is taken. Using the Burst setting Burst allows you to take two or more pictures as quickly as possible when you press and hold the Shutter button all the way down. 1. While in the Picture Capture Menu, touch or to display Burst. Touch Burst. 2. In the Burst menu, touch On, touch OK, then touch to return to Picture Capture. 3. Frame the subject, then press the Shutter button halfway down to lock the focus and exposure. Then press the Shutter button all the way down and hold it. The camera takes pictures as quickly as possible until you release the Shutter button or the camera runs out of memory. The Image Display remains off during the burst capture. After the burst images have been taken, each image appears one at a time in Instant Review (see "Instant Review" on page 12). You can delete the entire burst sequence in Instant Review. To delete individual images, see "Deleting images" on page 25. The Burst setting remains in effect until it is changed again, or until it resets to the default Off setting when you turn off the camera. Steady Photo Steady Photo minimizes blur in pictures you take under dim lighting conditions. When the camera detects motion, either because the camera is shaking slightly or the subject is moving, it increases the ISO speed (see "ISO speed" on page 22). In this Using the Picture Capture and Video Record menus 21
-
 1
1 -
2
-
3
-
4
-
5
-
6
-
7
-
8
-
9
-
10
-
11
-
12
-
13
-
14
-
15
-
16
-
17
-
 18
18 -
 19
19 -
 20
20 -
 21
21 -
 22
22 -
 23
23 -
 24
24 -
 25
25 -
 26
26 -
 27
27 -
 28
28 -
29
-
30
-
31
-
32
-
33
-
34
-
35
-
36
-
37
-
38
-
39
-
40
-
41
-
42
-
43
-
44
-
45
-
46
-
47
-
48
-
49
-
50
-
51
-
52
-
53
-
54
-
55
-
56
-
57
-
58
-
59
-
60
-
61
-
62
-
63
-
64
 |
 |
