HP Photosmart R930 User Guide - Page 30
Managing tags on the camera, HP Photosmart Software see
 |
View all HP Photosmart R930 manuals
Add to My Manuals
Save this manual to your list of manuals |
Page 30 highlights
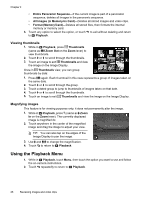
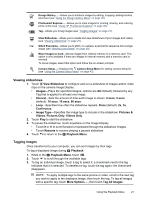
Chapter 4 4. When you have finished tagging images, touch Done to exit the Tag menu. 5. Touch or to scroll to the next image you wish to tag, then repeat Steps 2 through 4. 6. When you have finished tagging images, touch Done, then touch to return to the Playback Menu. NOTE: You can select a tag to be applied to all images you take (see Tag under "Taking pictures and recording video clips" on page 11). You can also create new tags on the camera (see "Managing tags on the camera" on page 28) or by using the HP Photosmart Software (see "Managing tags in Windows" on page 29 and "Managing tags on your Macintosh" on page 29). Managing tags on the camera To create a new tag: 1. From the Tag menu, touch More Options..., then touch Create New Tag to display the camera keyboard. 2. Use the keyboard to define a new tag (see "Using the keyboard" on page 28). 3. When you have finished creating a tag, touch Done. The new tag appears at the beginning of the Tag menu. To permanently delete a tag from the camera (which also removes the tag from any images): 1. Touch More Options..., touch Delete a Tag from the Menu, then touch the tag you want to delete. 2. Touch Yes on the confirmation screen to delete the selected tag. You can also create and delete tags using the HP Photosmart Software (see "Managing tags in Windows" on page 29 and "Managing tags on your Macintosh" on page 29). Using the keyboard You may have a maximum of 100 tags defined on your camera (this includes the predefined tags that came on your camera). Tag names may contain a maximum of 32 characters (letters, numbers, special characters, and spaces). With the keyboard displayed: 1. Touch the key corresponding to the letter, symbol, or number you want. • To enter capital letters, touch Shift, then touch a letter. • To enter numbers and special characters, touch 123+, then touch a number or special character. • To delete the last character you entered, touch ←. TIP: At any time, you can touch to cancel the entry. 2. When you have finished, touch Done. 28 Reviewing images and video clips
-
 1
1 -
2
-
3
-
4
-
5
-
6
-
7
-
8
-
9
-
10
-
11
-
12
-
13
-
14
-
15
-
16
-
17
-
18
-
19
-
20
-
21
-
22
-
23
-
24
-
 25
25 -
 26
26 -
 27
27 -
 28
28 -
 29
29 -
 30
30 -
 31
31 -
 32
32 -
 33
33 -
 34
34 -
 35
35 -
36
-
37
-
38
-
39
-
40
-
41
-
42
-
43
-
44
-
45
-
46
-
47
-
48
-
49
-
50
-
51
-
52
-
53
-
54
-
55
-
56
-
57
-
58
-
59
-
60
-
61
-
62
-
63
-
64
 |
 |
