HP Professional sp750 Compaq Professional Workstation SP750 Hardware Reference - Page 30
Installing a Drive, Installing a Hard Drive in Bays 5 and 6
 |
View all HP Professional sp750 manuals
Add to My Manuals
Save this manual to your list of manuals |
Page 30 highlights
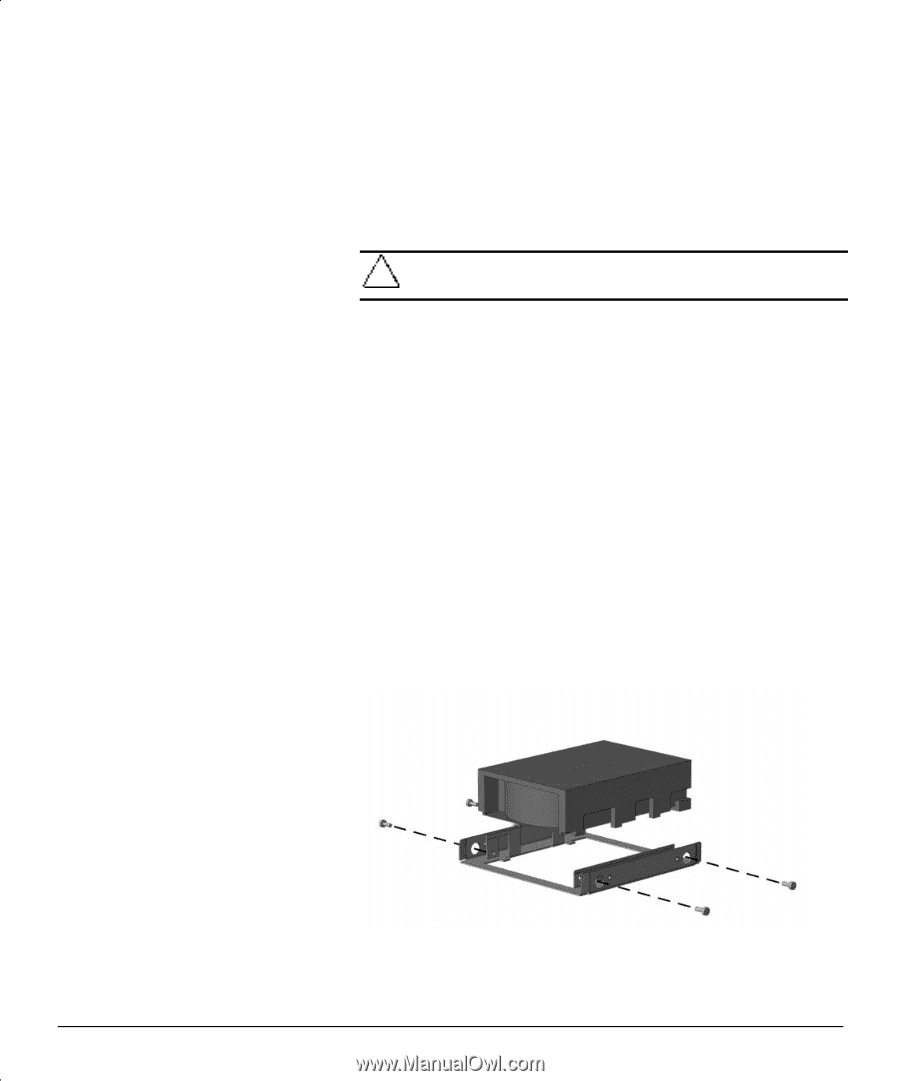
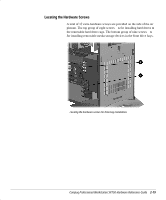
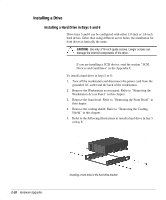
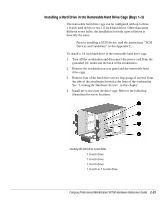
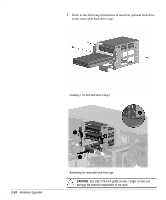
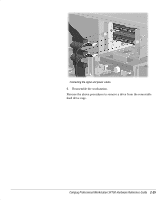
Installing a Drive Installing a Hard Drive in Bays 5 and 6 Drive bays 5 and 6 can be configured with either 1.0-inch or 1.6-inch hard drives. Other than using different screw holes, the installation for both drives is basically the same. CAUTION: Use only 3/16-inch guide screws. Longer screws can damage the internal components of the drive. ✎ If you are installing a SCSI device, read the section “ SCSI Devices and Guidelines” in the Appendix C. To install a hard drive in bays 5 or 6: 1. Turn off the workstation and disconnect the power cord from the grounded AC outlet and the back of the workstation. 2. Remove the Workstation access panel. Refer to “ Removing the Workstation Access Panel” in this chapter. 3. Remove the front bezel. Refer to “ Removing the .ront Bezel” in this chapter. 4. Remove the cooling shield. Refer to “ Removing the Cooling Shield” in this chapter. 5. Refer to the following illustrations to install a hard drive in bay 5 or bay 6. 2-20 Hardware Upgrades Installing a hard drive in the hard drive bracket
-
 1
1 -
2
-
3
-
4
-
5
-
6
-
7
-
8
-
9
-
10
-
11
-
12
-
13
-
14
-
15
-
16
-
17
-
18
-
19
-
20
-
21
-
22
-
23
-
24
-
 25
25 -
 26
26 -
 27
27 -
 28
28 -
 29
29 -
 30
30 -
 31
31 -
 32
32 -
 33
33 -
 34
34 -
 35
35 -
36
-
37
-
38
-
39
-
40
-
41
-
42
-
43
-
44
-
45
-
46
-
47
-
48
-
49
-
50
-
51
-
52
-
53
-
54
-
55
-
56
-
57
-
58
-
59
-
60
-
61
-
62
-
63
-
64
-
65
-
66
-
67
-
68
-
69
-
70
-
71
-
72
-
73
-
74
-
75
-
76
-
77
-
78
-
79
 |
 |