Compaq Professional Workstation SP750 Hardware Reference Guide
iii
Compaq Confidential - Need to Know Required
C
ONTENTS
chapter 1
Product ±eatures
Standard Configuration ±eatures
.............................................................................................
1-1
±ront Panel Components
.........................................................................................................
1-2
Rear Panel Components
..........................................................................................................
1-3
System Board Components
.....................................................................................................
1-4
Windows Logo Key
................................................................................................................
1-5
Special Mouse ±unctions
.........................................................................................................
1-5
Serial Number Location
..........................................................................................................
1-5
chapter 2
Hardware Upgrades
Installation Sequence
...............................................................................................................
2-2
Removing the Workstation Access Panel
................................................................................
2-3
Removing the ±ront Bezel
.......................................................................................................
2-4
Installing Additional Memory
.................................................................................................
2-5
Removing a Memory Board
..............................................................................................
2-5
Eight-RIMM Slot Memory Board
.....................................................................................
2-7
Configurations for RIMM Installation
.........................................................................
2-7
Configuration 1
............................................................................................................
2-7
Configuration 2
............................................................................................................
2-8
Configuration 3
............................................................................................................
2-8
Configuration 4
............................................................................................................
2-8
Guidelines for RIMM Installation
.....................................................................................
2-9
Installing RIMMs
............................................................................................................
2-10
Removing RIMMs
...........................................................................................................
2-12
Installing a Memory Board
..............................................................................................
2-12
Installing Additional Drives
..................................................................................................
2-14
Drive Bay Components
...................................................................................................
2-14
Preparing for Drive Installation
.......................................................................................
2-16
Removing the Bezel Blank
........................................................................................
2-16
Removing and Replacing the Removable Hard Drive Cage
......................................
2-17
Removing the Cooling Shield
....................................................................................
2-18
Locating the Hardware Screws
..................................................................................
2-19
Installing a Drive
.............................................................................................................
2-20
Installing a Hard Drive in Bays 5 and 6
.....................................................................
2-20
Installing a Hard Drive in the Removable Hard Drive Cage (Bays 1-3)
...................
2-23

 1
1 2
2 3
3 4
4 5
5 6
6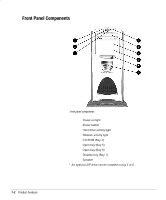 7
7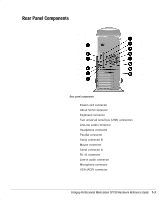 8
8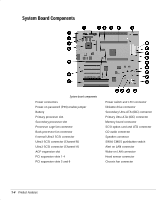 9
9 10
10

