HP Scitex FB500 HP Scitex FB500 and FB700 Printer Series - User Guide - Page 78
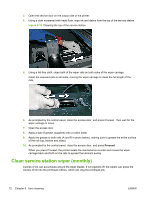
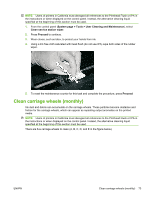
Clean service station wiper (monthly),
 |
View all HP Scitex FB500 manuals
Add to My Manuals
Save this manual to your list of manuals |
Page 78 highlights
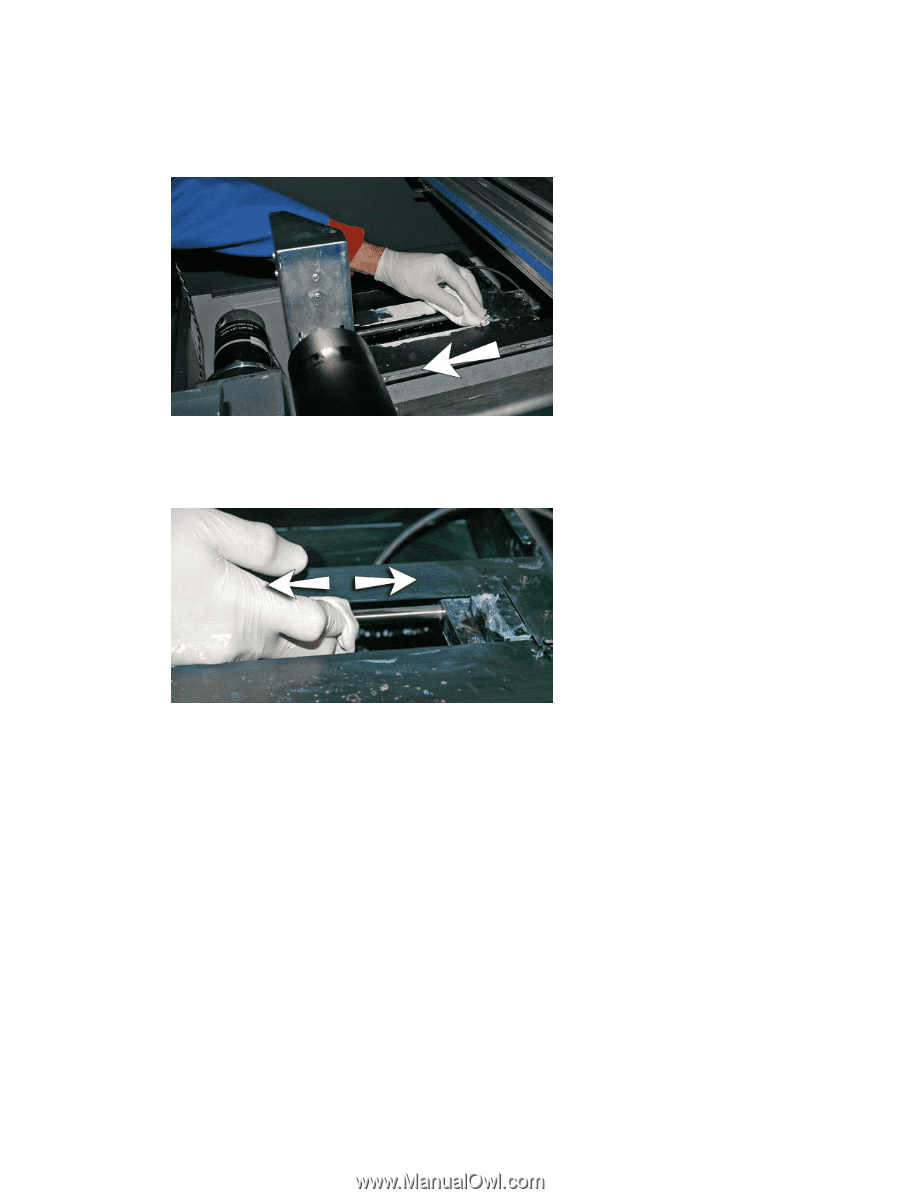
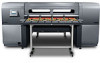
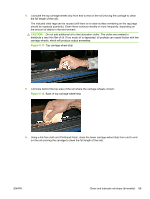
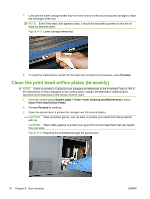
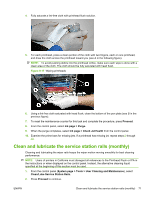
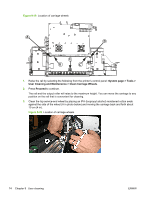
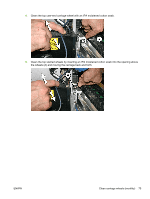
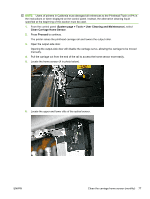
3. Open the service door on the output side of the printer. 4. Using a cloth moistened with head flush, wipe ink and debris from the top of the service station. Figure 9-18 Cleaning the top of the service station 5. Using a lint-free cloth, clean both of the wiper rails on both sides of the wiper carriage. Clean the exposed rails on all sides, moving the wiper carriage to clean the full length of the rails. 6. As prompted by the control panel, close the access door, and press Proceed. Then wait for the wiper carriage to move. 7. Open the access door. 8. Apply a dab of grease (supplied) onto a cotton swab. 9. Apply the grease to both rails (A and B in photo below), making sure to grease the entire surface of the rail (top, bottom and sides). 10. As prompted by the control panel, close the access door, and press Proceed. When you press Proceed, the printer resets the maintenance counter and moves the wiper carriage back and forth on the rails to spread the lubricant evenly. Clean service station wiper (monthly) Clumps of ink can accumulate around the wiper blades. If not cleaned off, the wipers can press the clumps of ink into the printhead orifices, which can clog the printhead jets. 72 Chapter 9 User cleaning ENWW
-
 1
1 -
2
-
3
-
4
-
5
-
6
-
7
-
8
-
9
-
10
-
11
-
12
-
13
-
14
-
15
-
16
-
17
-
18
-
19
-
20
-
21
-
22
-
23
-
24
-
25
-
26
-
27
-
28
-
29
-
30
-
31
-
32
-
33
-
34
-
35
-
36
-
37
-
38
-
39
-
40
-
41
-
42
-
43
-
44
-
45
-
46
-
47
-
48
-
49
-
50
-
51
-
52
-
53
-
54
-
55
-
56
-
57
-
58
-
59
-
60
-
61
-
62
-
63
-
64
-
65
-
66
-
67
-
68
-
69
-
70
-
71
-
72
-
 73
73 -
 74
74 -
 75
75 -
 76
76 -
 77
77 -
 78
78 -
 79
79 -
 80
80 -
 81
81 -
 82
82 -
 83
83 -
84
-
85
-
86
-
87
-
88
-
89
-
90
-
91
-
92
-
93
-
94
-
95
-
96
-
97
-
98
-
99
-
100
-
101
-
102
 |
 |