HP Scitex FB500 HP Scitex FB500 and FB700 Printer Series - User Guide - Page 80
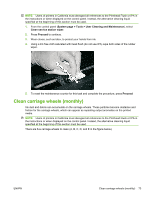
System gt; Tools >, User Cleaning and Maintenance > Clean Carriage Wheels, Proceed
 |
View all HP Scitex FB500 manuals
Add to My Manuals
Save this manual to your list of manuals |
Page 80 highlights
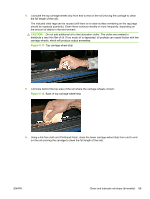
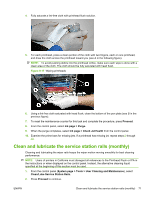
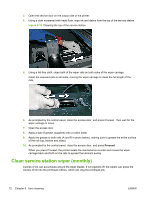
Figure 9-19 Location of carriage wheels A D E B C 1. Raise the rail by selecting the following from the printer's control panel: System page > Tools > User Cleaning and Maintenance > Clean Carriage Wheels. 2. Press Proceed to continue. The rail and the output roller will raise to the maximum height. You can move the carriage to any position on the rail that is convenient for cleaning. 3. Clean the top service-end wheel by placing an IPA (Isopropyl alcohol) moistened cotton swab against the side of the wheel (A in photo below) and moving the carriage back and forth about 10 cm (4 in). Figure 9-20 Location of carriage wheels 74 Chapter 9 User cleaning ENWW
-
 1
1 -
2
-
3
-
4
-
5
-
6
-
7
-
8
-
9
-
10
-
11
-
12
-
13
-
14
-
15
-
16
-
17
-
18
-
19
-
20
-
21
-
22
-
23
-
24
-
25
-
26
-
27
-
28
-
29
-
30
-
31
-
32
-
33
-
34
-
35
-
36
-
37
-
38
-
39
-
40
-
41
-
42
-
43
-
44
-
45
-
46
-
47
-
48
-
49
-
50
-
51
-
52
-
53
-
54
-
55
-
56
-
57
-
58
-
59
-
60
-
61
-
62
-
63
-
64
-
65
-
66
-
67
-
68
-
69
-
70
-
71
-
72
-
73
-
74
-
 75
75 -
 76
76 -
 77
77 -
 78
78 -
 79
79 -
 80
80 -
 81
81 -
 82
82 -
 83
83 -
 84
84 -
 85
85 -
86
-
87
-
88
-
89
-
90
-
91
-
92
-
93
-
94
-
95
-
96
-
97
-
98
-
99
-
100
-
101
-
102
 |
 |
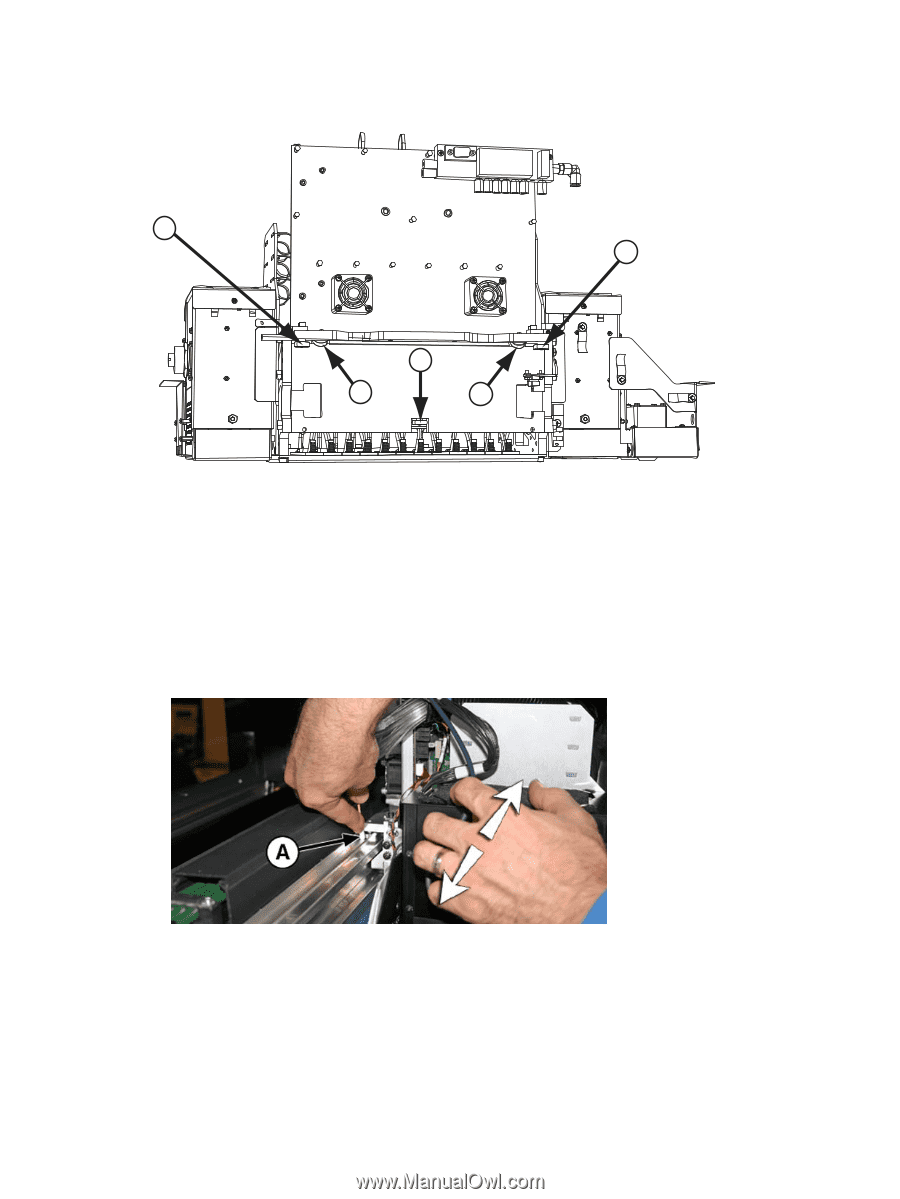
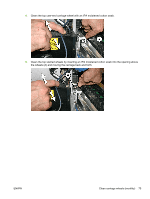
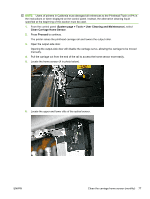
Figure 9-19
Location of carriage wheels
D
C
A
B
E
1.
Raise the rail by selecting the following from the printer’s control panel:
System page > Tools >
User Cleaning and Maintenance > Clean Carriage Wheels
.
2.
Press
Proceed
to continue.
The rail and the output roller will raise to the maximum height. You can move the carriage to any
position on the rail that is convenient for cleaning.
3.
Clean the top service-end wheel by placing an IPA (Isopropyl alcohol) moistened cotton swab
against the side of the wheel (A in photo below) and moving the carriage back and forth about
10 cm (4 in).
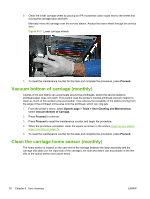
Figure 9-20
Location of carriage wheels
74
Chapter 9
User cleaning
ENWW