HP T1100 HP Designjet T1100 Printer Series - User's Guide - Page 200
Cannot access the Embedded Web Server, Automatic file system check
 |
UPC - 883585044979
View all HP T1100 manuals
Add to My Manuals
Save this manual to your list of manuals |
Page 200 highlights
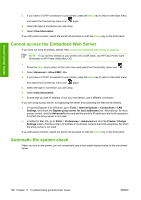
General printer issues 3. If you have a TCP/IP connection to your printer, press the Menu key to return to the main menu and select the Connectivity menu icon again. 4. Select the type of connection you are using. 5. Select View Information. If you still cannot connect, switch the printer off and back on with the Power key on the front panel. Cannot access the Embedded Web Server If you have not done so already, please read Access the Embedded Web Server on page 30. NOTE: If you connect directly to your printer with a USB cable, use HP Easy Printer Care (Windows) or HP Printer Utility (Mac OS). 1. Press the Menu key to return to the main menu and select the Connectivity menu icon . 2. Select Advanced > Allow EWS > On. 3. If you have a TCP/IP connection to your printer, press the Menu key to return to the main menu and select the Connectivity menu icon again. 4. Select the type of connection you are using. 5. Select View Information. 6. Ensure that you see IP enabled. If not, you may need to use a different connection. If you are using a proxy server, try bypassing the server and accessing the Web server directly. ● In Internet Explorer 6 for Windows, go to Tools > Internet Options > Connections > LAN Settings, and check the Bypass proxy server for local addresses box. Alternatively, for more precise control, click the Advanced button and add the printer's IP address to the list of exceptions, for which the proxy server is not used. ● In Safari for Mac OS, go to Safari > Preferences > Advanced and click the Proxies: Change Settings button. Add the printer's IP address or its domain name to the list of exceptions, for which the proxy server is not used. If you still cannot connect, switch the printer off and back on with the Power key on the front panel. Automatic file system check When you turn on the printer, you will occasionally see a front panel display similar to the one shown below. 188 Chapter 17 Troubleshooting general printer issues ENWW
-
 1
1 -
2
-
3
-
4
-
5
-
6
-
7
-
8
-
9
-
10
-
11
-
12
-
13
-
14
-
15
-
16
-
17
-
18
-
19
-
20
-
21
-
22
-
23
-
24
-
25
-
26
-
27
-
28
-
29
-
30
-
31
-
32
-
33
-
34
-
35
-
36
-
37
-
38
-
39
-
40
-
41
-
42
-
43
-
44
-
45
-
46
-
47
-
48
-
49
-
50
-
51
-
52
-
53
-
54
-
55
-
56
-
57
-
58
-
59
-
60
-
61
-
62
-
63
-
64
-
65
-
66
-
67
-
68
-
69
-
70
-
71
-
72
-
73
-
74
-
75
-
76
-
77
-
78
-
79
-
80
-
81
-
82
-
83
-
84
-
85
-
86
-
87
-
88
-
89
-
90
-
91
-
92
-
93
-
94
-
95
-
96
-
97
-
98
-
99
-
100
-
101
-
102
-
103
-
104
-
105
-
106
-
107
-
108
-
109
-
110
-
111
-
112
-
113
-
114
-
115
-
116
-
117
-
118
-
119
-
120
-
121
-
122
-
123
-
124
-
125
-
126
-
127
-
128
-
129
-
130
-
131
-
132
-
133
-
134
-
135
-
136
-
137
-
138
-
139
-
140
-
141
-
142
-
143
-
144
-
145
-
146
-
147
-
148
-
149
-
150
-
151
-
152
-
153
-
154
-
155
-
156
-
157
-
158
-
159
-
160
-
161
-
162
-
163
-
164
-
165
-
166
-
167
-
168
-
169
-
170
-
171
-
172
-
173
-
174
-
175
-
176
-
177
-
178
-
179
-
180
-
181
-
182
-
183
-
184
-
185
-
186
-
187
-
188
-
189
-
190
-
191
-
192
-
193
-
194
-
 195
195 -
 196
196 -
 197
197 -
 198
198 -
 199
199 -
 200
200 -
 201
201 -
 202
202 -
 203
203 -
 204
204 -
 205
205 -
206
-
207
-
208
-
209
-
210
-
211
-
212
-
213
-
214
-
215
-
216
-
217
-
218
-
219
-
220
 |
 |