HP Tc2110 hp server tc2110 operation and maintenance guide (online version 1.1 - Page 23
Removing the Upper Bezel, Replacing the Left Side Cover
 |
View all HP Tc2110 manuals
Add to My Manuals
Save this manual to your list of manuals |
Page 23 highlights
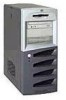
Chapter 3 4. Lift the latch to engage the lock and completely close the side cover. The side cover should snap into place when securely closed. Installing and Configuring Figure 3-2. Replacing the Left Side Cover 5. Lock the cover using the key provided, if required. Reconnect all the power and telecommunication cables. Removing the Upper Bezel The upper front bezel must be removed to install or replace mass storage devices in the first four shelves (common trays). To remove the upper bezel: 1. Switch off the monitor and HP Server, and disconnect all power cords and any telecommunication cables. If necessary, label each one to expedite re-assembly. 2. Remove the left side cover, as described earlier in this chapter. 3. Locate the upper bezel release tabs just behind the front bezel, as shown below. 4. Pull the release tabs outward, releasing the upper bezel and pull the tabs/upper bezel forward. The upper front bezel swings open on its hinge teeth. 5. Swing the upper bezel completely open and remove it from the front of the Server. 17
-
 1
1 -
2
-
3
-
4
-
5
-
6
-
7
-
8
-
9
-
10
-
11
-
12
-
13
-
14
-
15
-
16
-
17
-
 18
18 -
 19
19 -
 20
20 -
 21
21 -
 22
22 -
 23
23 -
 24
24 -
 25
25 -
 26
26 -
 27
27 -
 28
28 -
29
-
30
-
31
-
32
-
33
-
34
-
35
-
36
-
37
-
38
-
39
-
40
-
41
-
42
-
43
-
44
-
45
-
46
-
47
-
48
-
49
-
50
-
51
-
52
-
53
-
54
-
55
-
56
-
57
-
58
-
59
-
60
-
61
-
62
-
63
-
64
-
65
-
66
-
67
-
68
-
69
-
70
-
71
-
72
-
73
-
74
-
75
-
76
-
77
-
78
-
79
-
80
-
81
-
82
-
83
-
84
-
85
-
86
-
87
-
88
-
89
-
90
-
91
-
92
-
93
-
94
-
95
-
96
-
97
-
98
-
99
-
100
-
101
-
102
-
103
-
104
-
105
-
106
-
107
-
108
-
109
-
110
-
111
-
112
-
113
-
114
-
115
-
116
-
117
-
118
 |
 |
