HP Vectra XM 5/xxx HP Vectra XM 5/xxx Series 3 - User Guide - Page 44
Installing Accessory Boards
 |
View all HP Vectra XM 5/xxx manuals
Add to My Manuals
Save this manual to your list of manuals |
Page 44 highlights
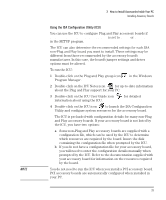
3 How to Install Accessories Inside Your PC Installing Accessory Boards Installing Accessory Boards The PC has four accessory board slots: • Slot 1 (the bottom slot) can be used for half-length 16-bit ISA boards • Slot 2 can be used for full-length 16-bit ISA boards • Slot 3 can be used for either a full-length 32-bit PCI or a full-length 16-bit ISA board • Slot 4 (the top slot) can be used for a half-length 32-bit PCI board. Configuring Accessory Boards with Plug and Play Plug and Play is an industry standard for automatically configuring your PC's hardware resources and the accessory boards installed in it. Your PC has configurable support for Plug and Play in the BIOS. When you start your PC, the Plug and Play BIOS automatically detects which hardware resources (IRQs, DMAs, memory ranges, and I/O addresses) are used by the system-based components. Configuring Plug and Play with the SETUP program You can use the SETUP program to select the level of support provided by the BIOS for Plug and Play-compatible accessory boards: 1 Turn on the PC and press when appears. 2 Highlight the Plug and Play Device Management line and use or to select None, Boot Only, or Full. • If None is selected, you must use the ISA Configuration Utility (ICU) to configure all accessory boards. • If Boot Only is selected, Plug and Play accessory boards which have the ability to boot (start) your PC will be configured by the BIOS. You must use the ICU to configure all other accessory boards. • If Full is selected, all Plug and Play accessories will be configured by the BIOS. However, if you install a non-Plug and Play accessory board, you must use the ICU to determine a conflict-free setting for the board. 3 Press to save your selection and exit from the SETUP program. 32 English
-
 1
1 -
2
-
3
-
4
-
5
-
6
-
7
-
8
-
9
-
10
-
11
-
12
-
13
-
14
-
15
-
16
-
17
-
18
-
19
-
20
-
21
-
22
-
23
-
24
-
25
-
26
-
27
-
28
-
29
-
30
-
31
-
32
-
33
-
34
-
35
-
36
-
37
-
38
-
 39
39 -
 40
40 -
 41
41 -
 42
42 -
 43
43 -
 44
44 -
 45
45 -
 46
46 -
 47
47 -
 48
48 -
 49
49 -
50
-
51
-
52
-
53
-
54
-
55
-
56
-
57
-
58
-
59
-
60
-
61
-
62
-
63
-
64
-
65
-
66
-
67
-
68
-
69
-
70
-
71
-
72
-
73
-
74
-
75
-
76
-
77
-
78
-
79
-
80
-
81
-
82
-
83
-
84
-
85
-
86
-
87
-
88
-
89
-
90
-
91
-
92
-
93
-
94
-
95
-
96
-
97
-
98
-
99
-
100
-
101
-
102
-
103
-
104
-
105
-
106
-
107
-
108
-
109
-
110
-
111
-
112
-
113
-
114
-
115
-
116
-
117
-
118
-
119
-
120
-
121
-
122
 |
 |
