HP Vectra XM 5/xxx HP Vectra XM 5/xxx Series 3 - User Guide - Page 65
When an IDE Drive is, Not Detected by the, SETUP Program
 |
View all HP Vectra XM 5/xxx manuals
Add to My Manuals
Save this manual to your list of manuals |
Page 65 highlights
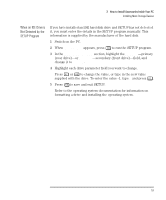
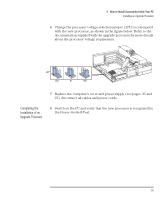
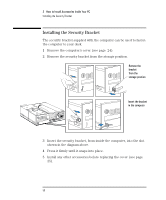
3 How to Install Accessories Inside Your PC Installing Mass Storage Devices When an IDE Drive is Not Detected by the SETUP Program If you have installed an IDE hard disk drive and SETUP has not detected it, you must enter the details in the SETUP program manually. This information is supplied by the manufacturer of the hard disk. 1 Switch on the PC. 2 When appears, press to run the SETUP program. 3 In the Hard Disk Drives section, highlight the Drive 1-primary (rear drive)-or Drive 2-secondary (front drive)-field, and change it to Custom. 4 Highlight each drive parameter field you want to change. Press or to change the value, or type in the new value supplied with the drive. To enter the value -1, type 0 and press . 5 Press to save and exit SETUP. Refer to the operating system documentation for information on formatting a drive and installing the operating system. English 53
-
 1
1 -
2
-
3
-
4
-
5
-
6
-
7
-
8
-
9
-
10
-
11
-
12
-
13
-
14
-
15
-
16
-
17
-
18
-
19
-
20
-
21
-
22
-
23
-
24
-
25
-
26
-
27
-
28
-
29
-
30
-
31
-
32
-
33
-
34
-
35
-
36
-
37
-
38
-
39
-
40
-
41
-
42
-
43
-
44
-
45
-
46
-
47
-
48
-
49
-
50
-
51
-
52
-
53
-
54
-
55
-
56
-
57
-
58
-
59
-
 60
60 -
 61
61 -
 62
62 -
 63
63 -
 64
64 -
 65
65 -
 66
66 -
 67
67 -
 68
68 -
 69
69 -
 70
70 -
71
-
72
-
73
-
74
-
75
-
76
-
77
-
78
-
79
-
80
-
81
-
82
-
83
-
84
-
85
-
86
-
87
-
88
-
89
-
90
-
91
-
92
-
93
-
94
-
95
-
96
-
97
-
98
-
99
-
100
-
101
-
102
-
103
-
104
-
105
-
106
-
107
-
108
-
109
-
110
-
111
-
112
-
113
-
114
-
115
-
116
-
117
-
118
-
119
-
120
-
121
-
122
 |
 |
