HP XM600 hp kayak xm600 series 1, user's guide for desktop models - Page 23
Removing the, Front Bezel, Replacing the Cover
 |
View all HP XM600 manuals
Add to My Manuals
Save this manual to your list of manuals |
Page 23 highlights
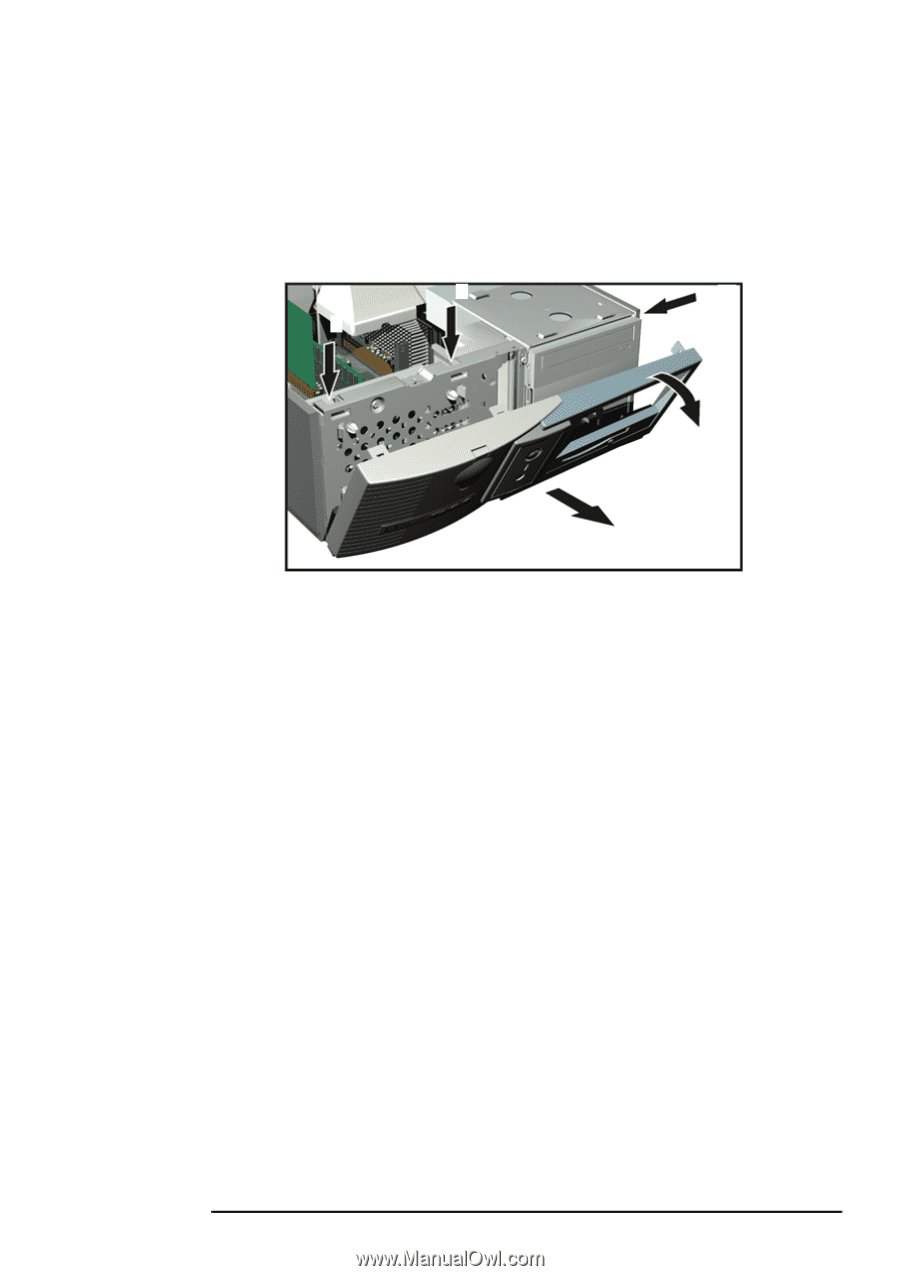
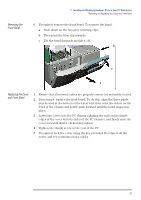
Removing the Front Bezel 2 Installing and Replacing Hardware Parts in Your PC Workstation Removing and Replacing the Cover and Front Bezel 6 If required, remove the front bezel. To remove the bezel: a Push down on the two grey retaining clips. b Then push the blue clip inwards. c Tilt the bezel forwards and lift it off. a b a c c Replacing the Cover and Front Bezel 1 Ensure that all internal cables are properly connected and safely routed. 2 If necessary, replace the front bezel. To do this, align the three guide pins located at the bottom of the bezel with their associated slots on the front of the chassis and gently push forward until the bezel snaps into place. 3 Lower the cover onto the PC chassis (aligning the rails on the inside edges of the cover with the sides of the PC chassis), and firmly slide the cover forwards until it clicks into position. 4 Tighten the thumb screw at the rear of the PC. 5 If required, lock the cover using the key provided. Reconnect all the power and telecommunications cables. 23
-
 1
1 -
2
-
3
-
4
-
5
-
6
-
7
-
8
-
9
-
10
-
11
-
12
-
13
-
14
-
15
-
16
-
17
-
 18
18 -
 19
19 -
 20
20 -
 21
21 -
 22
22 -
 23
23 -
 24
24 -
 25
25 -
 26
26 -
 27
27 -
 28
28 -
29
-
30
-
31
-
32
-
33
-
34
-
35
-
36
-
37
-
38
-
39
-
40
-
41
-
42
-
43
-
44
-
45
-
46
-
47
-
48
-
49
-
50
-
51
-
52
-
53
-
54
-
55
-
56
-
57
-
58
-
59
-
60
-
61
-
62
-
63
-
64
-
65
-
66
-
67
-
68
-
69
-
70
-
71
-
72
-
73
-
74
-
75
-
76
-
77
-
78
-
79
-
80
-
81
-
82
-
83
-
84
 |
 |