HP XM600 hp kayak xm600 series 1, user's guide for desktop models - Page 45
Replacing the Processor Fan, Removing the, Processor Fan, Replacing
 |
View all HP XM600 manuals
Add to My Manuals
Save this manual to your list of manuals |
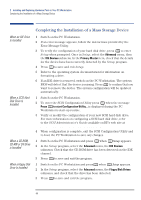
Page 45 highlights
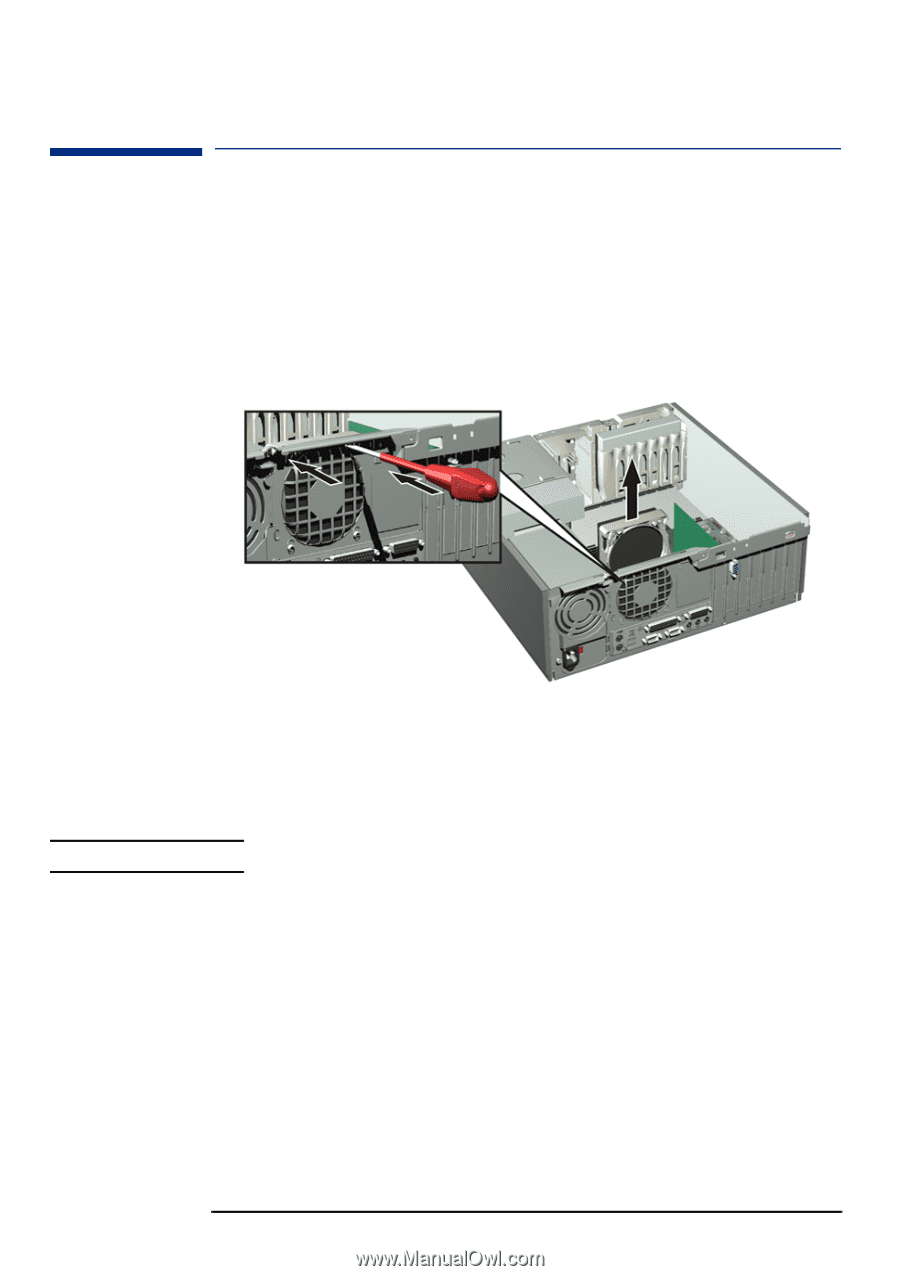
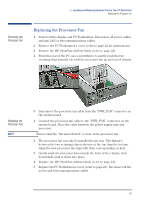
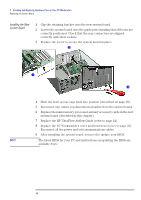
2 Installing and Replacing Hardware Parts in Your PC Workstation Replacing the Processor Fan Removing the Processor Fan Replacing the Processor Fan 1 Switch off the display and PC Workstation. Disconnect all power cables and any LAN or telecommunications cables. 2 Remove the PC Workstation's cover (refer to page 22 for instructions). 3 Remove the HP UltraFlow Airflow Guide (refer to page 24). 4 From the rear of the PC, use a screwdriver to gently push the two retaining clips inwards, then lift the processor fan up and out of chassis. Replacing the Processor Fan NOTE 5 Disconnect the processor fan cable from the "PWR_FAN" connector on the system board. 1 Connect the processor fan cable to the "PWR_FAN" connector on the system board. Place the cable between the power supply unit and processor. Ensure that the "Intrusion Switch" is clear of the processor fan. 2 The processor fan can only be installed in one way. The distance between the two retaining clips is shorter at the top than the bottom. Align the new processor fan clips with their corresponding sockets. 3 Gently push the processor fan towards the front of the chassis, then downwards until it clicks into place. 4 Replace the HP UltraFlow Airflow Guide (refer to page 24). 5 Replace the PC Workstation's cover (refer to page 23). Reconnect all the power and telecommunications cables. 45
-
 1
1 -
2
-
3
-
4
-
5
-
6
-
7
-
8
-
9
-
10
-
11
-
12
-
13
-
14
-
15
-
16
-
17
-
18
-
19
-
20
-
21
-
22
-
23
-
24
-
25
-
26
-
27
-
28
-
29
-
30
-
31
-
32
-
33
-
34
-
35
-
36
-
37
-
38
-
39
-
 40
40 -
 41
41 -
 42
42 -
 43
43 -
 44
44 -
 45
45 -
 46
46 -
 47
47 -
 48
48 -
 49
49 -
 50
50 -
51
-
52
-
53
-
54
-
55
-
56
-
57
-
58
-
59
-
60
-
61
-
62
-
63
-
64
-
65
-
66
-
67
-
68
-
69
-
70
-
71
-
72
-
73
-
74
-
75
-
76
-
77
-
78
-
79
-
80
-
81
-
82
-
83
-
84
 |
 |