HP XM600 hp kayak xm600 series 1, user's guide for desktop models - Page 48
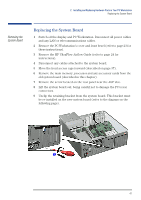
Installing the New, System Board, Slide the front access cage back into position described
 |
View all HP XM600 manuals
Add to My Manuals
Save this manual to your list of manuals |
Page 48 highlights
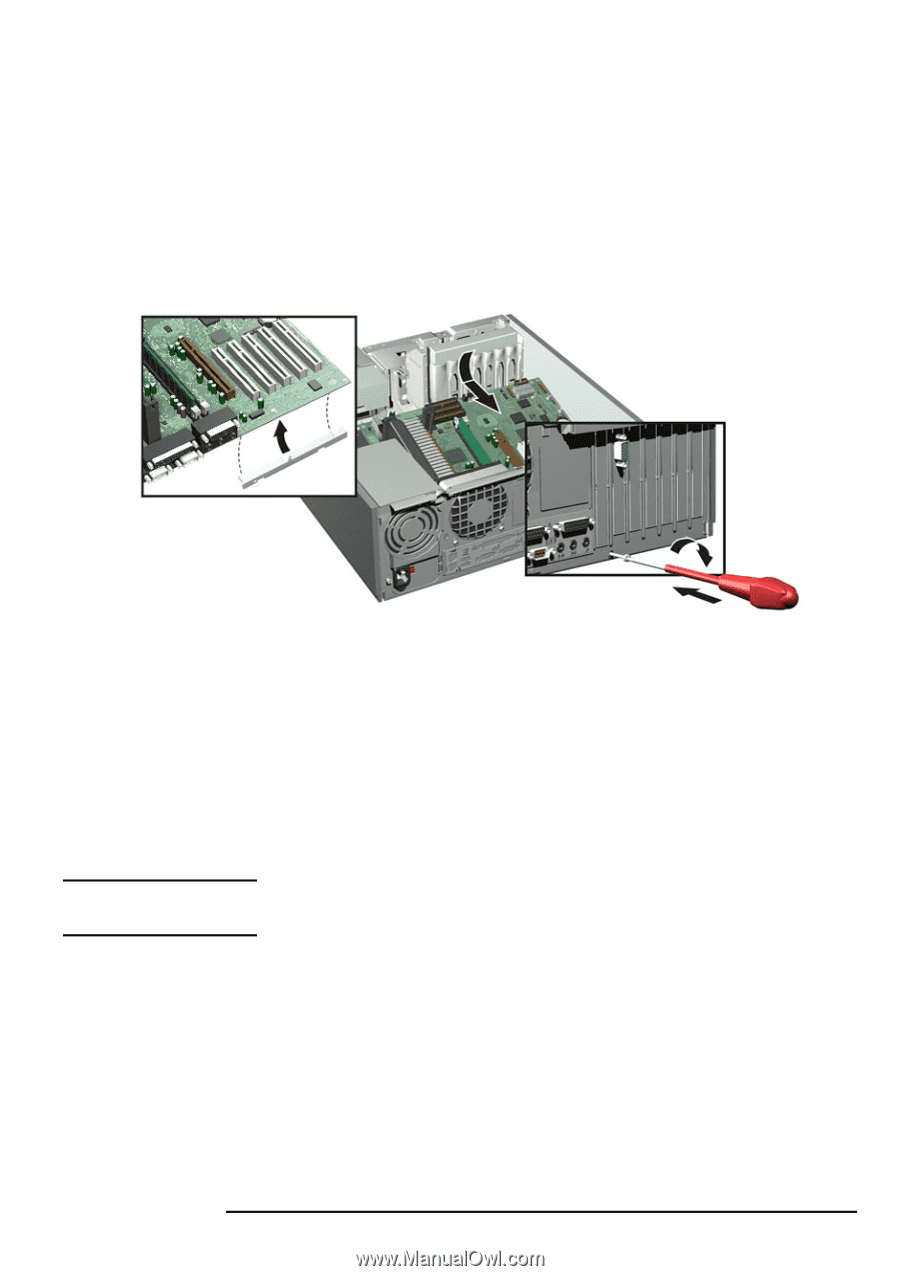
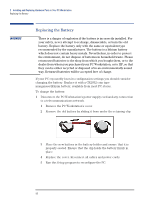
2 Installing and Replacing Hardware Parts in Your PC Workstation Replacing the System Board Installing the New System Board 1 Clip the retaining bracket onto the new system board. 2 Lower the system board onto the guide pins ensuring that all hooks are correctly positioned. Check that the rear connectors are aligned correctly with their sockets. 3 Replace the screw to secure the system board in place. å ê 4 Slide the front access cage back into position (described on page 38). 5 Reconnect any cables you disconnected earlier from the system board. 6 Replace the main memory, processor and any accessory cards in the new system board (described in this chapter). 7 Replace the HP UltraFlow Airflow Guide (refer to page 24). 8 Replace the PC Workstation's cover and front bezel (refer to page 23). Reconnect all the power and telecommunications cables. 9 After installing the system board, you need to update your BIOS. NOTE The latest BIOS for your PC and instructions on updating the BIOS are available from: www.hp.com/go/kayaksupport. 48
-
 1
1 -
2
-
3
-
4
-
5
-
6
-
7
-
8
-
9
-
10
-
11
-
12
-
13
-
14
-
15
-
16
-
17
-
18
-
19
-
20
-
21
-
22
-
23
-
24
-
25
-
26
-
27
-
28
-
29
-
30
-
31
-
32
-
33
-
34
-
35
-
36
-
37
-
38
-
39
-
40
-
41
-
42
-
 43
43 -
 44
44 -
 45
45 -
 46
46 -
 47
47 -
 48
48 -
 49
49 -
 50
50 -
 51
51 -
 52
52 -
 53
53 -
54
-
55
-
56
-
57
-
58
-
59
-
60
-
61
-
62
-
63
-
64
-
65
-
66
-
67
-
68
-
69
-
70
-
71
-
72
-
73
-
74
-
75
-
76
-
77
-
78
-
79
-
80
-
81
-
82
-
83
-
84
 |
 |