HP XM600 hp kayak xm600 series 1, user's guide for desktop models - Page 43
Replacing the, Assembly, and speaker assembly.
 |
View all HP XM600 manuals
Add to My Manuals
Save this manual to your list of manuals |
Page 43 highlights
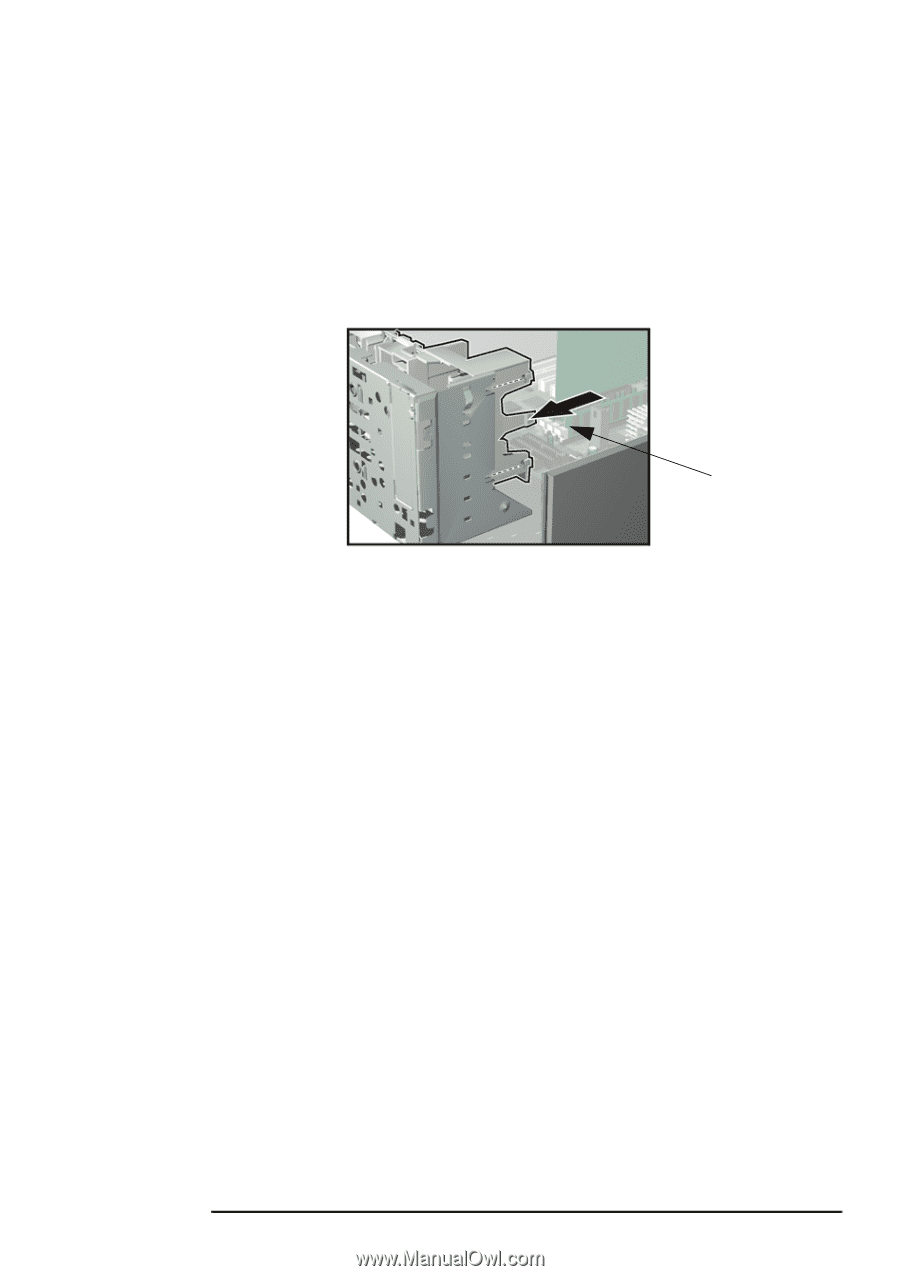
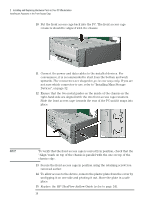
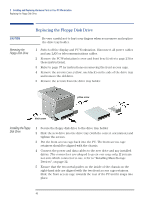
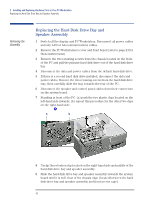
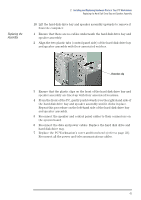
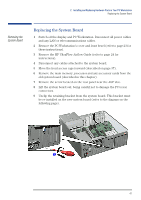
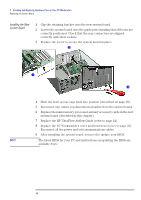
Replacing the Assembly 2 Installing and Replacing Hardware Parts in Your PC Workstation Replacing the Hard Disk Drive Bay and Speaker Assembly 10 Lift the hard disk drive bay and speaker assembly upwards to remove it from the computer. 1 Ensure that there are no cables underneath the hard disk drive bay and speaker assembly. 2 Align the two plastic tabs (control panel side) of the hard disk drive bay and speaker assembly with their associated notches. Retention clip 3 Ensure that the plastic clips on the front of the hard disk drive bay and speaker assembly are lined-up with their associated locations. 4 From the front of the PC, gently push towards you the right-hand side of the hard disk drive bay and speaker assembly until it clicks in place. Repeat this procedure on the left-hand side of the hard disk drive bay and speaker assembly. 5 Reconnect the speaker and control panel cables to their connectors on the system board. 6 Reconnect the data and power cables. Replace the hard disk drive and hard disk drive tray. 7 Replace the PC Workstation's cover and front bezel (refer to page 23). Reconnect all the power and telecommunications cables. 43
-
 1
1 -
2
-
3
-
4
-
5
-
6
-
7
-
8
-
9
-
10
-
11
-
12
-
13
-
14
-
15
-
16
-
17
-
18
-
19
-
20
-
21
-
22
-
23
-
24
-
25
-
26
-
27
-
28
-
29
-
30
-
31
-
32
-
33
-
34
-
35
-
36
-
37
-
 38
38 -
 39
39 -
 40
40 -
 41
41 -
 42
42 -
 43
43 -
 44
44 -
 45
45 -
 46
46 -
 47
47 -
 48
48 -
49
-
50
-
51
-
52
-
53
-
54
-
55
-
56
-
57
-
58
-
59
-
60
-
61
-
62
-
63
-
64
-
65
-
66
-
67
-
68
-
69
-
70
-
71
-
72
-
73
-
74
-
75
-
76
-
77
-
78
-
79
-
80
-
81
-
82
-
83
-
84
 |
 |