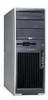
HP Xw4200 Getting Started Guide HP Workstations xw4100, xw4200, xw6200, and xw - Page 37
At Startup, During Operation, monitor is connected into one of these ports, it will not function. - 5 beeps
 |
UPC - 829160426853
View all HP Xw4200 manuals
Add to My Manuals
Save this manual to your list of manuals |
Page 37 highlights
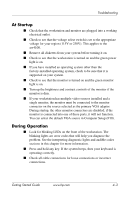
Troubleshooting At Startup ■ Check that the workstation and monitor are plugged into a working electrical outlet. ■ Check to see that the voltage select switch is set to the appropriate voltage for your region (115V or 230V). This applies to the xw4100. ■ Remove all diskettes from your system before turning it on. ■ Check to see that the workstation is turned on and the green power light is on. ■ If you have installed an operating system other than the factory-installed operating system, check to be sure that it is supported on your system. ■ Check to see that the monitor is turned on and the green monitor light is on. ■ Turn up the brightness and contrast controls of the monitor if the monitor is dim. ■ If your workstation has multiple video sources installed and a single monitor, the monitor must be connected to the monitor connector on the source selected as the primary VGA adapter. During startup, the other monitor connectors are disabled; if the monitor is connected into one of these ports, it will not function. You can select the default VGA source in Computer Setup (F10). During Operation ■ Look for blinking LEDs on the front of the workstation. The blinking lights are error codes that will help you diagnose the problem. See the interpreting diagnostic lights and audible codes sections in this chapter for more information. ■ Press and hold any key. If the system beeps, then your keyboard is operating correctly. ■ Check all cable connections for loose connections or incorrect connections. Getting Started Guide www.hp.com 4-3
-
 1
1 -
2
-
3
-
4
-
5
-
6
-
7
-
8
-
9
-
10
-
11
-
12
-
13
-
14
-
15
-
16
-
17
-
18
-
19
-
20
-
21
-
22
-
23
-
24
-
25
-
26
-
27
-
28
-
29
-
30
-
31
-
 32
32 -
 33
33 -
 34
34 -
 35
35 -
 36
36 -
 37
37 -
 38
38 -
 39
39 -
 40
40 -
 41
41 -
 42
42 -
43
-
44
-
45
-
46
-
47
-
48
-
49
-
50
-
51
-
52
-
53
-
54
-
55
-
56
-
57
-
58
-
59
-
60
-
61
-
62
 |
 |