HP Xw4200 Getting Started Guide HP Workstations xw4100, xw4200, xw6200, and xw - Page 59
Index - drivers windows 7
 |
UPC - 829160426853
View all HP Xw4200 manuals
Add to My Manuals
Save this manual to your list of manuals |
Page 59 highlights
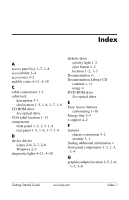
Index A access panel key 1-7, 1-8 accessibility 2-4 accessories 3-2 audible codes 4-11, 4-18 C cable connections 1-1 cable lock description 3-1 slot location 1-5, 1-6, 1-7, 1-8 CD-ROM drive See optical drive COA label location 1-13 components front panel 1-2, 1-3, 1-4 rear panel 1-5, 1-6, 1-7, 1-8 D device drivers Linux 2-6, 2-7, 2-8 Windows 2-3 diagnostic lights 4-11, 4-18 diskette drive activity light 1-2 eject button 1-2 location 1-2, 1-3 Documentation vi Documentation Library CD contents v, vi using vi DVD-ROM drive See optical drive E Easy Access buttons customizing 1-10 Energy Star 2-3 e-support 4-2 F features chassis conversion 3-2 security 3-1 finding additional information v front panel components 1-2, 1-3, 1-4 G graphics adapter location 1-5, 1-6, 1-7, 1-8 Getting Started Guide www.hp.com Index-1
-
 1
1 -
2
-
3
-
4
-
5
-
6
-
7
-
8
-
9
-
10
-
11
-
12
-
13
-
14
-
15
-
16
-
17
-
18
-
19
-
20
-
21
-
22
-
23
-
24
-
25
-
26
-
27
-
28
-
29
-
30
-
31
-
32
-
33
-
34
-
35
-
36
-
37
-
38
-
39
-
40
-
41
-
42
-
43
-
44
-
45
-
46
-
47
-
48
-
49
-
50
-
51
-
52
-
53
-
 54
54 -
 55
55 -
 56
56 -
 57
57 -
 58
58 -
 59
59 -
 60
60 -
 61
61 -
 62
62
 |
 |