HP iPAQ 112 HP iPAQ 100 Series Classic Handheld - Product Guide - Page 17
Step 4: Turn on your HP iPAQ, Protect your HP iPAQ with a password, Find the serial and model number
 |
View all HP iPAQ 112 manuals
Add to My Manuals
Save this manual to your list of manuals |
Page 17 highlights
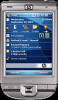
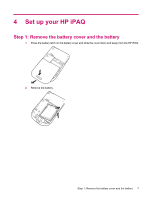
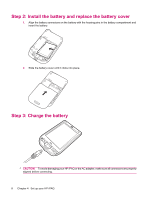
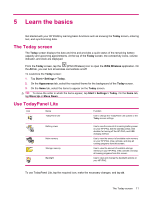
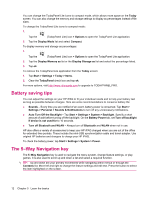
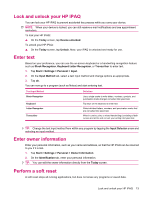
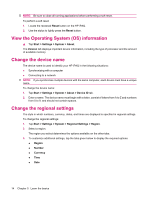
The battery provides power for your HP iPAQ to operate. Your HP iPAQ comes with a mini-USB synchronization cable, which must be used to charge the device. It takes approximately 2-4 hours to fully charge the battery for the first time. Subsequent charges might take longer. 1. Insert the USB end of the mini-USB synchronization cable into the port on the AC adapter. 2. Connect the AC adapter to an electrical outlet. 3. Connect the mini-USB synchronization cable to the charging/communications port on your HP iPAQ. The cable connector fits only one way. If the connector does not insert easily, turn it over. TIP: You can also charge the battery by connecting your HP iPAQ to a USB port on your computer using the mini-USB synchronization cable. NOTE: Whenever a replacement battery is inserted into your HP iPAQ, press the Power key for at least two seconds. In case the device does not switch on, attach the AC adapter to switch on your HP iPAQ. Step 4: Turn on your HP iPAQ Press the Power key to turn on your HP iPAQ. Next, follow the instructions on the screen to complete the setup. Use the on-screen keyboard to enter information. Protect your HP iPAQ with a password You can secure the data on your HP iPAQ by setting a password. Each time you turn on your HP iPAQ, you will be prompted to enter the password. To set a password: 1. Tap Start > Settings > Lock. 2. Select the Prompt if device unused for check box, and select the time that your HP iPAQ must be unused before you are prompted for a password. 3. In the Password type list, select the type of password you would like to use. Enter the password, and then confirm the password. 4. On the Hint tab, enter a phrase to help you remember your password. Make sure that your hint does not allow others to guess your password. The hint is displayed after the wrong password is entered five times in a row. 5. When prompted, tap ok. The next time your HP iPAQ remains unused for the specified amount of time, you will be prompted to enter your password. TIP: Follow the steps above to change or reset your password. Find the serial and model number Locate the serial and model numbers before contacting HP Customer Support, particularly if you are calling for in-warranty support. View the serial number and model ID by tapping Start > Programs > HP Help and Support > Serial and Model Number. Step 4: Turn on your HP iPAQ 9
-
 1
1 -
2
-
3
-
4
-
5
-
6
-
7
-
8
-
9
-
10
-
11
-
 12
12 -
 13
13 -
 14
14 -
 15
15 -
 16
16 -
 17
17 -
 18
18 -
 19
19 -
 20
20 -
 21
21 -
 22
22 -
23
-
24
-
25
-
26
-
27
-
28
-
29
-
30
-
31
-
32
-
33
-
34
-
35
-
36
-
37
-
38
-
39
-
40
-
41
-
42
-
43
-
44
-
45
-
46
-
47
-
48
-
49
-
50
-
51
-
52
-
53
-
54
-
55
-
56
-
57
-
58
-
59
-
60
-
61
-
62
-
63
-
64
-
65
-
66
-
67
-
68
-
69
-
70
-
71
-
72
-
73
-
74
-
75
-
76
-
77
-
78
-
79
-
80
-
81
 |
 |