HP iPAQ hw6910 HP iPAQ hw6900 Mobile Messenger Series - Additional Product Inf - Page 107
Setting Up Messaging Accounts, Mobile Business E-mail Using Exchange Server 2003, Internet E-mail
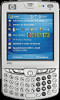 |
View all HP iPAQ hw6910 manuals
Add to My Manuals
Save this manual to your list of manuals |
Page 107 highlights
Setting Up Messaging Accounts Mobile Business E-mail Using Exchange Server 2003 To connect to your Mobile Business E-mail, ensure: ● Your company has a Microsoft Exchange Server with the ActiveSync plug-in activated. ● Your company is running Microsoft Exchange Server 2003 or later. ● Wireless data service is activated on your HP iPAQ. ● You have an Exchange Portal Address from your IT Administrator. 1. Perform one of the following: ● If this is the first time you are setting up ActiveSync, tap Start > Programs > ActiveSync. ● If you have set up ActiveSync, tap Start > ActiveSync > Menu > Configure Server. NOTE A screen appears that reads If your company supports synchronizing directly with its Exchange Server you can set up your device to sync with it. 2. Tap the link. 3. In the Server address box, enter the Exchange Portal Address you obtained from your IT Administrator. 4. Confirm with your IT Administrator whether you need to put a check in the box that reads This server requires an encrypted (SSL) Connection. 5. Tap Next. 6. Enter your username, password, and domain, and then tap Next. 7. Select the Save password text box, if you want to enable automatic sync. 8. To change the rules for resolving synchronization conflicts that may occur between your HP iPAQ and the Exchange Server, tap Advanced. 9. Ensure that the box for synchronizing e-mail is checked. 10. Tap Finish. Internet E-mail Creating a New POP3 or IMAP4 Account You must set up an e-mail account that you have with an Internet Service Provider (ISP) or an account that you access using a VPN server connection (typically a work account) before you can send and receive e-mail. 1. Tap Start > Messaging. 2. Tap Menu > Tools > New Account. 3. Enter your e-mail address, and tap Next. ENWW Setting Up Messaging Accounts 99
-
 1
1 -
2
-
3
-
4
-
5
-
6
-
7
-
8
-
9
-
10
-
11
-
12
-
13
-
14
-
15
-
16
-
17
-
18
-
19
-
20
-
21
-
22
-
23
-
24
-
25
-
26
-
27
-
28
-
29
-
30
-
31
-
32
-
33
-
34
-
35
-
36
-
37
-
38
-
39
-
40
-
41
-
42
-
43
-
44
-
45
-
46
-
47
-
48
-
49
-
50
-
51
-
52
-
53
-
54
-
55
-
56
-
57
-
58
-
59
-
60
-
61
-
62
-
63
-
64
-
65
-
66
-
67
-
68
-
69
-
70
-
71
-
72
-
73
-
74
-
75
-
76
-
77
-
78
-
79
-
80
-
81
-
82
-
83
-
84
-
85
-
86
-
87
-
88
-
89
-
90
-
91
-
92
-
93
-
94
-
95
-
96
-
97
-
98
-
99
-
100
-
101
-
 102
102 -
 103
103 -
 104
104 -
 105
105 -
 106
106 -
 107
107 -
 108
108 -
 109
109 -
 110
110 -
 111
111 -
 112
112 -
113
-
114
-
115
-
116
-
117
-
118
-
119
-
120
-
121
-
122
-
123
-
124
-
125
-
126
-
127
-
128
-
129
-
130
-
131
-
132
-
133
-
134
-
135
-
136
-
137
-
138
-
139
-
140
-
141
-
142
-
143
-
144
-
145
-
146
-
147
-
148
-
149
-
150
-
151
-
152
-
153
-
154
-
155
-
156
-
157
-
158
-
159
-
160
-
161
-
162
-
163
-
164
-
165
-
166
-
167
-
168
-
169
-
170
-
171
-
172
-
173
-
174
-
175
-
176
-
177
-
178
-
179
-
180
-
181
-
182
-
183
-
184
-
185
-
186
-
187
-
188
-
189
-
190
-
191
-
192
-
193
-
194
-
195
-
196
-
197
-
198
-
199
-
200
-
201
-
202
-
203
 |
 |
