HP iPAQ hw6910 HP iPAQ hw6900 Mobile Messenger Series - Additional Product Inf - Page 48
Setting Up a VPN Server Connection
 |
View all HP iPAQ hw6910 manuals
Add to My Manuals
Save this manual to your list of manuals |
Page 48 highlights
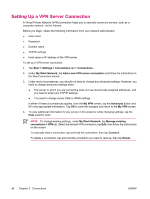
Setting Up a VPN Server Connection A Virtual Private Network (VPN) connection helps you to securely connect to servers, such as a corporate network, via the Internet. Before you begin, obtain the following information from your network administrator: ● User name ● Password ● Domain name ● TCP/IP settings ● Host name or IP address of the VPN server To set up a VPN server connection: 1. Tap Start > Settings > Connections tab > Connections. 2. Under My Work Network, tap Add a new VPN server connection and follow the instructions in the New Connection wizard. 3. Under most circumstances, you should not need to change any advanced settings. However, you need to change advanced settings when: ● The server to which you are connecting does not use dynamically-assigned addresses, and you need to enter your TCP/IP settings. ● You need to change server DNS or WINS settings. If either of these circumstances applies, from the My VPN screen, tap the Advanced button and fill in the appropriate information. Tap OK to save the changes and return to the My VPN screen. 4. To view additional information for any screen in the wizard or while changing settings, tap the Help question mark. NOTE To change existing settings, under My Work Network, tap Manage existing connections > VPN tab. Select the desired VPN connection, tap Edit, then follow the instructions on the screen. To manually start a connection, tap and hold the connection, then tap Connect. To delete a connection, tap and hold the connection you want to remove, then tap Delete. 40 Chapter 3 Connections ENWW
-
 1
1 -
2
-
3
-
4
-
5
-
6
-
7
-
8
-
9
-
10
-
11
-
12
-
13
-
14
-
15
-
16
-
17
-
18
-
19
-
20
-
21
-
22
-
23
-
24
-
25
-
26
-
27
-
28
-
29
-
30
-
31
-
32
-
33
-
34
-
35
-
36
-
37
-
38
-
39
-
40
-
41
-
42
-
 43
43 -
 44
44 -
 45
45 -
 46
46 -
 47
47 -
 48
48 -
 49
49 -
 50
50 -
 51
51 -
 52
52 -
 53
53 -
54
-
55
-
56
-
57
-
58
-
59
-
60
-
61
-
62
-
63
-
64
-
65
-
66
-
67
-
68
-
69
-
70
-
71
-
72
-
73
-
74
-
75
-
76
-
77
-
78
-
79
-
80
-
81
-
82
-
83
-
84
-
85
-
86
-
87
-
88
-
89
-
90
-
91
-
92
-
93
-
94
-
95
-
96
-
97
-
98
-
99
-
100
-
101
-
102
-
103
-
104
-
105
-
106
-
107
-
108
-
109
-
110
-
111
-
112
-
113
-
114
-
115
-
116
-
117
-
118
-
119
-
120
-
121
-
122
-
123
-
124
-
125
-
126
-
127
-
128
-
129
-
130
-
131
-
132
-
133
-
134
-
135
-
136
-
137
-
138
-
139
-
140
-
141
-
142
-
143
-
144
-
145
-
146
-
147
-
148
-
149
-
150
-
151
-
152
-
153
-
154
-
155
-
156
-
157
-
158
-
159
-
160
-
161
-
162
-
163
-
164
-
165
-
166
-
167
-
168
-
169
-
170
-
171
-
172
-
173
-
174
-
175
-
176
-
177
-
178
-
179
-
180
-
181
-
182
-
183
-
184
-
185
-
186
-
187
-
188
-
189
-
190
-
191
-
192
-
193
-
194
-
195
-
196
-
197
-
198
-
199
-
200
-
201
-
202
-
203
 |
 |
