Icom ID-52A Advanced Manual english - Page 9
Attaching and detaching the belt clip, Attaching the hand strap, To attach, WARNING! NEVER
 |
View all Icom ID-52A manuals
Add to My Manuals
Save this manual to your list of manuals |
Page 9 highlights
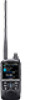
1 ATTACHING ACCESSORIES Attaching and detaching the belt clip To attach or detach the belt clip, first remove the battery pack or case, if it is attached. (p. 1-2) See the illustration below. To attach the belt clip, slide the belt clip in the direction of the arrow until the belt clip locks in place, and makes a 'click' sound. To detach the belt clip, lift the tab up (1) and slide the belt clip in the direction of the arrow (2). Attaching the hand strap Slide the hand strap through the loop on the top of the rear panel, as illustrated below. To attach To detach q w Tab Belt clip Battery pack or battery case Hand strap RRWARNING! NEVER swing the transceiver by holding the hand strap. This could cause injury to yourself or others. 1-3
-
 1
1 -
2
-
3
-
 4
4 -
 5
5 -
 6
6 -
 7
7 -
 8
8 -
 9
9 -
 10
10 -
 11
11 -
 12
12 -
 13
13 -
 14
14 -
15
-
16
-
17
-
18
-
19
-
20
-
21
-
22
-
23
-
24
-
25
-
26
-
27
-
28
-
29
-
30
-
31
-
32
-
33
-
34
-
35
-
36
-
37
-
38
-
39
-
40
-
41
-
42
-
43
-
44
-
45
-
46
-
47
-
48
-
49
-
50
-
51
-
52
-
53
-
54
-
55
-
56
-
57
-
58
-
59
-
60
-
61
-
62
-
63
-
64
-
65
-
66
-
67
-
68
-
69
-
70
-
71
-
72
-
73
-
74
-
75
-
76
-
77
-
78
-
79
-
80
-
81
-
82
-
83
-
84
-
85
-
86
-
87
-
88
-
89
-
90
-
91
-
92
-
93
-
94
-
95
-
96
-
97
-
98
-
99
-
100
-
101
-
102
-
103
-
104
-
105
-
106
-
107
-
108
-
109
-
110
-
111
-
112
-
113
-
114
-
115
-
116
-
117
-
118
-
119
-
120
-
121
-
122
-
123
-
124
-
125
-
126
-
127
-
128
-
129
-
130
-
131
-
132
-
133
-
134
-
135
-
136
-
137
-
138
-
139
-
140
-
141
-
142
-
143
-
144
-
145
-
146
-
147
-
148
-
149
-
150
-
151
-
152
-
153
-
154
-
155
-
156
-
157
-
158
-
159
-
160
-
161
-
162
-
163
-
164
-
165
-
166
-
167
-
168
-
169
-
170
-
171
-
172
-
173
-
174
-
175
-
176
-
177
-
178
-
179
-
180
-
181
-
182
-
183
-
184
-
185
-
186
-
187
-
188
-
189
-
190
-
191
-
192
-
193
-
194
-
195
-
196
-
197
-
198
-
199
-
200
-
201
-
202
-
203
-
204
-
205
-
206
-
207
-
208
-
209
-
210
-
211
-
212
-
213
-
214
-
215
-
216
-
217
-
218
-
219
-
220
-
221
-
222
-
223
-
224
-
225
-
226
-
227
-
228
-
229
-
230
-
231
-
232
-
233
-
234
-
235
-
236
-
237
-
238
-
239
-
240
-
241
-
242
-
243
-
244
-
245
-
246
-
247
-
248
-
249
-
250
-
251
-
252
-
253
-
254
-
255
-
256
-
257
-
258
-
259
-
260
-
261
-
262
-
263
 |
 |

1
ATTACHING ACCESSORIES
1-3
q
w
Attaching the hand strap
Slide the hand strap through the loop on the top of the
rear panel, as illustrated below±
Attaching and detaching the belt clip
To attach or detach the belt clip, first remove the
battery pack or case, if it is attached± (p± 1-2) See
the illustration below±
To attach the belt clip, slide the belt clip in the
direction of the arrow until the belt clip locks in place,
and makes a ‘click’ sound±
To detach the belt clip, lift the tab up (
1
) and slide the
belt clip in the direction of the arrow (
2
)±
To attach
R
WARNING! NEVER
swing the transceiver by
holding the hand strap± This could cause injury to
yourself or others±
Belt clip
Battery pack or
battery case
To detach
Tab
Hand strap