Intel SR1630HGP Service Guide - Page 67
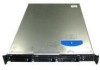
HDD 0, Locating Drive Positions SR1630GP
 |
UPC - 735858211901
View all Intel SR1630HGP manuals
Add to My Manuals
Save this manual to your list of manuals |
Page 67 highlights
HDD 0 HDD 1 AF003252 Figure 31. Locating Drive Positions (SR1630GP) 5. HDD1 location only: Slide the power cables from the cable clip located on the top of the hard drive carrier. 6. Remove the screw that holds the hard drive bracket to the chassis. See letter "A" in Figure 32. Save this screw. You will use it to reinstall the drive assembly later. 7. Lift the drive carrier from the chassis. See letter "B" in Figure 32. A B ChFarsosnist AF001050 Figure 32. Removing Drive Carrier from the Server System (SR1630GP) Intel® Server System SR1630GP / SR1630HGP Service Guide 45
-
 1
1 -
2
-
3
-
4
-
5
-
6
-
7
-
8
-
9
-
10
-
11
-
12
-
13
-
14
-
15
-
16
-
17
-
18
-
19
-
20
-
21
-
22
-
23
-
24
-
25
-
26
-
27
-
28
-
29
-
30
-
31
-
32
-
33
-
34
-
35
-
36
-
37
-
38
-
39
-
40
-
41
-
42
-
43
-
44
-
45
-
46
-
47
-
48
-
49
-
50
-
51
-
52
-
53
-
54
-
55
-
56
-
57
-
58
-
59
-
60
-
61
-
 62
62 -
 63
63 -
 64
64 -
 65
65 -
 66
66 -
 67
67 -
 68
68 -
 69
69 -
 70
70 -
 71
71 -
 72
72 -
73
-
74
-
75
-
76
-
77
-
78
-
79
-
80
-
81
-
82
-
83
-
84
-
85
-
86
-
87
-
88
-
89
-
90
-
91
-
92
-
93
-
94
-
95
-
96
-
97
-
98
-
99
-
100
-
101
-
102
-
103
-
104
-
105
-
106
-
107
-
108
-
109
-
110
-
111
-
112
-
113
-
114
-
115
-
116
-
117
-
118
-
119
-
120
-
121
-
122
-
123
-
124
-
125
-
126
-
127
-
128
-
129
-
130
-
131
-
132
-
133
-
134
-
135
-
136
-
137
-
138
-
139
-
140
-
141
-
142
-
143
-
144
-
145
-
146
-
147
-
148
-
149
-
150
-
151
-
152
-
153
-
154
-
155
-
156
-
157
-
158
-
159
-
160
-
161
-
162
-
163
-
164
-
165
-
166
-
167
-
168
-
169
-
170
-
171
-
172
-
173
-
174
-
175
-
176
-
177
-
178
-
179
-
180
-
181
-
182
-
183
-
184
-
185
-
186
-
187
-
188
-
189
-
190
-
191
-
192
-
193
-
194
-
195
-
196
 |
 |

Intel
®
Server System SR1630GP / SR1630HGP Service Guide
45
Figure 31. Locating Drive Positions (SR1630GP)
5.
HDD1 location only: Slide the power cables from the cable clip located on the top
of the hard drive carrier.
6.
Remove the screw that holds the hard drive bracket to the chassis. See letter “A” in
Figure 32. Save this screw. You will use it to reinstall the drive assembly later.
7.
Lift the drive carrier from the chassis. See letter “B” in Figure 32.
Figure 32. Removing Drive Carrier from the Server System (SR1630GP)
AF003252
HDD 0
HDD 1
AF001050
B
A
Chassis
Front