Intel SR1630HGP Service Guide - Page 68
Installing Drive into Drive Carrier SR1630GP
 |
UPC - 735858211901
View all Intel SR1630HGP manuals
Add to My Manuals
Save this manual to your list of manuals |
Page 68 highlights
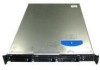
8. Position the drive with the drive connectors facing up as shown in Figure 33. 9. Set the drive carrier over the drive, as shown by the letter "A" in the figure. The data and power connectors must be positioned so they are accessible through the cut-out as shown by letter "B". 10. Use the four screws provided to attach the drive to the carrier. See letter "C" in Figure 33. A C B AF000668 Figure 33. Installing Drive into Drive Carrier (SR1630GP) 11. Set the drive assembly into place in the chassis. See letter "A" in Figure 34. 12. Attach the drive assembly to the chassis side with two screws. See letter "B" in Figure 34. 13. Attach the drive assembly to the chassis with the screw you removed in Step 6. See letter "C" in Figure 34. Note: You must install the assembly that contains the optical drive bracket at the left side of the system. C A HDD 0 B HDD 1 AF003253 Figure 34. Install Drive Assembly into the Server System (SR1630GP) 46 Intel® Server System SR1630GP / SR1630HGP Service Guide
-
 1
1 -
2
-
3
-
4
-
5
-
6
-
7
-
8
-
9
-
10
-
11
-
12
-
13
-
14
-
15
-
16
-
17
-
18
-
19
-
20
-
21
-
22
-
23
-
24
-
25
-
26
-
27
-
28
-
29
-
30
-
31
-
32
-
33
-
34
-
35
-
36
-
37
-
38
-
39
-
40
-
41
-
42
-
43
-
44
-
45
-
46
-
47
-
48
-
49
-
50
-
51
-
52
-
53
-
54
-
55
-
56
-
57
-
58
-
59
-
60
-
61
-
62
-
 63
63 -
 64
64 -
 65
65 -
 66
66 -
 67
67 -
 68
68 -
 69
69 -
 70
70 -
 71
71 -
 72
72 -
 73
73 -
74
-
75
-
76
-
77
-
78
-
79
-
80
-
81
-
82
-
83
-
84
-
85
-
86
-
87
-
88
-
89
-
90
-
91
-
92
-
93
-
94
-
95
-
96
-
97
-
98
-
99
-
100
-
101
-
102
-
103
-
104
-
105
-
106
-
107
-
108
-
109
-
110
-
111
-
112
-
113
-
114
-
115
-
116
-
117
-
118
-
119
-
120
-
121
-
122
-
123
-
124
-
125
-
126
-
127
-
128
-
129
-
130
-
131
-
132
-
133
-
134
-
135
-
136
-
137
-
138
-
139
-
140
-
141
-
142
-
143
-
144
-
145
-
146
-
147
-
148
-
149
-
150
-
151
-
152
-
153
-
154
-
155
-
156
-
157
-
158
-
159
-
160
-
161
-
162
-
163
-
164
-
165
-
166
-
167
-
168
-
169
-
170
-
171
-
172
-
173
-
174
-
175
-
176
-
177
-
178
-
179
-
180
-
181
-
182
-
183
-
184
-
185
-
186
-
187
-
188
-
189
-
190
-
191
-
192
-
193
-
194
-
195
-
196
 |
 |
