Konica Minolta EFI Pro 16h EFI Pro 16h Operations Guide - Page 105
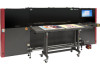
Caution! Do NOT RUB the print heads., Print Head Surfaces to Contact
 |
View all Konica Minolta EFI Pro 16h manuals
Add to My Manuals
Save this manual to your list of manuals |
Page 105 highlights
4. Fold a lint-free wipe in quarters and saturate with clean flush. Then reach under the carriage print head plate to locate the back of the print head to be cleaned. 5. Align two fingers with the bottom of the print head and press gently 1 against the head. 6. Pull the wipe forward across the bottom of the print heads in ONE motion, cleaning the heads' surface. Item 1 Description Print Head Surfaces to Contact Caution! Do NOT RUB the print heads. One smooth wipe forward should be all that is required. If a print head requires additional cleaning, use a new clean wipe, saturate it with flush, and repeat the single-wipe process. Rubbing damages print heads. 7. Discard each used wipe and pick up a new one before continuing to the next Print Head. 8. Repeat process for each print head. Note: Clean the print head plate again after all print heads have been wiped, to remove any ink that may have transferred to the plate during head cleaning. Document ID: OMM-00135 Revision A 105
-
 1
1 -
2
-
3
-
4
-
5
-
6
-
7
-
8
-
9
-
10
-
11
-
12
-
13
-
14
-
15
-
16
-
17
-
18
-
19
-
20
-
21
-
22
-
23
-
24
-
25
-
26
-
27
-
28
-
29
-
30
-
31
-
32
-
33
-
34
-
35
-
36
-
37
-
38
-
39
-
40
-
41
-
42
-
43
-
44
-
45
-
46
-
47
-
48
-
49
-
50
-
51
-
52
-
53
-
54
-
55
-
56
-
57
-
58
-
59
-
60
-
61
-
62
-
63
-
64
-
65
-
66
-
67
-
68
-
69
-
70
-
71
-
72
-
73
-
74
-
75
-
76
-
77
-
78
-
79
-
80
-
81
-
82
-
83
-
84
-
85
-
86
-
87
-
88
-
89
-
90
-
91
-
92
-
93
-
94
-
95
-
96
-
97
-
98
-
99
-
 100
100 -
 101
101 -
 102
102 -
 103
103 -
 104
104 -
 105
105 -
 106
106 -
 107
107 -
 108
108 -
 109
109 -
 110
110 -
111
-
112
-
113
 |
 |
