Konica Minolta EFI Pro 16h EFI Pro 16h Operations Guide - Page 94
Prints with Margins or White Space on Edges
 |
View all Konica Minolta EFI Pro 16h manuals
Add to My Manuals
Save this manual to your list of manuals |
Page 94 highlights
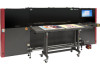
6.8.1 Prints with Margins or White Space on Edges Use this technique for prints with margins or white space on the edges. 1. Align boards to the media fence. 2. Push each board up against the previous board until the print area is filled. 1 Figure 6-19: Media Boards Pushed Together 1 No Gap Between Boards 3. Determine the margin needed on each board, if any, to be set in the software (see section 6.8.4 for options to set up print files margins). Document ID: OMM-00135 Revision A 94
-
 1
1 -
2
-
3
-
4
-
5
-
6
-
7
-
8
-
9
-
10
-
11
-
12
-
13
-
14
-
15
-
16
-
17
-
18
-
19
-
20
-
21
-
22
-
23
-
24
-
25
-
26
-
27
-
28
-
29
-
30
-
31
-
32
-
33
-
34
-
35
-
36
-
37
-
38
-
39
-
40
-
41
-
42
-
43
-
44
-
45
-
46
-
47
-
48
-
49
-
50
-
51
-
52
-
53
-
54
-
55
-
56
-
57
-
58
-
59
-
60
-
61
-
62
-
63
-
64
-
65
-
66
-
67
-
68
-
69
-
70
-
71
-
72
-
73
-
74
-
75
-
76
-
77
-
78
-
79
-
80
-
81
-
82
-
83
-
84
-
85
-
86
-
87
-
88
-
 89
89 -
 90
90 -
 91
91 -
 92
92 -
 93
93 -
 94
94 -
 95
95 -
 96
96 -
 97
97 -
 98
98 -
 99
99 -
100
-
101
-
102
-
103
-
104
-
105
-
106
-
107
-
108
-
109
-
110
-
111
-
112
-
113
 |
 |

Document ID: OMM-00135 Revision A
94
6.8.1 Prints with Margins or White Space on Edges
Use this technique for prints with margins or white space on the edges.
1.
Align boards to the media fence.
2.
Push each board up against the previous board until the print area is filled.
3.
Determine the margin needed on each board, if any, to be set in the software (see section
6.8.4
for options to set up print files
margins).
1
No Gap Between Boards
Figure 6-19: Media Boards Pushed Together
1