Lenovo ThinkPad T420si (English) User Guide - Page 171
Installing device drivers, Installing the driver for the 4-in-1 Media Card Reader
 |
View all Lenovo ThinkPad T420si manuals
Add to My Manuals
Save this manual to your list of manuals |
Page 171 highlights
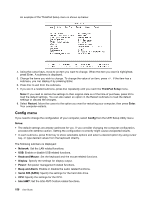
not true: If you remove the hard disk drive from a computer with a dual-core processor and install it on a computer with a single-core processor, you cannot get access to the hard disk drive. Installing device drivers To install device drivers, refer to the web site at: http://www.lenovo.com/support To install the driver for the 4-in-1 Media Card Reader, refer to "Installing the driver for the 4-in-1 Media Card Reader" on page 155 To install the driver for USB 3.0, refer to: "Installing the driver for USB 3.0" on page 155. To install the ThinkPad Monitor File for Windows 2000/XP/Vista/7, refer to "Installing ThinkPad Monitor File for Windows 2000/XP/Vista/7" on page 155. Installing the driver for the 4-in-1 Media Card Reader To use the 4-in-1 media card reader, you need to download and install the Ricoh Multi Card Reader Driver. To download it, go to Lenovo Web site at: http://www.lenovo.com/support Installing the driver for USB 3.0 If your computer supports USB 3.0, and you have reinstalled the operating system, you need to download and install the USB 3.0 driver to use the USB 3.0. Do the following: For Windows 7 and Windows Vista 1. Access Lenovo Web site at http://www.lenovo.com/ThinkPadDrivers. When you get to the site, find your model and display the driver links. 2. Select the USB 3.0 driver for 32-bit or 64-bit and extract it to your local hard disk. 3. Double-click Setup.exe in C:\DRIVERS\WIN\USB3.0\. 4. Click Next. If the device driver is already installed, click Cancel. Follow the instructions on the screen until the installation is finished. For Windows XP 1. Access Lenovo Web site at http://www.lenovo.com/ThinkPadDrivers. When you get to the site, find your model and display the driver links. 2. Select the USB 3.0 driver for 32-bit and extract it to your local hard disk. 3. Double-click Setup.exe in C:\DRIVERS\WIN\USB3.0\. 4. Click Next. If the device driver is already installed, click Cancel. Follow the instructions on the screen until the installation is finished. Installing ThinkPad Monitor File for Windows 2000/XP/Vista/7 ThinkPad Monitor File for Windows 2000/XP/Vista/7 is in the following directory: C:\SWTOOLS\DRIVERS\MONITOR. Note: If you cannot find this directory on your hard disk drive or solid state drive, download the ThinkPad Monitor File for Windows 2000/XP/Vista/7 from the ThinkPad Web site at: http://www.lenovo.com/ThinkPadDrivers Chapter 8. Advanced configuration 155
-
 1
1 -
2
-
3
-
4
-
5
-
6
-
7
-
8
-
9
-
10
-
11
-
12
-
13
-
14
-
15
-
16
-
17
-
18
-
19
-
20
-
21
-
22
-
23
-
24
-
25
-
26
-
27
-
28
-
29
-
30
-
31
-
32
-
33
-
34
-
35
-
36
-
37
-
38
-
39
-
40
-
41
-
42
-
43
-
44
-
45
-
46
-
47
-
48
-
49
-
50
-
51
-
52
-
53
-
54
-
55
-
56
-
57
-
58
-
59
-
60
-
61
-
62
-
63
-
64
-
65
-
66
-
67
-
68
-
69
-
70
-
71
-
72
-
73
-
74
-
75
-
76
-
77
-
78
-
79
-
80
-
81
-
82
-
83
-
84
-
85
-
86
-
87
-
88
-
89
-
90
-
91
-
92
-
93
-
94
-
95
-
96
-
97
-
98
-
99
-
100
-
101
-
102
-
103
-
104
-
105
-
106
-
107
-
108
-
109
-
110
-
111
-
112
-
113
-
114
-
115
-
116
-
117
-
118
-
119
-
120
-
121
-
122
-
123
-
124
-
125
-
126
-
127
-
128
-
129
-
130
-
131
-
132
-
133
-
134
-
135
-
136
-
137
-
138
-
139
-
140
-
141
-
142
-
143
-
144
-
145
-
146
-
147
-
148
-
149
-
150
-
151
-
152
-
153
-
154
-
155
-
156
-
157
-
158
-
159
-
160
-
161
-
162
-
163
-
164
-
165
-
 166
166 -
 167
167 -
 168
168 -
 169
169 -
 170
170 -
 171
171 -
 172
172 -
 173
173 -
 174
174 -
 175
175 -
 176
176 -
177
-
178
-
179
-
180
-
181
-
182
-
183
-
184
-
185
-
186
-
187
-
188
-
189
-
190
-
191
-
192
-
193
-
194
-
195
-
196
-
197
-
198
-
199
-
200
-
201
-
202
-
203
-
204
-
205
-
206
-
207
-
208
-
209
-
210
-
211
-
212
-
213
-
214
-
215
-
216
-
217
-
218
-
219
-
220
-
221
-
222
-
223
-
224
-
225
-
226
-
227
-
228
-
229
-
230
-
231
-
232
-
233
-
234
-
235
-
236
-
237
-
238
-
239
-
240
-
241
-
242
-
243
-
244
-
245
-
246
 |
 |