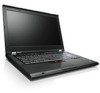
Lenovo ThinkPad T420si (English) User Guide - Page 77
Using the ThinkLight feature, Using the optical drive, Using the media card reader
 |
View all Lenovo ThinkPad T420si manuals
Add to My Manuals
Save this manual to your list of manuals |
Page 77 highlights
Configuring camera settings You can configure the camera settings to meet your needs, such as adjusting the quality of the video output. To configure the camera settings, do the following: 1. Press Fn+F6. The Communications settings window opens. 2. Click the Manage Settings button. The Communications Utility window opens. 3. In the Communications Utility window, configure the camera settings depending on your individual needs. Using the ThinkLight feature Because your computer can travel with you, you might need to use it in less than perfect lighting conditions. To illuminate the keyboard by turning on your computer, press Fn+PgUp. Note: Avoid using your computer in dark conditions for prolonged periods. It is bad for your eyes. Using the optical drive Note: Your computer support only the MultiBurner driver. MultiBurner drive This drive can read DVD-ROM discs, DVD-R discs, DVD-RAM discs, DVD-RW discs, and all types of CDs, such as CD-ROM discs, CD-RW discs, CD-R discs, and audio CDs. In addition, it can record on DVD-R discs, DVD-RW discs, type II DVD-RAM discs, CD-RW standard and high speed discs, and CD-R discs. Using the media card reader Depending on the model, your computer may have an ExpressCard slot for a 34 mm-wide card, a media card reader slot, or a smart card reader slot. If your computer has a media card reader slot, it supports the following cards: • SD card • SDHC card • SDXC card • MultiMediaCard (MMC) Notes: • Your computer does not support the CPRM feature for the SD card. • When transferring data to or from a flash media card, such as an SD card, do not put your computer in sleep (standby) or hibernation mode before the data transfer is complete. To do so might cause damage to your data. For more information on ExpressCards, smart cards, and flash media cards, refer to any of the following topics: Chapter 2. Using your computer 61
-
 1
1 -
2
-
3
-
4
-
5
-
6
-
7
-
8
-
9
-
10
-
11
-
12
-
13
-
14
-
15
-
16
-
17
-
18
-
19
-
20
-
21
-
22
-
23
-
24
-
25
-
26
-
27
-
28
-
29
-
30
-
31
-
32
-
33
-
34
-
35
-
36
-
37
-
38
-
39
-
40
-
41
-
42
-
43
-
44
-
45
-
46
-
47
-
48
-
49
-
50
-
51
-
52
-
53
-
54
-
55
-
56
-
57
-
58
-
59
-
60
-
61
-
62
-
63
-
64
-
65
-
66
-
67
-
68
-
69
-
70
-
71
-
 72
72 -
 73
73 -
 74
74 -
 75
75 -
 76
76 -
 77
77 -
 78
78 -
 79
79 -
 80
80 -
 81
81 -
 82
82 -
83
-
84
-
85
-
86
-
87
-
88
-
89
-
90
-
91
-
92
-
93
-
94
-
95
-
96
-
97
-
98
-
99
-
100
-
101
-
102
-
103
-
104
-
105
-
106
-
107
-
108
-
109
-
110
-
111
-
112
-
113
-
114
-
115
-
116
-
117
-
118
-
119
-
120
-
121
-
122
-
123
-
124
-
125
-
126
-
127
-
128
-
129
-
130
-
131
-
132
-
133
-
134
-
135
-
136
-
137
-
138
-
139
-
140
-
141
-
142
-
143
-
144
-
145
-
146
-
147
-
148
-
149
-
150
-
151
-
152
-
153
-
154
-
155
-
156
-
157
-
158
-
159
-
160
-
161
-
162
-
163
-
164
-
165
-
166
-
167
-
168
-
169
-
170
-
171
-
172
-
173
-
174
-
175
-
176
-
177
-
178
-
179
-
180
-
181
-
182
-
183
-
184
-
185
-
186
-
187
-
188
-
189
-
190
-
191
-
192
-
193
-
194
-
195
-
196
-
197
-
198
-
199
-
200
-
201
-
202
-
203
-
204
-
205
-
206
-
207
-
208
-
209
-
210
-
211
-
212
-
213
-
214
-
215
-
216
-
217
-
218
-
219
-
220
-
221
-
222
-
223
-
224
-
225
-
226
-
227
-
228
-
229
-
230
-
231
-
232
-
233
-
234
-
235
-
236
-
237
-
238
-
239
-
240
-
241
-
242
-
243
-
244
-
245
-
246
 |
 |
