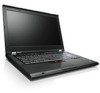
Lenovo ThinkPad T420si (English) User Guide - Page 220
Power problems, Mini Dock Plus Series 3
 |
View all Lenovo ThinkPad T420si manuals
Add to My Manuals
Save this manual to your list of manuals |
Page 220 highlights
1. Make sure that the connection of the ac power adapter is correct. For connecting the ac power adapter, see the Setup Instructions manual included in the shipping contents of your computer. 2. If the above step is correct, turn off the computer, then disconnect the ac power adapter and uninstall the main battery. 3. Reinstall the battery and reconnect the ac power adapter, then turn on the computer. 4. If the power adapter icon still does not appear on the task bar and the ac power indicator does not light up, have the ac power adapter and your computer serviced. Note: If your computer is a Windows 7 model, to display the power adapter (power plug) icon, click Show hidden icons in the task bar. Power problems Print these instructions now and keep it with your computer for reference later. If your computer is getting no power at all, check the following items: 1. Verify the power switch. Refer to "System-status indicators" on page 11. The power switch is illuminated whenever the computer is on. 2. Check all power connections. Remove any power strips and surge protectors to connect the ac power adapter directly to the ac power outlet. 3. Inspect the ac power adapter. Check for any physical damage, and make sure that the power cable is firmly attached to the adapter brick and the computer. 4. Verify the ac power source is working by attaching another device to the outlet. 5. Remove the computer from a ThinkPad Port Replicator Series 3, ThinkPad Mini Dock Series 3, ThinkPad Mini Dock Plus Series 3, or the ThinkPad Mini Dock Plus Series 3 (170 W). Refer to "Detaching a ThinkPad Port Replicator Series 3, ThinkPad Mini Dock Series 3, ThinkPad Mini Dock Plus Series 3, or the ThinkPad Mini Dock Plus Series 3 (170 W)" on page 144. 6. Remove all devices and then test for system power with minimal devices attached. a. Disconnect the ac power adapter and all cables from the computer. b. Close the computer display, and turn the computer over. c. Remove the battery. Refer to "Replacing the battery" on page 97. d. Remove the memory (SO-DIMM). Refer to "Replacing memory" on page 93. e. Remove the PCI Express Mini Card. Refer to "Replacing the PCI Express Mini Card for wireless LAN/WiMAX connection" on page 110. f. Remove the hard disk drive and solid state drive. Refer to "Replacing the hard disk drive" on page 99 and "Replacing the solid state drive" on page 124. g. Remove the Ultrabay devices. Refer to "Replacing the device" on page 129. h. Wait for 30 seconds, and then reinstall the SO-DIMM and the known good battery or the ac power adapter to test the computer with minimal devices attached first. i. Reinstall each device one at a time that you have removed in the earlier steps. If your computer does not run on battery power, check the following items: 1. Remove and reseat the battery to make sure that it is properly connected. Refer to "Replacing the battery" on page 97. 2. Swap batteries with another similar model, if available. If another similar ThinkPad model is available, then verify that the battery pack works in the other computer and that the battery pack for the other model works in this computer. 3. Verify the battery-status indicator. Refer to "Power-status indicators" on page 11. 204 User Guide
-
 1
1 -
2
-
3
-
4
-
5
-
6
-
7
-
8
-
9
-
10
-
11
-
12
-
13
-
14
-
15
-
16
-
17
-
18
-
19
-
20
-
21
-
22
-
23
-
24
-
25
-
26
-
27
-
28
-
29
-
30
-
31
-
32
-
33
-
34
-
35
-
36
-
37
-
38
-
39
-
40
-
41
-
42
-
43
-
44
-
45
-
46
-
47
-
48
-
49
-
50
-
51
-
52
-
53
-
54
-
55
-
56
-
57
-
58
-
59
-
60
-
61
-
62
-
63
-
64
-
65
-
66
-
67
-
68
-
69
-
70
-
71
-
72
-
73
-
74
-
75
-
76
-
77
-
78
-
79
-
80
-
81
-
82
-
83
-
84
-
85
-
86
-
87
-
88
-
89
-
90
-
91
-
92
-
93
-
94
-
95
-
96
-
97
-
98
-
99
-
100
-
101
-
102
-
103
-
104
-
105
-
106
-
107
-
108
-
109
-
110
-
111
-
112
-
113
-
114
-
115
-
116
-
117
-
118
-
119
-
120
-
121
-
122
-
123
-
124
-
125
-
126
-
127
-
128
-
129
-
130
-
131
-
132
-
133
-
134
-
135
-
136
-
137
-
138
-
139
-
140
-
141
-
142
-
143
-
144
-
145
-
146
-
147
-
148
-
149
-
150
-
151
-
152
-
153
-
154
-
155
-
156
-
157
-
158
-
159
-
160
-
161
-
162
-
163
-
164
-
165
-
166
-
167
-
168
-
169
-
170
-
171
-
172
-
173
-
174
-
175
-
176
-
177
-
178
-
179
-
180
-
181
-
182
-
183
-
184
-
185
-
186
-
187
-
188
-
189
-
190
-
191
-
192
-
193
-
194
-
195
-
196
-
197
-
198
-
199
-
200
-
201
-
202
-
203
-
204
-
205
-
206
-
207
-
208
-
209
-
210
-
211
-
212
-
213
-
214
-
 215
215 -
 216
216 -
 217
217 -
 218
218 -
 219
219 -
 220
220 -
 221
221 -
 222
222 -
 223
223 -
 224
224 -
 225
225 -
226
-
227
-
228
-
229
-
230
-
231
-
232
-
233
-
234
-
235
-
236
-
237
-
238
-
239
-
240
-
241
-
242
-
243
-
244
-
245
-
246
 |
 |
