Lenovo ThinkPad T420si (English) User Guide - Page 87
Security, Attaching a mechanical lock, Using passwords
 |
View all Lenovo ThinkPad T420si manuals
Add to My Manuals
Save this manual to your list of manuals |
Page 87 highlights
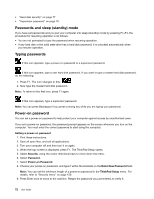
Chapter 4. Security This chapter provides information about how to protect your computer from theft and unauthorized use. • "Attaching a mechanical lock" on page 71 • "Using passwords" on page 71 • "Hard disk security" on page 77 • "Setting the security chip" on page 78 • "Using a fingerprint reader" on page 79 • "Notice on deleting data from your hard disk drive or solid state drive" on page 82 • "Using and understanding firewalls " on page 82 • "Protecting data against viruses " on page 83 Attaching a mechanical lock You can attach a mechanical lock to your computer, to help prevent it from being removed without your permission. Attach a mechanical lock to the keyhole of the computer; then secure the chain on the lock to a stationary object. Refer to the instructions shipped with the mechanical lock. Note: You are responsible for evaluating, selecting, and implementing the locking devices and security features. Lenovo makes no comments, judgments, or warranties about the function, quality, or performance of locking devices and security features. Using passwords By using passwords, you can help prevent your computer from being used by others. Once you set a password, a prompt appears on the screen each time you power on the computer. Enter your password at the prompt. You cannot use the computer unless you type the correct password. Make sure that only authorized individuals access your computer. Establishing different kinds of passwords requires that other possible users know the proper passwords in order to access your computer or your data. If this icon appears, enter Power-on password or Supervisor password. If this icon appears, enter Hard disk password. Note: If this icon appears, type a user hard disk password. If you want to type a master hard disk password, press F1 and type a master hard disk password. . If this icon appears, enter Supervisor password. Click on the items below to find out more about passwords and how to use them to protect your computer. • "Passwords and sleep (standby) mode" on page 72 • "Power-on password" on page 72 © Copyright Lenovo 2012 71
-
 1
1 -
2
-
3
-
4
-
5
-
6
-
7
-
8
-
9
-
10
-
11
-
12
-
13
-
14
-
15
-
16
-
17
-
18
-
19
-
20
-
21
-
22
-
23
-
24
-
25
-
26
-
27
-
28
-
29
-
30
-
31
-
32
-
33
-
34
-
35
-
36
-
37
-
38
-
39
-
40
-
41
-
42
-
43
-
44
-
45
-
46
-
47
-
48
-
49
-
50
-
51
-
52
-
53
-
54
-
55
-
56
-
57
-
58
-
59
-
60
-
61
-
62
-
63
-
64
-
65
-
66
-
67
-
68
-
69
-
70
-
71
-
72
-
73
-
74
-
75
-
76
-
77
-
78
-
79
-
80
-
81
-
 82
82 -
 83
83 -
 84
84 -
 85
85 -
 86
86 -
 87
87 -
 88
88 -
 89
89 -
 90
90 -
 91
91 -
 92
92 -
93
-
94
-
95
-
96
-
97
-
98
-
99
-
100
-
101
-
102
-
103
-
104
-
105
-
106
-
107
-
108
-
109
-
110
-
111
-
112
-
113
-
114
-
115
-
116
-
117
-
118
-
119
-
120
-
121
-
122
-
123
-
124
-
125
-
126
-
127
-
128
-
129
-
130
-
131
-
132
-
133
-
134
-
135
-
136
-
137
-
138
-
139
-
140
-
141
-
142
-
143
-
144
-
145
-
146
-
147
-
148
-
149
-
150
-
151
-
152
-
153
-
154
-
155
-
156
-
157
-
158
-
159
-
160
-
161
-
162
-
163
-
164
-
165
-
166
-
167
-
168
-
169
-
170
-
171
-
172
-
173
-
174
-
175
-
176
-
177
-
178
-
179
-
180
-
181
-
182
-
183
-
184
-
185
-
186
-
187
-
188
-
189
-
190
-
191
-
192
-
193
-
194
-
195
-
196
-
197
-
198
-
199
-
200
-
201
-
202
-
203
-
204
-
205
-
206
-
207
-
208
-
209
-
210
-
211
-
212
-
213
-
214
-
215
-
216
-
217
-
218
-
219
-
220
-
221
-
222
-
223
-
224
-
225
-
226
-
227
-
228
-
229
-
230
-
231
-
232
-
233
-
234
-
235
-
236
-
237
-
238
-
239
-
240
-
241
-
242
-
243
-
244
-
245
-
246
 |
 |
