Lexmark W850 User's Guide - Page 71
Ready, Printer Busy, File Allocation Tables, Technology File System
 |
View all Lexmark W850 manuals
Add to My Manuals
Save this manual to your list of manuals |
Page 71 highlights
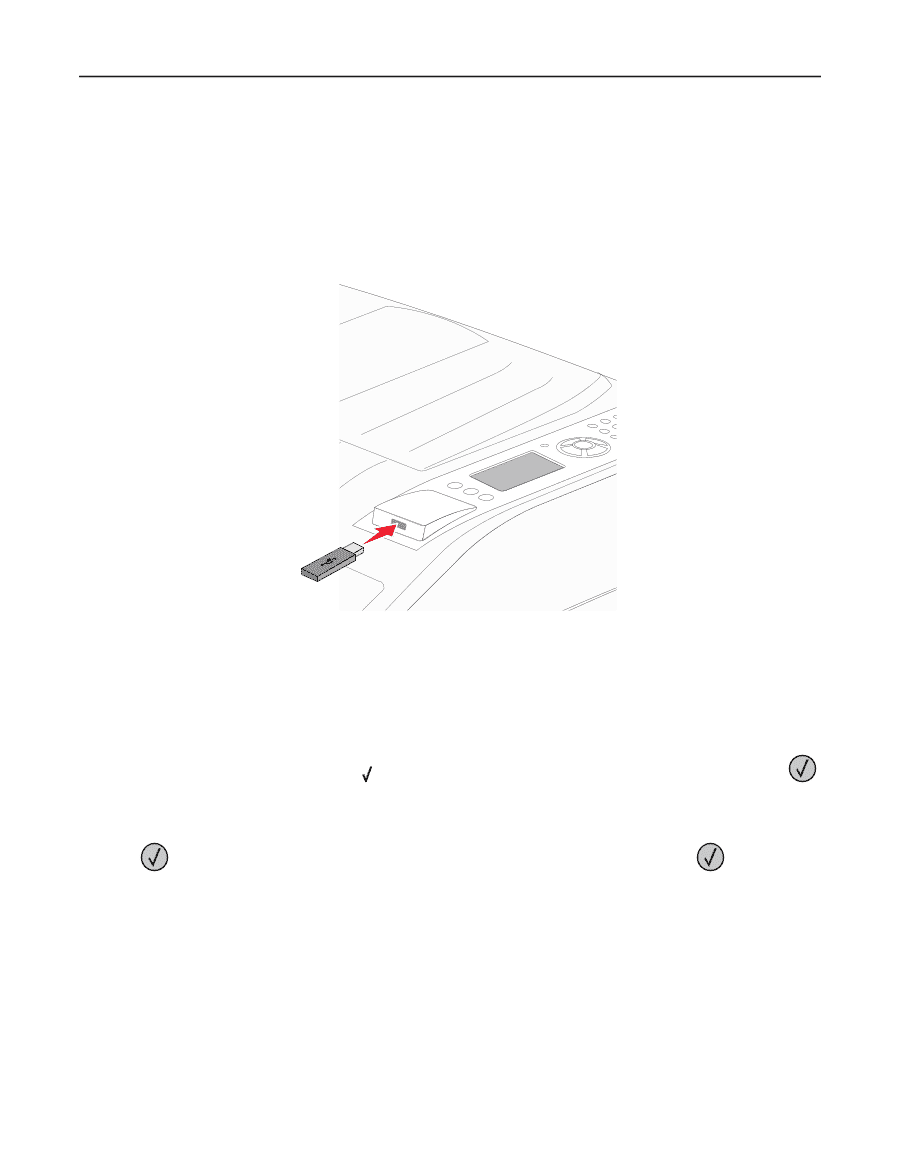
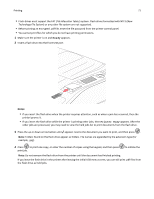
Printing 71 • Flash drives must support the FAT (File Allocation Tables) system. Flash drives formatted with NTFS (New Technology File System) or any other file system are not supported. • Before printing an encrypted .pdf file, enter the file password from the printer control panel. • You cannot print files for which you do not have printing permissions. 1 Make sure the printer is on and Ready appears. 2 Insert a flash drive into the front USB port. Notes: • If you insert the flash drive when the printer requires attention, such as when a jam has occurred, then the printer ignores it. • If you insert the flash drive while the printer is printing other jobs, then Printer Busy appears. After the other jobs are processed, you may need to view the held jobs list to print documents from the flash drive. 3 Press the up or down arrow button until appears next to the document you want to print, and then press . Note: Folders found on the flash drive appear as folders. File names are appended by the extension type (for example, .jpg). 4 Press to print one copy, or enter the number of copies using the keypad, and then press print job. to initiate the Note: Do not remove the flash drive from the printer until the document has finished printing. If you leave the flash drive in the printer after leaving the initial USB menu screen, you can still print .pdf files from the flash drive as held jobs.
-
 1
1 -
2
-
3
-
4
-
5
-
6
-
7
-
8
-
9
-
10
-
11
-
12
-
13
-
14
-
15
-
16
-
17
-
18
-
19
-
20
-
21
-
22
-
23
-
24
-
25
-
26
-
27
-
28
-
29
-
30
-
31
-
32
-
33
-
34
-
35
-
36
-
37
-
38
-
39
-
40
-
41
-
42
-
43
-
44
-
45
-
46
-
47
-
48
-
49
-
50
-
51
-
52
-
53
-
54
-
55
-
56
-
57
-
58
-
59
-
60
-
61
-
62
-
63
-
64
-
65
-
 66
66 -
 67
67 -
 68
68 -
 69
69 -
 70
70 -
 71
71 -
 72
72 -
 73
73 -
 74
74 -
 75
75 -
 76
76 -
77
-
78
-
79
-
80
-
81
-
82
-
83
-
84
-
85
-
86
-
87
-
88
-
89
-
90
-
91
-
92
-
93
-
94
-
95
-
96
-
97
-
98
-
99
-
100
-
101
-
102
-
103
-
104
-
105
-
106
-
107
-
108
-
109
-
110
-
111
-
112
-
113
-
114
-
115
-
116
-
117
-
118
-
119
-
120
-
121
-
122
-
123
-
124
-
125
-
126
-
127
-
128
-
129
-
130
-
131
-
132
-
133
-
134
-
135
-
136
-
137
-
138
-
139
-
140
-
141
-
142
-
143
-
144
-
145
-
146
-
147
-
148
-
149
-
150
-
151
-
152
-
153
-
154
-
155
-
156
-
157
-
158
-
159
-
160
-
161
-
162
-
163
-
164
-
165
-
166
-
167
-
168
-
169
-
170
-
171
-
172
-
173
-
174
-
175
-
176
-
177
-
178
-
179
-
180
-
181
-
182
-
183
-
184
-
185
-
186
-
187
-
188
-
189
-
190
-
191
-
192
-
193
-
194
-
195
-
196
-
197
-
198
-
199
-
200
-
201
-
202
-
203
-
204
-
205
-
206
-
207
-
208
-
209
-
210
-
211
-
212
-
213
-
214
-
215
-
216
-
217
 |
 |