Lexmark X5070 User's Guide - Page 126
Partial document or photo prints, Photo smudges or scratches, Checking the print cartridges
 |
View all Lexmark X5070 manuals
Add to My Manuals
Save this manual to your list of manuals |
Page 126 highlights
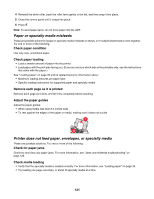
Add memory Consider purchasing more RAM. Select a lower print quality 1 From the software application, click File Œ Print. 2 Click Properties, Preferences, Options, or Setup. 3 Click Quality/Copies. 4 From the Quality/Speed area, select a lower print quality. Remove and reinstall the software It is sometimes helpful to remove the existing printer software and reinstall it. Check paper loading • Load a smaller amount of paper into the printer. You may be using a thicker type of paper. • Make sure you are loading the correct type of media. See "Loading paper" on page 35 and its related topics for information about: • Maximum loading amounts per paper type • Specific loading instructions for supported paper and specialty media Partial document or photo prints These are possible solutions. Try one or more of the following: Check document placement Make sure the document or photo is loaded facedown in the Automatic Document Feeder (ADF) and centered between the ADF paper guides. Check paper size Make sure the paper size being used matches the document or photo size you selected. Photo smudges or scratches To prevent photo smudging or scratching, avoid touching the printed surface with your fingers or sharp objects. For best results, remove each printed sheet individually from the paper exit tray, and allow the prints to dry at least 24 hours before stacking, displaying, or storing. Checking the print cartridges Are the print cartridges properly installed? For more information, see "Installing print cartridges" on page 99. 126
-
 1
1 -
2
-
3
-
4
-
5
-
6
-
7
-
8
-
9
-
10
-
11
-
12
-
13
-
14
-
15
-
16
-
17
-
18
-
19
-
20
-
21
-
22
-
23
-
24
-
25
-
26
-
27
-
28
-
29
-
30
-
31
-
32
-
33
-
34
-
35
-
36
-
37
-
38
-
39
-
40
-
41
-
42
-
43
-
44
-
45
-
46
-
47
-
48
-
49
-
50
-
51
-
52
-
53
-
54
-
55
-
56
-
57
-
58
-
59
-
60
-
61
-
62
-
63
-
64
-
65
-
66
-
67
-
68
-
69
-
70
-
71
-
72
-
73
-
74
-
75
-
76
-
77
-
78
-
79
-
80
-
81
-
82
-
83
-
84
-
85
-
86
-
87
-
88
-
89
-
90
-
91
-
92
-
93
-
94
-
95
-
96
-
97
-
98
-
99
-
100
-
101
-
102
-
103
-
104
-
105
-
106
-
107
-
108
-
109
-
110
-
111
-
112
-
113
-
114
-
115
-
116
-
117
-
118
-
119
-
120
-
 121
121 -
 122
122 -
 123
123 -
 124
124 -
 125
125 -
 126
126 -
 127
127 -
 128
128 -
 129
129 -
 130
130 -
 131
131 -
132
-
133
-
134
-
135
-
136
-
137
-
138
-
139
-
140
-
141
-
142
-
143
-
144
-
145
-
146
-
147
-
148
-
149
-
150
-
151
-
152
-
153
-
154
-
155
-
156
-
157
-
158
-
159
-
160
-
161
-
162
-
163
-
164
-
165
-
166
-
167
-
168
-
169
-
170
-
171
 |
 |
