Lexmark X5070 User's Guide - Page 58
Setting up Quick Dial buttons using the computer
 |
View all Lexmark X5070 manuals
Add to My Manuals
Save this manual to your list of manuals |
Page 58 highlights
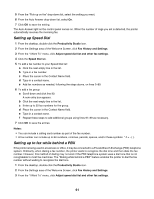
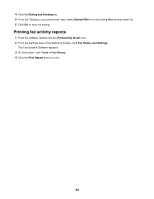
4 Click the Ringing and Answering tab. 5 From the Auto Answer drop-down list, select On. 6 Click OK to save the setting. The Auto Answer light on the control panel comes on. When the number of rings you set is detected, the printer automatically receives the incoming fax. Setting up Quick Dial buttons using the computer 1 Create the first five Speed Dial numbers, which become Quick Dial 1, 2, 3, 4, and 5. 2 If you need more information, see "Setting up Speed Dial" on page 61. Creating a fax cover page using the Productivity Studio 1 From the desktop, double-click the Productivity Studio icon. 2 From the Settings area of the Welcome Screen, click Fax History and Settings. 3 From the toolbar, click Tools ΠCover Pages. This screen provides a selection of cover pages and tells you how to change the personal information on the cover page. 4 Click OK to save your selection. Blocking junk faxes 1 From the desktop, double-click the Productivity Studio icon. 2 From the Settings area of the Welcome Screen, click Fax History and Settings. The Fax Solution Software appears. 3 From the "I Want To" menu, click Adjust speed dial list and other fax settings. 4 Click the Ringing and Answering tab. 5 From the "Block Faxes from particular senders/numbers" area, select Manage Blocked Faxes. 6 If you want to block faxes from senders missing a valid Caller ID, select the check box, and enable fax blocking. 7 If you want to block faxes from specific fax numbers, list them in the box provided. You can also edit this list. 8 Click OK to save the setting. 58
-
 1
1 -
2
-
3
-
4
-
5
-
6
-
7
-
8
-
9
-
10
-
11
-
12
-
13
-
14
-
15
-
16
-
17
-
18
-
19
-
20
-
21
-
22
-
23
-
24
-
25
-
26
-
27
-
28
-
29
-
30
-
31
-
32
-
33
-
34
-
35
-
36
-
37
-
38
-
39
-
40
-
41
-
42
-
43
-
44
-
45
-
46
-
47
-
48
-
49
-
50
-
51
-
52
-
 53
53 -
 54
54 -
 55
55 -
 56
56 -
 57
57 -
 58
58 -
 59
59 -
 60
60 -
 61
61 -
 62
62 -
 63
63 -
64
-
65
-
66
-
67
-
68
-
69
-
70
-
71
-
72
-
73
-
74
-
75
-
76
-
77
-
78
-
79
-
80
-
81
-
82
-
83
-
84
-
85
-
86
-
87
-
88
-
89
-
90
-
91
-
92
-
93
-
94
-
95
-
96
-
97
-
98
-
99
-
100
-
101
-
102
-
103
-
104
-
105
-
106
-
107
-
108
-
109
-
110
-
111
-
112
-
113
-
114
-
115
-
116
-
117
-
118
-
119
-
120
-
121
-
122
-
123
-
124
-
125
-
126
-
127
-
128
-
129
-
130
-
131
-
132
-
133
-
134
-
135
-
136
-
137
-
138
-
139
-
140
-
141
-
142
-
143
-
144
-
145
-
146
-
147
-
148
-
149
-
150
-
151
-
152
-
153
-
154
-
155
-
156
-
157
-
158
-
159
-
160
-
161
-
162
-
163
-
164
-
165
-
166
-
167
-
168
-
169
-
170
-
171
 |
 |
