Lexmark X5070 User's Guide - Page 55
Forwarding faxes, Using the computer Phone Book, Fax History and Settings
 |
View all Lexmark X5070 manuals
Add to My Manuals
Save this manual to your list of manuals |
Page 55 highlights
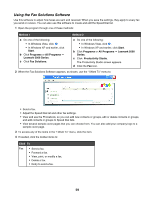
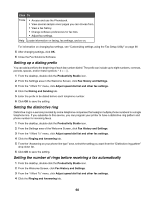
3 Set the answering machine to answer incoming calls before the printer does. For example, if you set the answering machine to answer calls after three rings, set the printer to answer calls after five rings. Forwarding faxes Use the fax-forwarding feature if you are going to be away but still want to receive your faxes. There are three fax-forwarding settings: • Off-(Default) • Forward-The printer sends the fax to the designated fax number. • Print & forward-The printer prints the fax and then sends it to the designated fax number. To set up fax forwarding: 1 From the desktop, double-click the Productivity Studio icon. 2 From the Settings area of the Welcome screen, click Fax History and Settings. 3 From the "I Want To" menu, click Adjust speed dial list and other fax settings. 4 Click the Ringing and Answering tab. 5 From the "Forward received faxes to another number" area, select the setting you want from the "Fax forwarding" drop-down list. 6 Enter the number to which you want to forward the fax. Notes: • You can include a calling card number as part of the fax number. • A fax number can include up to 64 numbers, commas, periods, spaces, and/or these symbols 7 Click OK to save the setting. Using the computer Phone Book Address books from your operating system appear as Phone Books. To access a Phone Book entry: 1 From the desktop, double-click the Productivity Studio icon. 2 From the Welcome Screen, click Fax History and Settings. 3 From the "I Want To" menu, click View phonebook. 4 To modify the Phone Book, select an option, enter the new information, and click OK. Use this New Contact New Group Edit Delete Add Contact to Speed Dial list To Create a new Phone Book entry. Create a new Group Phone Book entry. Edit a Phone Book entry. Delete a Phone Book entry. Add a Phone Book entry to your Speed Dial or Group Dial list. 55
-
 1
1 -
2
-
3
-
4
-
5
-
6
-
7
-
8
-
9
-
10
-
11
-
12
-
13
-
14
-
15
-
16
-
17
-
18
-
19
-
20
-
21
-
22
-
23
-
24
-
25
-
26
-
27
-
28
-
29
-
30
-
31
-
32
-
33
-
34
-
35
-
36
-
37
-
38
-
39
-
40
-
41
-
42
-
43
-
44
-
45
-
46
-
47
-
48
-
49
-
 50
50 -
 51
51 -
 52
52 -
 53
53 -
 54
54 -
 55
55 -
 56
56 -
 57
57 -
 58
58 -
 59
59 -
 60
60 -
61
-
62
-
63
-
64
-
65
-
66
-
67
-
68
-
69
-
70
-
71
-
72
-
73
-
74
-
75
-
76
-
77
-
78
-
79
-
80
-
81
-
82
-
83
-
84
-
85
-
86
-
87
-
88
-
89
-
90
-
91
-
92
-
93
-
94
-
95
-
96
-
97
-
98
-
99
-
100
-
101
-
102
-
103
-
104
-
105
-
106
-
107
-
108
-
109
-
110
-
111
-
112
-
113
-
114
-
115
-
116
-
117
-
118
-
119
-
120
-
121
-
122
-
123
-
124
-
125
-
126
-
127
-
128
-
129
-
130
-
131
-
132
-
133
-
134
-
135
-
136
-
137
-
138
-
139
-
140
-
141
-
142
-
143
-
144
-
145
-
146
-
147
-
148
-
149
-
150
-
151
-
152
-
153
-
154
-
155
-
156
-
157
-
158
-
159
-
160
-
161
-
162
-
163
-
164
-
165
-
166
-
167
-
168
-
169
-
170
-
171
 |
 |
