Lexmark X852E User's Reference
Lexmark X852E - Mfp Manual
 |
UPC - 734646002806
View all Lexmark X852E manuals
Add to My Manuals
Save this manual to your list of manuals |
Lexmark X852E manual content summary:
- Lexmark X852E | User's Reference - Page 1
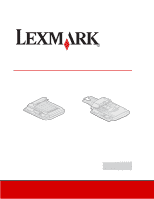
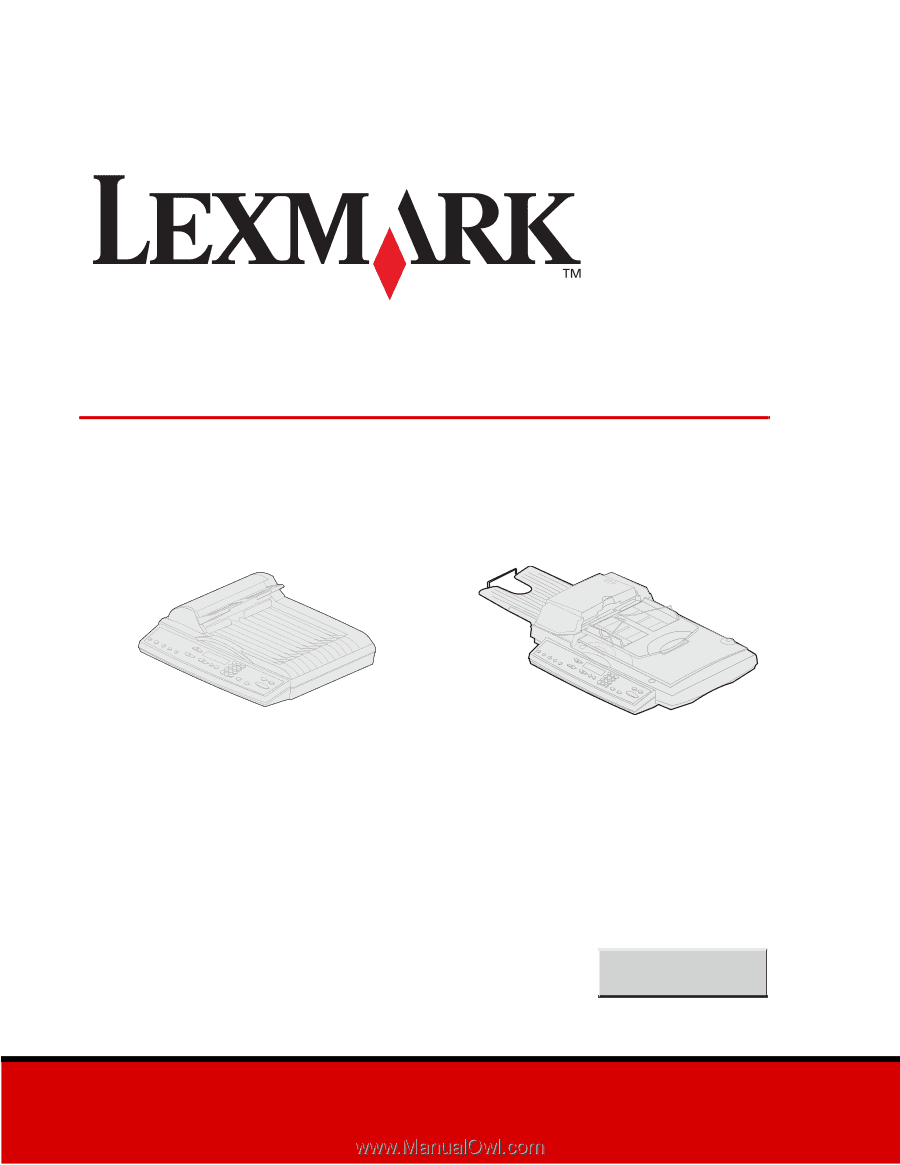
3100, 3200 MFP options User's Guide 3100 3200 October 2002 Click here for Quick Reference www.lexmark.com - Lexmark X852E | User's Reference - Page 2
This publication could include technical inaccuracies or typographical errors. Changes are periodically made to the information herein; the United Kingdom and Eire, send to Lexmark International Ltd., Marketing and Services Department, Westhorpe House, Westhorpe, Marlow Bucks SL7 3RQ. Lexmark may - Lexmark X852E | User's Reference - Page 3
the duplex option 6 Set Collation/Finishing features 6 Save paper when you print 6 Select your copy media 7 Chapter 2: Sending faxes 8 Examples of typical fax jobs 9 Chapter 3: Scanning to PC 12 Create a scan profile 12 Custom Scan to PC settings 14 Chapter 4: Scanning to e-mail 16 Create - Lexmark X852E | User's Reference - Page 4
Solving copy problems 38 Common problems and solutions 38 Copy status messages 39 Copy error messages 39 Chapter 9: Solving fax problems 41 Common fax questions 41 Solve problems sending faxes 41 Solve problems receiving faxes 42 Send fax status 43 Receive fax status 43 Send fax errors 44 - Lexmark X852E | User's Reference - Page 5
Scan to e-mail status 46 Scan to FTP status 47 Job Accounting status 48 Scan to e-mail errors 48 Scan to FTP errors 50 Work with destination lists 50 Chapter 11: Solving scanning problems 52 Preventing paper jams 52 Solve scanner problems 53 Index 54 Contents v - Lexmark X852E | User's Reference - Page 6
MFP (Multifunction Printer) control panel is in copy mode and the Ready status message is displayed. If necessary, press Stop/Clear to return to copy mode. 2 Load all pages in the automatic document feeder of the scanner. Place the pages according to the drawing on the scanner. 3 Enter the number - Lexmark X852E | User's Reference - Page 7
text in color, but minimize paper usage. 1 Load all pages in the automatic document feeder of the scanner. Place the pages according to the drawing on the scanner. 2 Press 3 on the keypad. 3 Press Paper Saver until the 2-up light comes on. If the scanner and printer support duplex, you could also - Lexmark X852E | User's Reference - Page 8
the document on the flatbed of the scanner. 2 Press Content until the photo light is on, and then press Go/Send to print a copy. Note: Photo mode is intended to be used to copy actual photographs or similar high quality images. Photos printed on a printer should be copied using mixed mode. 3 Press - Lexmark X852E | User's Reference - Page 9
factor. • If either Reduce or Enlarge is pressed, the Original Size light is turned off. • Automatic scaling between the original and the copy is used if the paper size selections have been set. Press once to increase the scaling factor by 1%. Hold button down to rapidly increase the scaling factor - Lexmark X852E | User's Reference - Page 10
if the original is color. Original document contains a mix of both text and graphics. If both the scanner and printer are color-capable, this choice produces color copies. Original document contains extremely fine details and graphics. Use with actual photographs or similar high quality images. If - Lexmark X852E | User's Reference - Page 11
or short edge). Display message 1 > 2 1 > 2 short edge One double-sided original is copied to 2 > 1 two single-sided copies. (available only if scanner supports duplex) A double-sided original is copied to a double-sided copy. 2 > 2 (available only if scanner supports duplex) Note: If you - Lexmark X852E | User's Reference - Page 12
, transparencies, card stock, and bond paper. Feature Plain paper Transparency Transparency + Separators Other Description Plain paper is the default for copy media type. Choose transparency to draw from the tray loaded with transparencies. Press Copy Media until the transparency light is lit, and - Lexmark X852E | User's Reference - Page 13
to send an outgoing fax using the MFP control panel. You can manually enter the telephone number to the receiving fax machine and then transmit your fax. Create shortcut numbers and then select the shortcut number and transmit your fax. Note: If you use the flatbed of the scanner, watch the control - Lexmark X852E | User's Reference - Page 14
to copy mode. You must restart the fax sending process. Examples of typical fax jobs You can send an outgoing fax using any of the three methods already mentioned. The examples below show manually entering the fax number on the numeric keypad. Note: If you are using the flatbed of the scanner, watch - Lexmark X852E | User's Reference - Page 15
produces a document that is much clearer and more easily faxed. 2 Place the copy on the flatbed of the scanner. 3 Press Fax/Scan Mode repeatedly until Enter Phone # appears on the control panel display. 4 Enter the fax recipient phone number on the numeric keypad. 5 Press Content repeatedly until - Lexmark X852E | User's Reference - Page 16
6 Press Fax Resolution, and then select fine. 7 Press Go/Send. Examples of typical fax jobs 11 - Lexmark X852E | User's Reference - Page 17
your systems person to obtain a list, or click the Setup button to manually search for an IP address or hostname. You must select at least one MFP to continue creating a profile. 3 Follow the instructions on the screens to define the type of document being scanned and what kind of output you want to - Lexmark X852E | User's Reference - Page 18
your PC is waiting to receive the scan output file. Step 3: Scan your original documents 1 Locate the MFP you specified in the scan profile. 2 Load all pages in the automatic document feeder of the scanner. Place the pages according to the drawing on the scanner. 3 On the control panel, press Fax - Lexmark X852E | User's Reference - Page 19
scanner, watch the control panel for messages. If prompted to Place Next Or Stop, place the next page on the flatbed and then press Go/Send to continue scanning. Press Stop/Clear when all the pages have been scanned. 6 Return to your PC if your scanner supports color.) the scanner the paper size of - Lexmark X852E | User's Reference - Page 20
the path or browse to the location Type in a unique name Both or Single (only available with duplex scanners) Description Location path where scanned file is to be located. Name that appears in the MFP control panel. Select this name in the MFP control panel to activate the scan profile. Specifies - Lexmark X852E | User's Reference - Page 21
Scan your original documents 1 Locate the MFP. This must be the same MFP where the scan profile is stored. 2 Load all pages in the automatic document feeder of the scanner. Place the pages according to the drawing on the scanner. 3 On the control panel, press Fax/Scan Mode repeatedly until you see - Lexmark X852E | User's Reference - Page 22
, it is available on the MFP control panel. 1 Locate the MFP where the permanent destinations are stored. 2 Load all pages in the automatic document feeder of the scanner. Place the pages according to the drawing on the scanner. 3 On the control panel, press Fax/Scan Mode repeatedly until you see - Lexmark X852E | User's Reference - Page 23
scanning choice in the MFP control panel. 1 Locate the MFP you want to use. This must be the MFP configured with your FTP destination. 2 Load all pages in the automatic document feeder of the scanner. Place the pages according to the drawing on the scanner. 3 Press Fax/Scan Mode repeatedly until - Lexmark X852E | User's Reference - Page 24
for scanning and current a Ready message. Phone #. scan to network destination. Scan to Fax: Control panel displays SCAN → Fax 2 Keypad for entering Manual fax: Keypad for entering Keypad for entering numbers number of copies to be outgoing fax phone numbers. lets you move around in made - Lexmark X852E | User's Reference - Page 25
not apply to fax type of duplex copies mode, unless you have duplex being made. capabilities on your scanner. Duplex does not apply to scan to network mode, unless you have duplex capabilities on your scanner. 15 Paper Saver lets you Paper Saver does not apply to fax Paper Saver specifies the - Lexmark X852E | User's Reference - Page 26
in scan to network mode 16 Copy Media specifies Fax Resolution specifies the Fax Resolution specifies the type of media for resolution of your fax (standard, the resolution and JPEG your printed copies fine, super fine, ultra fine). quality of your scan to (plain paper, transparencies, other - Lexmark X852E | User's Reference - Page 27
do not need to press Fax/Scan Mode) In copy mode, you can make a copy by placing the document in the scanner and pressing Go/Send on the MFP control panel. Ready Fax (manually enter the outgoing fax phone number) If you have set the basic fax information during setup, press Fax/Scan Mode once to - Lexmark X852E | User's Reference - Page 28
press Enter. 2 Click Configuration. 3 Select Copy Settings from the MFP menu. Note: Many of the available settings depend on the type of printer and scanner you have. Restore factory default settings To restore the default settings manually: 1 Press Menu > until Copy Menu appears, and then press - Lexmark X852E | User's Reference - Page 29
Type the IP address of the MFP in the URL field of your browser (for example, http://192.168.236.24), and then press Enter. 2 Click Configuration. 3 Select Copy Setup from the MFP menu. 4 Find the Factory Defaults drop-down box, and select Restore. 5 Click Submit. Manually set basic fax the numbers - Lexmark X852E | User's Reference - Page 30
to select another number. 7 Click Submit. Change fax send and receive settings When incoming faxes are sent to your printer, they are documented in a Receive Fax Log. For more information about this log, see "Adjust analog fax log options" on page 27. 1 Type the IP address of the MFP in the URL - Lexmark X852E | User's Reference - Page 31
minutes repeatedly until the number of attempts defined in Auto Redial have been made. Adjusts the resolution of the fax being sent. The Faxes are sent in the specified resolution if that resolution is supported by the receiving fax machine. Defines the content of the original document being faxed - Lexmark X852E | User's Reference - Page 32
on) if the requested size is not available. Fax Paper Type Defines the type of paper on which incoming faxes are to be printed (plain paper, card stock, and so on). If the requested type is not available, the printer prompts for the correct paper to be loaded. Output Bin Defines the output bin - Lexmark X852E | User's Reference - Page 33
, and so on) for the log. Log Paper Size is only used if the setting for Log Paper Type is not available. The choices vary from printer to printer. For information about what your printer supports, refer to your printer documentation. Selects an output paper type (Plain, Card stock, and so on) for - Lexmark X852E | User's Reference - Page 34
To Field Reply Address Subject Message Scan Type Paper Size Fax Resolution Default Content Default Darkness Original Orientation Description Refer to your fax server documentation for the exact format for the e-mail address field. Use [NUMBER] where the phone number should appear on the address - Lexmark X852E | User's Reference - Page 35
to the e-mail message • Web link -- scan output file is sent to a Web site and only a Web link is sent in the e-mail Create a separate recipient entry for each e-mail type and give them unique names easily identified in the e-mail destinations list. 1 Type the IP address of the MFP in the URL field - Lexmark X852E | User's Reference - Page 36
. This is the name that appears in the MFP control panel display. 6 Enter Server name, Log-in, Password, and Filename. 7 Select scan type and resolution. 8 If you want, enter a shortcut number (1-245) to identify the recipient. A shortcut number lets you rapidly find your FTP destination by pressing - Lexmark X852E | User's Reference - Page 37
MFP hardware. A file of permanent destinations (e-mail, FTP, and fax) can be created manually in any text editor using the following entries as guides 1 "NAME=Sheila;NUMBER=5544;SHORT=88;" Valid values for an external destinations file: • Type=1 entries are e-mail attachments. • Type=2 are set up - Lexmark X852E | User's Reference - Page 38
200, 300, 400, or 600 dpi. Specify the external file 1 Type the IP address of the MFP in the URL field of your browser, and then press Enter. E-mail Destinations Setup. Note: The process works the same for FTP and fax entries. 8 Click E-mail Destinations Setup. The e-mail destinations stored in the - Lexmark X852E | User's Reference - Page 39
capabilities of Lexmark network printers and MarkVision™ software with an Oracle database. MFP Job Accounting provides MarkTrack users with the ability to accumulate statistics on copy jobs, outgoing faxes, and scan to network jobs by requiring users to enter a Job Account number on the control - Lexmark X852E | User's Reference - Page 40
Under the Other heading, click Security. 4 Enter a user name and a password. Note: The user name is MarkNet. The password is whatever you assign. You must type it a second time for verification. 5 Click Submit. Select a tracking mode 1 Type the IP address of the MFP in the URL field of your browser - Lexmark X852E | User's Reference - Page 41
the account is displayed in the control panel, and then press Select. Sets the most security for using the MFP control panel. Enter an account number using the keypad on the MFP control panel. The account is checked against the master Job Account list and validated before the control panel accepts - Lexmark X852E | User's Reference - Page 42
panel displays an Enter Account # prompt. To unlock the control panel, a user must enter a valid account number using the keypad on the control panel, and then press Select. 1 Type the IP address of the MFP in the URL field of your browser, and then press Enter. 2 Click Configuration. 3 Click - Lexmark X852E | User's Reference - Page 43
your printer. Problem Solution Copy printed on the wrong kind of paper Wrong type of paper is loaded in the paper tray you selected, or the printer may not be set up for automatically selecting the paper type. 1 Put the correct paper or other media in the tray. 2 Check the paper type setting - Lexmark X852E | User's Reference - Page 44
control panel resets to copy mode and the Ready message appears on the display. Copy error messages Error Check Printer Check Scanner Press Return Description There is a problem with the printer, such as a paper jam, open door, missing tray, or toner problem. Check the printer operator panel for - Lexmark X852E | User's Reference - Page 45
Error Close Door No Duplex Option Installed Description Message appears in the top line of the control panel display. Toner cartridge door is open. This message does not display for all scanner and printer combinations. Message appears if user presses Duplex on the MFP control panel, but the duplex - Lexmark X852E | User's Reference - Page 46
9 Solving fax problems Common fax questions Problem Solution Can I create a fax distribution list? Group faxing is supported. When you create a permanent fax destination, separate multiple entries with a comma. How do I enter a pause in the fax recipient phone number? • If you are manually - Lexmark X852E | User's Reference - Page 47
at a lower resolution. If you frequently send large faxes, or faxes requiring high resolutions, you may want to add a printer hard disk or more memory to your MFP. Solve problems receiving faxes Problem Fax was not received Fax was printed on two pages Fax quality is poor Solution Have the sender - Lexmark X852E | User's Reference - Page 48
entering the shortcut number on the numeric keypad. Destination Name is the name assigned to the fax recipient. 1 Place the next page on the flatbed. 2 Press Go to continue sending pages. 3 Press Stop to end the fax transmission. The control panel resets to copy mode and the Ready message appears on - Lexmark X852E | User's Reference - Page 49
is pressed before the fax number to be dialed has been entered. Appears when a fax is attempted to let the user know that Scan to Fax function is disabled for this MFP. Appears in top line of control panel display. Some older printers display this message when the printer memory is full. Appears - Lexmark X852E | User's Reference - Page 50
one type of list. Fax Destinations NameFax NumberShortcut # Smith, Jane555-121231 Smith, Jane21-666-555-123332 Doe, John1-666-444-778835 Print the shortcut list When creating permanent destinations for an MFP, your systems person may have assigned shortcut numbers - Lexmark X852E | User's Reference - Page 51
by the selection. Repeat this process until all e-mail destinations have been selected. Press Go/Send to start the scan. Message indicates the MFP is trying to make a connection with the SMTP server. Message indicates the MFP is scanning and sending the document. Solving network scan problems 46 - Lexmark X852E | User's Reference - Page 52
the shortcut number on the numeric keypad. Destination Name is the name assigned to the e-mail destination. 1 Place the next page on the flatbed. 2 Press Go/Send to continue sending pages. 3 Press Stop/Clear to end the scan. The control panel resets to copy mode and the Ready message appears. Scan - Lexmark X852E | User's Reference - Page 53
control panel. This applies to all Job Accounting modes. Appears when the user attempts to enter an invalid account number. This applies to Courtesy III and Validation modes. Scan to e-mail errors Message Description Connection Failed MFP is unable to find the e-mail server and deliver the file - Lexmark X852E | User's Reference - Page 54
accept e-mail from the MFP IP address. • Mail server is down. • Mail server is busy. Make sure your reply address has been set up correctly. Mail server determined that one of the recipient addresses is bad. Correct the address or remove it from the e-mail destination list. Scan to e-mail errors 49 - Lexmark X852E | User's Reference - Page 55
the user MFP. Check DNS server address. Username, password, or both have been refused by the FTP server. Check the FTP server address. See the FTP scan error log that prints for information about this error. Message Message appears on the second line of the display when an invalid shortcut number - Lexmark X852E | User's Reference - Page 56
is an example of one type of list. E-Mail Destinations number on the numeric keypad of the MFP control panel. Posting a printed shortcut list close to the MFP can reduce the time spent searching for destinations in the control panel menus. 1 Locate the MFP. This must be the same MFP - Lexmark X852E | User's Reference - Page 57
11 Solving scanning problems Preventing paper jams Your automatic document feeder is designed to handle most paper types. However, if you are unsure if your document will cause a jam in the automatic document feeder, we recommend that you scan it using the flatbed. The following cannot be properly - Lexmark X852E | User's Reference - Page 58
Clean if necessary. 6 Replace the pad assembly. Paper skewed in the scanner • Clean the paper feed roller. • Use the paper guide when feeding the paper. Paper does not feed through the automatic document feeder Make sure the paper support is open. Make sure the pages to be copied are not damaged - Lexmark X852E | User's Reference - Page 59
34 MarkVision software 34 menus Fax log 27 Fax send 26 N N-up copying 6 P paper jams 52 print server 13, 24 problem solving copying 38 multiple pages feed 53 no duplex lights on 6 paper jam 53 paper skew 53 receiving faxing 42 scan unit is noisy 53 sending faxing 41 S Scan to e-mail creating - Lexmark X852E | User's Reference - Page 60
16 Scan to PC customizing settings 14 profile 13 setup 13 scanning control panel modes 22 selecting copy content 5 copy media 7 setting a password for job accounts 35 setting duplex option 6 shortcut list 51 T tracking usage 34 troubleshooting copying 38 faxing, receiving 42 faxing, sending 41 job - Lexmark X852E | User's Reference - Page 61
Lexmark and Lexmark with diamond design are trademarks of Lexmark International, Inc., registered in the United States and/or other countries. © 2002 Lexmark International, Inc. 740 West New Circle Road Lexington, Kentucky 40550 www.lexmark.com
-
 1
1 -
 2
2 -
 3
3 -
 4
4 -
 5
5 -
 6
6 -
 7
7 -
8
-
9
-
10
-
11
-
12
-
13
-
14
-
15
-
16
-
17
-
18
-
19
-
20
-
21
-
22
-
23
-
24
-
25
-
26
-
27
-
28
-
29
-
30
-
31
-
32
-
33
-
34
-
35
-
36
-
37
-
38
-
39
-
40
-
41
-
42
-
43
-
44
-
45
-
46
-
47
-
48
-
49
-
50
-
51
-
52
-
53
-
54
-
55
-
56
-
57
-
58
-
59
-
60
-
61
 |
 |
www.lexmark.com
User’s Guide
October 2002
3100
3200
3100, 3200
MFP options
Click here for
Quick Reference