Lexmark X852E User's Reference - Page 38
Specify the external file, Disable scan functions
 |
UPC - 734646002806
View all Lexmark X852E manuals
Add to My Manuals
Save this manual to your list of manuals |
Page 38 highlights
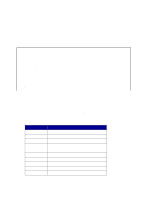
Scan value 12 13 14 Content and output file Photo content - RGB JPEG Photo content - RGB TIFF Photo content - RGB PS • Res= Resolution values can equal 75, 150, 200, 300, 400, or 600 dpi. Specify the external file 1 Type the IP address of the MFP in the URL field of your browser, and then press Enter. 2 Click Configuration. 3 Click Manage Destinations. 4 Click Specify External Destinations File. 5 Specify the FTP server where the file is stored, plus the login and password necessary to gain access to the server. Specify the full path and name of the file. 6 Click Submit. The file is accessed from the server location. The e-mail and FTP destinations stored in the external file are added to the current list of permanent destinations. 7 Check the process worked by clicking Back on the Browser menu until you see one of the destinations setup links, such as E-mail Destinations Setup. Note: The process works the same for FTP and fax entries. 8 Click E-mail Destinations Setup. The e-mail destinations stored in the file now appear in the e-mail destination list. You may have to scroll through the list to find them. The external destinations file is refreshed every 24 hours, on MFP power up, or by re-submitting the file (steps 1 through 6). Disable scan functions You can limit the scan to network functions available on a particular MFP control panel. You can disable any scan to network mode without affecting the others. Disabling Scan to e-mail or Scan to FTP lets you create or add permanent destinations, but the mode is not visible in the control panel, so the scan output file cannot be sent. Disabling Scan to Profile prevents anyone from creating a profile, plus the function is not visible in the MFP control panel. Disabling the multipage TIFF function places each page of a scan in an individual TIFF file rather than placing all pages in a single, multipage TIFF file. Disable scan functions 33
-
 1
1 -
2
-
3
-
4
-
5
-
6
-
7
-
8
-
9
-
10
-
11
-
12
-
13
-
14
-
15
-
16
-
17
-
18
-
19
-
20
-
21
-
22
-
23
-
24
-
25
-
26
-
27
-
28
-
29
-
30
-
31
-
32
-
 33
33 -
 34
34 -
 35
35 -
 36
36 -
 37
37 -
 38
38 -
 39
39 -
 40
40 -
 41
41 -
 42
42 -
 43
43 -
44
-
45
-
46
-
47
-
48
-
49
-
50
-
51
-
52
-
53
-
54
-
55
-
56
-
57
-
58
-
59
-
60
-
61
 |
 |