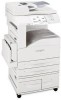
Lexmark X852E User's Reference - Page 39
Con Job Accounting, Track MFP usage, Create accounts
 |
UPC - 734646002806
View all Lexmark X852E manuals
Add to My Manuals
Save this manual to your list of manuals |
Page 39 highlights
Disabling the Scan to FTP confirmation page stops the confirmation page from being printed. 1 Type the IP address of the MFP in the URL field of your browser, and then press Enter. 2 Click Configuration. 3 Under the MFP heading, click Scan to Network General Setup. 4 Remove the check mark from any function you want to disable. 5 Click Submit. Configure Job Accounting Track MFP usage MarkTrack™ is software that combines the unique capabilities of Lexmark network printers and MarkVision™ software with an Oracle database. MFP Job Accounting provides MarkTrack users with the ability to accumulate statistics on copy jobs, outgoing faxes, and scan to network jobs by requiring users to enter a Job Account number on the control panel. Note: To count outgoing faxes, you must be using a MarkNet N2501e print server containing a fax modem port. Create accounts To use Job Accounting, you must create a Job Account for each authorized MFP user. You must also notify each user that they must enter the assigned Job Account number on the control panel before they are allowed to scan. 1 Type the IP address of the MFP in the URL field of your browser, and then press Enter. 2 Click Configuration. 3 Click MFP Job Accounting. 4 Click Manage Job Accounts. 5 Enter a name for the Job Account and assign an account number. 6 Click Add/Modify. The new Job Account appears in the list. Configure Job Accounting 34
-
 1
1 -
2
-
3
-
4
-
5
-
6
-
7
-
8
-
9
-
10
-
11
-
12
-
13
-
14
-
15
-
16
-
17
-
18
-
19
-
20
-
21
-
22
-
23
-
24
-
25
-
26
-
27
-
28
-
29
-
30
-
31
-
32
-
33
-
 34
34 -
 35
35 -
 36
36 -
 37
37 -
 38
38 -
 39
39 -
 40
40 -
 41
41 -
 42
42 -
 43
43 -
 44
44 -
45
-
46
-
47
-
48
-
49
-
50
-
51
-
52
-
53
-
54
-
55
-
56
-
57
-
58
-
59
-
60
-
61
 |
 |
