Linksys WPS54G User Guide - Page 49
The available options are Reset Device, Restore to Factory Default, Attached Remote, and Connected
 |
UPC - 745883561049
View all Linksys WPS54G manuals
Add to My Manuals
Save this manual to your list of manuals |
Page 49 highlights
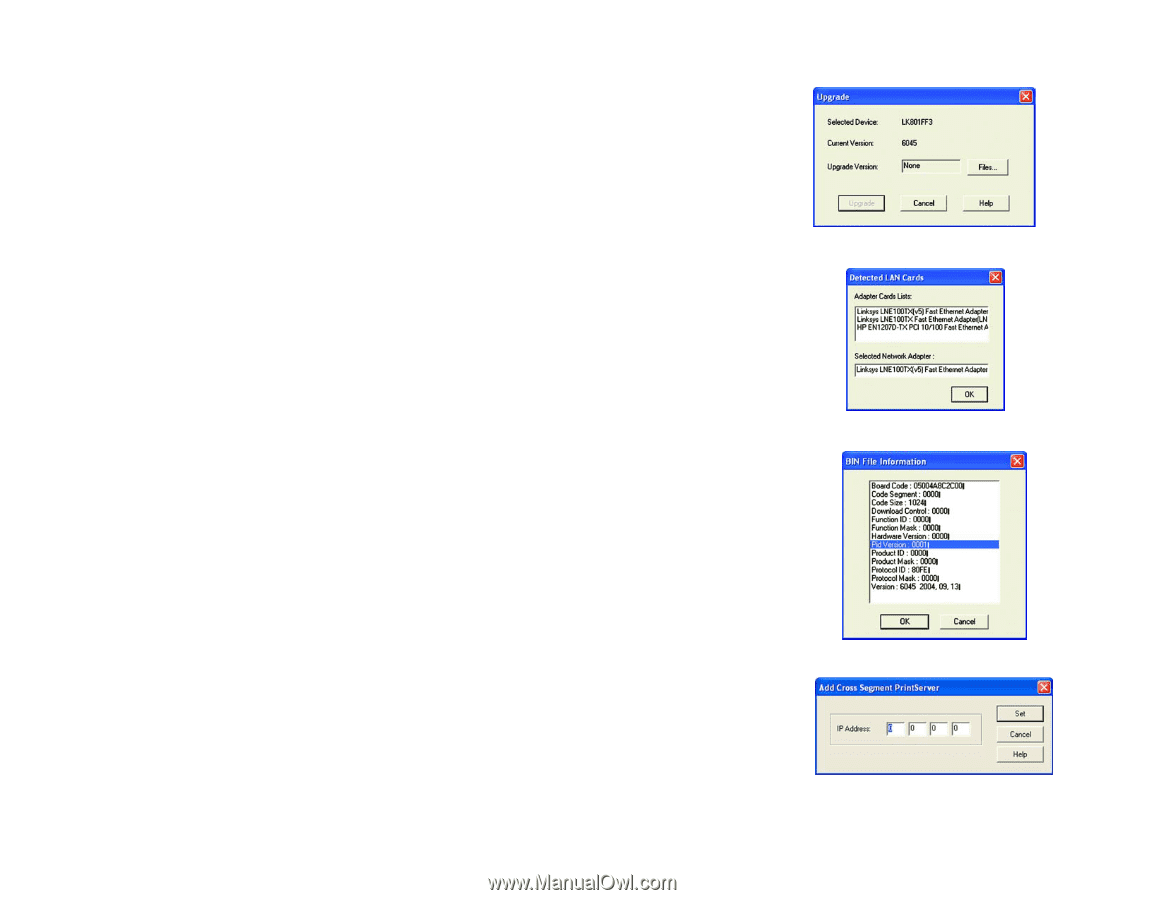
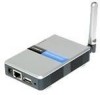
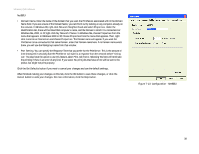
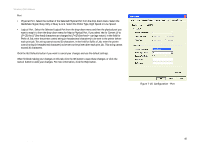
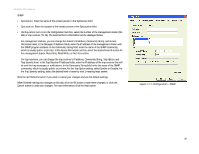
Wireless-G PrintServer • Upgrade. You may use this option to upgrade the firmware of the PrintServer. Follow these instructions: 1. On the Upgrade screen, click the Files button. 2. The Detected LAN Cards screen will appear. Select the LAN card the PrintServer is connected to, and then click the OK button. 3. Follow the on-screen instructions, and select the firmware file you want to use. 4. View the BIN File Information screen, and click the OK button if you have selected the correct firmware file. Click the Cancel button to select a different firmware file. 5. On the Upgrade screen, click the Upgrade button. Click the Cancel button to cancel the firmware upgrade. For more information, click the Help button. • Refresh. This option allows you to refresh the device list after you change the name or IP address of a device. The screen does not refresh automatically. • Exit. This option allows you to exit the Bi-Admin program. InitDevice. The available options are Reset Device, Restore to Factory Default, Attached Remote, and Connected Protocol. If you click Attached Remote, the Add Cross Segment Printer screen appears. To add a cross segment print server, enter its IP address in the fields provided, and click the Set button. Click Cancel to undo any changes. For more information, click the Help button. Diagnostic. Diagnostic allows you to print a test page from either of the PrintServer's ports. Help. The two options are Help Topics and About Bi-Admin. These help files offer extensive advice and details about all of the PrintServer's functions and capabilities. Figure 7-18: Upgrade Figure 7-19: Detected LAN Cards Figure 7-20: BIN File Information Chapter 7: Bi-Admin Management The Bi-Admin Management Utility Figure 7-21: Add Cross Segment PrintServer 43
-
 1
1 -
2
-
3
-
4
-
5
-
6
-
7
-
8
-
9
-
10
-
11
-
12
-
13
-
14
-
15
-
16
-
17
-
18
-
19
-
20
-
21
-
22
-
23
-
24
-
25
-
26
-
27
-
28
-
29
-
30
-
31
-
32
-
33
-
34
-
35
-
36
-
37
-
38
-
39
-
40
-
41
-
42
-
43
-
 44
44 -
 45
45 -
 46
46 -
 47
47 -
 48
48 -
 49
49 -
 50
50 -
 51
51 -
 52
52 -
 53
53 -
 54
54 -
55
-
56
-
57
-
58
-
59
-
60
-
61
-
62
-
63
-
64
-
65
-
66
-
67
-
68
-
69
-
70
-
71
-
72
-
73
-
74
 |
 |