Linksys WPS54G User Guide - Page 53
IPP Client Setup for Windows 2000, Specify a Printer, Connect to Printer - software for windows 7
 |
UPC - 745883561049
View all Linksys WPS54G manuals
Add to My Manuals
Save this manual to your list of manuals |
Page 53 highlights
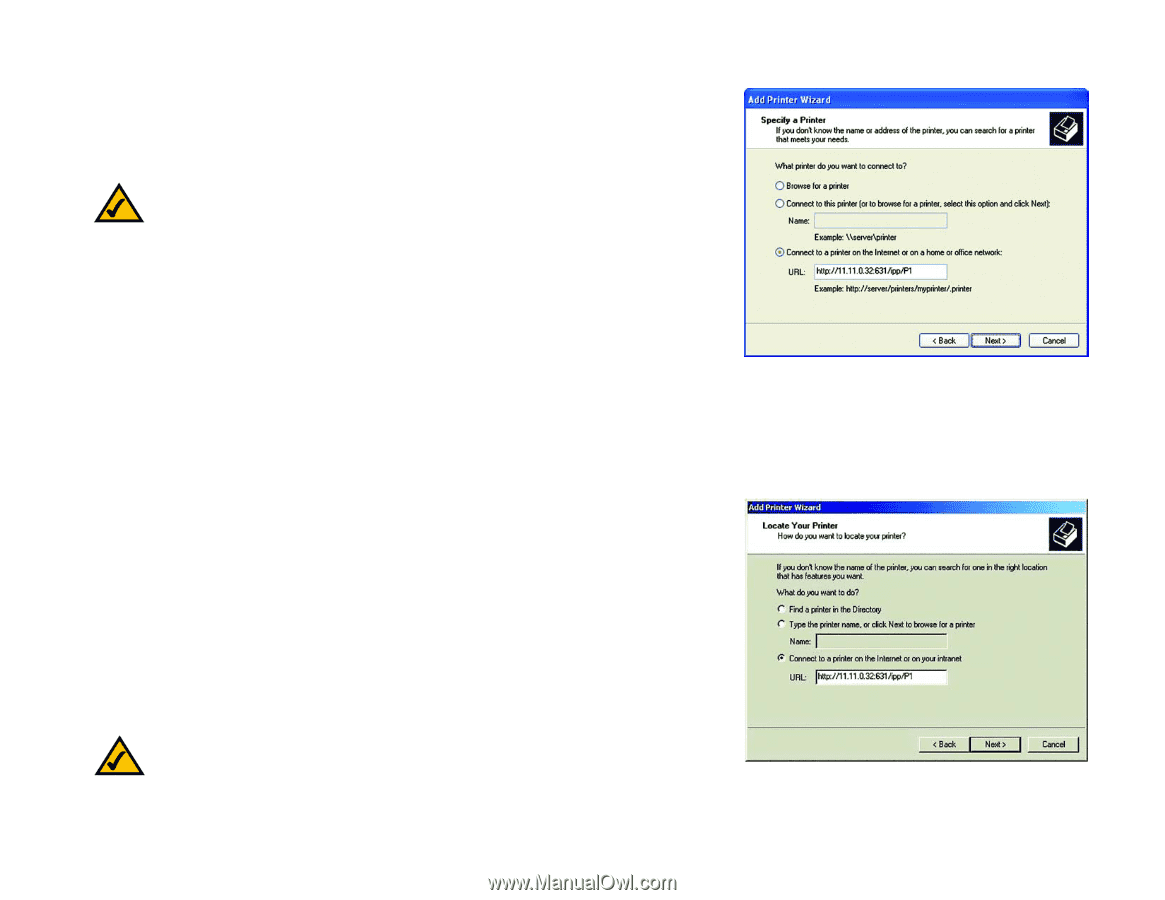
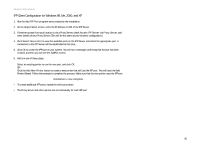
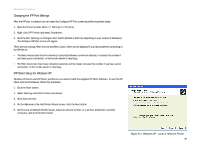
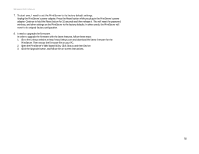
Wireless-G PrintServer 6. On the Specify a Printer screen, select Connect to a printer on the Internet or on a home or office network, and enter the URL of the IPP Server as follows (ip_address represents the IP Address of the IPP Server, and 631 represents the port number). Port 1 ip_address:631/ipp/P1 NOTE: These entries are case-sensitive. They must be entered as shown, with "ipp" in lowercase and P1 in uppercase. 7. If the connection can be established, and the printer on that port is online, the Connect to Printer dialog box will be displayed. This screen notifies you that the printer driver is not installed. Click the OK button. 8. Select the printer manufacturer and model to match the printer connected to the appropriate port on the IPP Server. 9. Click the OK button and follow the prompts to complete the Wizard. The IPP printer is now ready for use. IPP Client Setup for Windows 2000 Windows 2000 has its own IPP Client, and there is no need to install the supplied IPP Client Software. To use this IPP Client with the PrintServer, follow this procedure: 1. Click the Start button. 2. Select Settings and click Printers. 3. Double-click Add Printer. 4. On the Welcome to the Add Printer Wizard screen, click the Next button. 5. Select Network Printer and click Next to see the Locate your Printer screen. 6. Select Connect to a printer on the Internet or on your intranet, and enter the URL of the IPP Server as follows (ip_address represents the IP Address of the IPP Server, and 631 represents the port number). Port 1 ip_address:631/ipp/P1 NOTE: These entries are case-sensitive. They must be entered as shown, with "ipp" in lowercase and P1 in uppercase. Chapter 8: Internet Printing Protocol (IPP) Windows IPP Client Setup Figure 8-2: Windows XP - Specify a Printer Figure 8-3: Windows 2000 - Locate Your Printer 47
-
 1
1 -
2
-
3
-
4
-
5
-
6
-
7
-
8
-
9
-
10
-
11
-
12
-
13
-
14
-
15
-
16
-
17
-
18
-
19
-
20
-
21
-
22
-
23
-
24
-
25
-
26
-
27
-
28
-
29
-
30
-
31
-
32
-
33
-
34
-
35
-
36
-
37
-
38
-
39
-
40
-
41
-
42
-
43
-
44
-
45
-
46
-
47
-
 48
48 -
 49
49 -
 50
50 -
 51
51 -
 52
52 -
 53
53 -
 54
54 -
 55
55 -
 56
56 -
 57
57 -
 58
58 -
59
-
60
-
61
-
62
-
63
-
64
-
65
-
66
-
67
-
68
-
69
-
70
-
71
-
72
-
73
-
74
 |
 |