Logitech Harmony Ultimate One User Guide - Page 23
Using your Harmony Ultimate One - firmware
 |
View all Logitech Harmony Ultimate One manuals
Add to My Manuals
Save this manual to your list of manuals |
Page 23 highlights
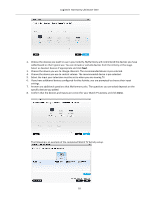
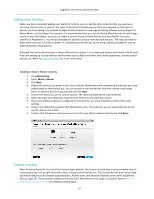
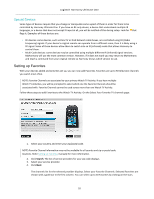
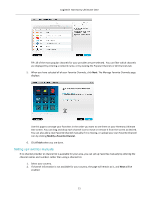
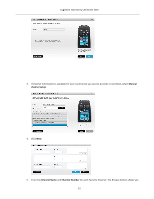
Logitech Harmony Ultimate One to select an image to represent each channel. 6. Click Add More to add more Favorite Channels. 7. Click Save when you are finished. Syncing your Harmony Ultimate One To complete your first time setup, MyHarmony will perform a sync operation to save all of your setup details and update your remote. When prompted, click Sync to continue. Upgrading your Harmony Ultimate One firmware When new firmware is available for your Harmony Ultimate One, it will automatically be applied the next time you sync your remote. The remote may reboot multiple times during this process. Once the firmware update is complete, your Harmony Ultimate One will sync with MyHarmony as usual. Testing your setup Once you have completed the setup process you may begin using your remote in your living room. Please ensure all of your devices are powered off, then start an Activity by tapping on it from the Harmony Ultimate One remote screen. To test your setup: 1. Make sure that all of your devices are turned off. 2. Tap an Activity such as Watch TV from the Harmony Ultimate One remote LCD screen. 3. Confirm that the Activity has started correctly and that you can hear sound and see video. If it has, select Yes, everything started correctly. If something is not working properly, the tutorial may help to correct it or you may have to visit MyHarmony. If you discover any setup problems during these tests, see Setup problems under Troubleshooting for more information. Using your Harmony Ultimate One After completing the first time setup to add your devices, create Activities, and choose your Favorite Channels, you are ready to use your remote. The following sections describe how to access the features you will use most often. 23
-
 1
1 -
2
-
3
-
4
-
5
-
6
-
7
-
8
-
9
-
10
-
11
-
12
-
13
-
14
-
15
-
16
-
17
-
 18
18 -
 19
19 -
 20
20 -
 21
21 -
 22
22 -
 23
23 -
 24
24 -
 25
25 -
 26
26 -
 27
27 -
 28
28 -
29
-
30
-
31
-
32
-
33
-
34
-
35
-
36
-
37
-
38
-
39
-
40
-
41
-
42
-
43
-
44
-
45
-
46
-
47
-
48
-
49
 |
 |
