Netgear WAC720 Reference Manual - Page 87
Con Captive Portal, Configuration > Captive Portal > Web Customization
 |
View all Netgear WAC720 manuals
Add to My Manuals
Save this manual to your list of manuals |
Page 87 highlights
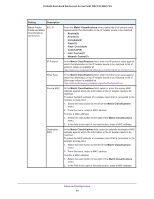
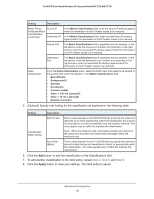
ProSAFE Dual-Band Wireless AC Access Point WAC720 WAC730 Configure Captive Portal Captive portal allows you to set up a login page so that only users with a valid user name and password may access the internet through the access point. You must first configure the captive portal and add users before enabling it on the access point. To configure a captive portal: 1. Select Configuration > Captive Portal > Web Customization. 2. Select Create from the Captive Portal Web Locale menu. 3. Enter a name for the Web Locale in the Web Local Name field. 4. Select an instance for the captive portal from the Captive Portal Instances menu. You may edit the look of the captive portal login page using the following fields: Field Logo Image Name Browser Title Browser Content Content Acceptance Use Policy Welcome Title Welcome Content Description This drop down menu displays the names of image files that have been uploaded to the AP for use with a captive portal. Image must be no larger than 5 Kb in size. You can upload logo images on the Upload Logo page. The browser title appears in the title bar of the browser. This is the text that will appear on the body of the page. You can enter instructions for logging into the portal here. Text entered here will display in a user agreement. This is the title of the welcome page that displays after the user has successfully logged in. This is the content of the welcome page that displays after the user has successfully logged in. 5. Click the Apply button to save your changes. Advanced Configuration 87
-
 1
1 -
2
-
3
-
4
-
5
-
6
-
7
-
8
-
9
-
10
-
11
-
12
-
13
-
14
-
15
-
16
-
17
-
18
-
19
-
20
-
21
-
22
-
23
-
24
-
25
-
26
-
27
-
28
-
29
-
30
-
31
-
32
-
33
-
34
-
35
-
36
-
37
-
38
-
39
-
40
-
41
-
42
-
43
-
44
-
45
-
46
-
47
-
48
-
49
-
50
-
51
-
52
-
53
-
54
-
55
-
56
-
57
-
58
-
59
-
60
-
61
-
62
-
63
-
64
-
65
-
66
-
67
-
68
-
69
-
70
-
71
-
72
-
73
-
74
-
75
-
76
-
77
-
78
-
79
-
80
-
81
-
 82
82 -
 83
83 -
 84
84 -
 85
85 -
 86
86 -
 87
87 -
 88
88 -
 89
89 -
 90
90 -
 91
91 -
 92
92 -
93
-
94
-
95
-
96
-
97
-
98
-
99
-
100
-
101
-
102
-
103
-
104
-
105
-
106
-
107
-
108
-
109
-
110
-
111
-
112
-
113
 |
 |
