Netgear XSM4324FS Software Setup Manual Software Version 12.x - Page 31
Monitor and complete the Auto Install process, admin, Login
 |
View all Netgear XSM4324FS manuals
Add to My Manuals
Save this manual to your list of manuals |
Page 31 highlights
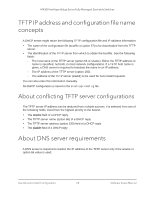
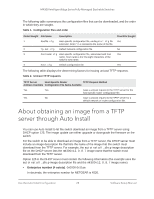
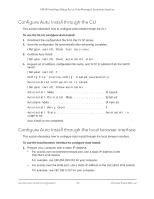
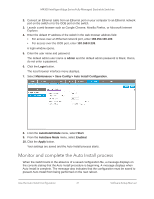
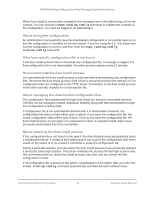
M4300 Intelligent Edge Series Fully Managed Stackable Switches 2. Connect an Ethernet cable from an Ethernet port on your computer to an Ethernet network port on the switch or to the OOB port on the switch. 3. Launch a web browser such as Google Chrome, Mozilla Firefox, or Microsoft Internet Explorer. 4. Enter the default IP address of the switch in the web browser address field: • For access over an Ethernet network port, enter 169.254.100.100. • For access over the OOB port, enter 192.168.0.239. A login window opens. 5. Enter the user name and password. The default admin user name is admin and the default admin password is blank, that is, do not enter a password. 6. Click the Login button. The local browser interface menu displays. 7. Select Maintenance > Save Config > Auto Install Configuration. 8. From the AutoInstall Mode menu, select Start. 9. From the AutoSave Mode menu, select Enabled. 10. Click the Apply button. Your settings are saved and the Auto Install process starts. Monitor and complete the Auto Install process When the switch boots in the absence of a saved configuration file, a message displays on the console stating that the Auto Install procedure is beginning. A message displays when Auto Install is complete. The message also indicates that the configuration must be saved to prevent Auto Install from being performed on the next reboot. Use the Auto Install Configuration 31 Software Setup Manual
-
 1
1 -
2
-
3
-
4
-
5
-
6
-
7
-
8
-
9
-
10
-
11
-
12
-
13
-
14
-
15
-
16
-
17
-
18
-
19
-
20
-
21
-
22
-
23
-
24
-
25
-
 26
26 -
 27
27 -
 28
28 -
 29
29 -
 30
30 -
 31
31 -
 32
32 -
 33
33
 |
 |