Nikon COOLPIX P610 Reference Manual - Page 91
Notes About HDR, Vibration reduction, Backlighting
 |
View all Nikon COOLPIX P610 manuals
Add to My Manuals
Save this manual to your list of manuals |
Page 91 highlights
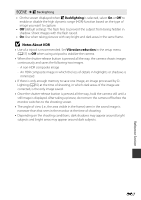
y M o Backlighting • On the screen displayed when o Backlighting is selected, select On or Off to enable or disable the high dynamic range (HDR) function based on the type of image you want to capture. • Off (default setting): The flash fires to prevent the subject from being hidden in shadow. Shoot images with the flash raised. • On: Use when taking pictures with very bright and dark areas in the same frame. B Notes About HDR • Use of a tripod is recommended. Set Vibration reduction in the setup menu (A57) to Off when using a tripod to stabilize the camera. • When the shutter-release button is pressed all the way, the camera shoots images continuously and saves the following two images. - A non-HDR composite image - An HDR composite image in which the loss of details in highlights or shadows is minimized • If there is only enough memory to save one image, an image processed by DLighting (A55) at the time of shooting, in which dark areas of the image are corrected, is the only image saved. • Once the shutter-release button is pressed all the way, hold the camera still until a still image is displayed. After taking a picture, do not turn the camera off before the monitor switches to the shooting screen. • The angle of view (i.e., the area visible in the frame) seen in the saved image is narrower than that seen in the monitor at the time of shooting. • Depending on the shooting conditions, dark shadows may appear around bright subjects and bright areas may appear around dark subjects. E7 Reference Section
-
 1
1 -
2
-
3
-
4
-
5
-
6
-
7
-
8
-
9
-
10
-
11
-
12
-
13
-
14
-
15
-
16
-
17
-
18
-
19
-
20
-
21
-
22
-
23
-
24
-
25
-
26
-
27
-
28
-
29
-
30
-
31
-
32
-
33
-
34
-
35
-
36
-
37
-
38
-
39
-
40
-
41
-
42
-
43
-
44
-
45
-
46
-
47
-
48
-
49
-
50
-
51
-
52
-
53
-
54
-
55
-
56
-
57
-
58
-
59
-
60
-
61
-
62
-
63
-
64
-
65
-
66
-
67
-
68
-
69
-
70
-
71
-
72
-
73
-
74
-
75
-
76
-
77
-
78
-
79
-
80
-
81
-
82
-
83
-
84
-
85
-
 86
86 -
 87
87 -
 88
88 -
 89
89 -
 90
90 -
 91
91 -
 92
92 -
 93
93 -
 94
94 -
 95
95 -
 96
96 -
97
-
98
-
99
-
100
-
101
-
102
-
103
-
104
-
105
-
106
-
107
-
108
-
109
-
110
-
111
-
112
-
113
-
114
-
115
-
116
-
117
-
118
-
119
-
120
-
121
-
122
-
123
-
124
-
125
-
126
-
127
-
128
-
129
-
130
-
131
-
132
-
133
-
134
-
135
-
136
-
137
-
138
-
139
-
140
-
141
-
142
-
143
-
144
-
145
-
146
-
147
-
148
-
149
-
150
-
151
-
152
-
153
-
154
-
155
-
156
-
157
-
158
-
159
-
160
-
161
-
162
-
163
-
164
-
165
-
166
-
167
-
168
-
169
-
170
-
171
-
172
-
173
-
174
-
175
-
176
-
177
-
178
-
179
-
180
-
181
-
182
-
183
-
184
-
185
-
186
-
187
-
188
-
189
-
190
-
191
-
192
-
193
-
194
-
195
-
196
-
197
-
198
-
199
-
200
-
201
-
202
-
203
-
204
-
205
-
206
-
207
-
208
-
209
-
210
-
211
-
212
-
213
-
214
-
215
-
216
-
217
-
218
-
219
-
220
-
221
-
222
-
223
-
224
-
225
-
226
-
227
-
228
-
229
-
230
-
231
-
232
-
233
-
234
-
235
-
236
-
237
-
238
 |
 |
