Nokia N77 User Guide - Page 31
Video settings, Extended digital zoom
 |
View all Nokia N77 manuals
Add to My Manuals
Save this manual to your list of manuals |
Page 31 highlights
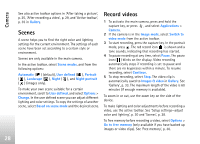
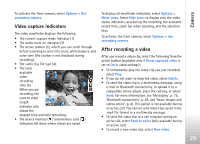
Camera These resolutions are only available in the main camera. Add to album-Select whether you want to save the image to a certain album in the gallery. If you select Yes, a list of available albums opens. Show captured image-Select On if you want to see the captured image after it is taken or Off if you want to continue taking pictures immediately. Default image name-Define the default name for the captured images. Extended digital zoom (main camera only)-Select On to allow the zoom increments to be smooth and continuous between digital and extended digital zoom. If you want to limit the zoom to where the selected image quality is maintained, select Off. Capture tone-Select the tone you want to hear when you take a picture. Memory in use-Select where to store your images. Restore camera settings-Select Yes to return the default values to the camera settings. Video settings To change the video recorder main settings, select Options > Settings and from the following: Video quality-Set the quality of the video clip to High (best quality for long term usage), Normal (standard quality for playback through your mobile device), or Sharing. If you want to view the video on a compatible TV or PC, select High, which has CIF resolution (352x288) and the .mp4 file format. To send the video clip through MMS, select Sharing (QCIF resolution 128x96, .3gp file format). The size of the video clip recorded with Sharing is limited to 300 KB (about 20 seconds in duration) so that it can be conveniently sent as a multimedia message to a compatible device. Audio recording-Select On if you want to record both image and sound. Add to album-Select whether you want to add the recorded video clip to a certain album in Gallery after recording it. Select Yes to open a list of available albums. Show captured video-Select whether you want the first frame of the recorded video clip to be shown on the display after the recording stops. Select Play from the active toolbar (main camera) or Options > Play (secondary camera) to view the video clip. Default video name-Define the default name for the captured video clips. Memory in use-Define the default memory store: device memory or memory card (if inserted). 31
-
 1
1 -
2
-
3
-
4
-
5
-
6
-
7
-
8
-
9
-
10
-
11
-
12
-
13
-
14
-
15
-
16
-
17
-
18
-
19
-
20
-
21
-
22
-
23
-
24
-
25
-
 26
26 -
 27
27 -
 28
28 -
 29
29 -
 30
30 -
 31
31 -
 32
32 -
 33
33 -
 34
34 -
 35
35 -
 36
36 -
37
-
38
-
39
-
40
-
41
-
42
-
43
-
44
-
45
-
46
-
47
-
48
-
49
-
50
-
51
-
52
-
53
-
54
-
55
-
56
-
57
-
58
-
59
-
60
-
61
-
62
-
63
-
64
-
65
-
66
-
67
-
68
-
69
-
70
-
71
-
72
-
73
-
74
-
75
-
76
-
77
-
78
-
79
-
80
-
81
-
82
-
83
-
84
-
85
-
86
-
87
-
88
-
89
-
90
-
91
-
92
-
93
-
94
-
95
-
96
-
97
-
98
-
99
-
100
-
101
-
102
-
103
-
104
-
105
-
106
-
107
-
108
-
109
-
110
-
111
-
112
-
113
-
114
-
115
-
116
-
117
-
118
-
119
-
120
-
121
-
122
-
123
-
124
-
125
-
126
-
127
-
128
-
129
-
130
-
131
-
132
-
133
 |
 |