Nokia N77 User Guide - Page 65
Contacts (phonebook), Save and edit names and numbers
 |
View all Nokia N77 manuals
Add to My Manuals
Save this manual to your list of manuals |
Page 65 highlights
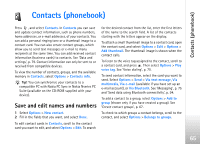
Contacts (phonebook) Contacts (phonebook) Press , and select Contacts. In Contacts you can save and update contact information, such as phone numbers, home addresses, or e-mail addresses, of your contacts. You can add a personal ringing tone or a thumbnail image to a contact card. You can also create contact groups, which allow you to send text messages or e-mail to many recipients at the same time. You can add received contact information (business cards) to contacts. See 'Data and settings', p. 79. Contact information can only be sent to or received from compatible devices. To view the number of contacts, groups, and the available memory in Contacts, select Options > Contacts info. Tip! You can synchronize your contacts to a compatible PC with Nokia PC Sync in Nokia Nseries PC Suite (available on the CD-ROM supplied with your device). Save and edit names and numbers 1 Select Options > New contact. 2 Fill in the fields that you want, and select Done. To edit contact cards in Contacts, scroll to the contact card you want to edit, and select Options > Edit. To search for the desired contact from the list, enter the first letters of the name to the search field. A list of the contacts starting with the letters appear on the display. To attach a small thumbnail image to a contact card, open the contact card, and select Options > Edit > Options > Add thumbnail. The thumbnail image is shown when the contact calls. To listen to the voice tag assigned to the contact, scroll to a contact card, and press . Then select Options > Play voice tag. See 'Voice dialing', p. 70. To send contact information, select the card you want to send. Select Options > Send > Via text message, Via multimedia, Via e-mail (available if you have set up an e-mail account), or Via Bluetooth. See 'Messaging', p. 75 and 'Send data using Bluetooth connectivity', p. 94. To add a contact to a group, select Options > Add to group (shown only if you have created a group). See 'Create contact groups', p. 67. To check to which groups a contact belongs, scroll to the contact, and select Options > Belongs to groups. 65
-
 1
1 -
2
-
3
-
4
-
5
-
6
-
7
-
8
-
9
-
10
-
11
-
12
-
13
-
14
-
15
-
16
-
17
-
18
-
19
-
20
-
21
-
22
-
23
-
24
-
25
-
26
-
27
-
28
-
29
-
30
-
31
-
32
-
33
-
34
-
35
-
36
-
37
-
38
-
39
-
40
-
41
-
42
-
43
-
44
-
45
-
46
-
47
-
48
-
49
-
50
-
51
-
52
-
53
-
54
-
55
-
56
-
57
-
58
-
59
-
 60
60 -
 61
61 -
 62
62 -
 63
63 -
 64
64 -
 65
65 -
 66
66 -
 67
67 -
 68
68 -
 69
69 -
 70
70 -
71
-
72
-
73
-
74
-
75
-
76
-
77
-
78
-
79
-
80
-
81
-
82
-
83
-
84
-
85
-
86
-
87
-
88
-
89
-
90
-
91
-
92
-
93
-
94
-
95
-
96
-
97
-
98
-
99
-
100
-
101
-
102
-
103
-
104
-
105
-
106
-
107
-
108
-
109
-
110
-
111
-
112
-
113
-
114
-
115
-
116
-
117
-
118
-
119
-
120
-
121
-
122
-
123
-
124
-
125
-
126
-
127
-
128
-
129
-
130
-
131
-
132
-
133
 |
 |