Nokia N93i User Guide - Page 93
Synchronization, Synchronize data
 |
View all Nokia N93i manuals
Add to My Manuals
Save this manual to your list of manuals |
Page 93 highlights
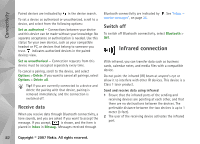
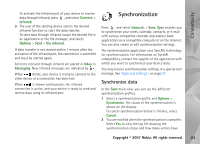
Connectivity To activate the infrared port of your device to receive data through infrared, press , and select Connect. > Infrared. 3 The user of the sending device selects the desired infrared function to start the data transfer. To send data through infrared, locate the desired file in an application or the file manager, and select Options > Send > Via infrared. If data transfer is not started within 1 minute after the activation of the infrared port, the connection is cancelled and must be started again. All items received through infrared are placed in Inbox in Messaging. New infrared messages are indicated by . When blinks, your device is trying to connect to the other device or a connection has been lost. When is shown continuously, the infrared connection is active, and your device is ready to send and receive data using its infrared port. Synchronization Press , and select Connect. > Sync. Sync enables you to synchronize your notes, calendar, contacts, or e-mail with various compatible calendar and address book applications on a compatible computer or on the internet. You can also create or edit synchronization settings. The synchronization application uses SyncML technology for synchronization. For information on SyncML compatibility, contact the supplier of the application with which you want to synchronize your device data. You may receive synchronization settings in a special text message. See "Data and settings", on page 37. Synchronize data In the Sync main view, you can see the different synchronization profiles. 1 Select a synchronization profile and Options > Synchronise. The status of the synchronization is shown on the display. To cancel synchronization before it finishes, select Cancel. 2 You are notified when the synchronization is complete. Select Yes to view the log file showing the synchronization status and how many entries have Copyright © 2007 Nokia. All rights reserved. 83
-
 1
1 -
2
-
3
-
4
-
5
-
6
-
7
-
8
-
9
-
10
-
11
-
12
-
13
-
14
-
15
-
16
-
17
-
18
-
19
-
20
-
21
-
22
-
23
-
24
-
25
-
26
-
27
-
28
-
29
-
30
-
31
-
32
-
33
-
34
-
35
-
36
-
37
-
38
-
39
-
40
-
41
-
42
-
43
-
44
-
45
-
46
-
47
-
48
-
49
-
50
-
51
-
52
-
53
-
54
-
55
-
56
-
57
-
58
-
59
-
60
-
61
-
62
-
63
-
64
-
65
-
66
-
67
-
68
-
69
-
70
-
71
-
72
-
73
-
74
-
75
-
76
-
77
-
78
-
79
-
80
-
81
-
82
-
83
-
84
-
85
-
86
-
87
-
 88
88 -
 89
89 -
 90
90 -
 91
91 -
 92
92 -
 93
93 -
 94
94 -
 95
95 -
 96
96 -
 97
97 -
 98
98 -
99
-
100
-
101
-
102
-
103
-
104
-
105
-
106
-
107
-
108
-
109
-
110
-
111
-
112
-
113
-
114
-
115
-
116
-
117
-
118
-
119
-
120
-
121
-
122
-
123
-
124
-
125
-
126
-
127
-
128
-
129
-
130
-
131
-
132
-
133
-
134
-
135
-
136
-
137
-
138
-
139
-
140
-
141
 |
 |