Onkyo TX-DS676 Owner Manual - Page 20
Setting the speaker distance
 |
View all Onkyo TX-DS676 manuals
Add to My Manuals
Save this manual to your list of manuals |
Page 20 highlights
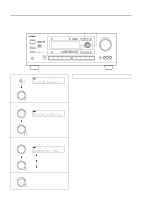
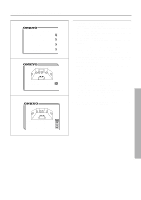
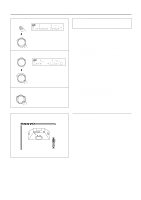
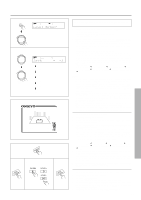
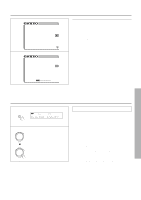
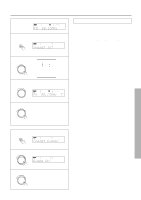
Setting the speaker distance 1 SP/SYS SETUP SPEAKERS A PRESET/MODE ADJ PUSH TO ENTER 2 ~ 7 PRESET/MODE ADJ PUSH TO ENTER PRESET/MODE ADJ SPEAKERS A PCM DIGITAL PUSH TO ENTER 8 PRESET/MODE ADJ PUSH TO ENTER TUNED AUTO TUNED FM STEREO AUTO ft Setting the distance from each speaker to the listening position (Loudspeaker Position Time Synchronization*) Select a value that is closest to the actual distance between each speaker and the listening position. Using the SMART SCAN CONTROLLER, you can easily set the speaker configuration. Turn it to select the setting and press it to go to the next item. For each speaker, you can set a distance of 0.3 meter to 9.0 meters (or 1 foot to 30 feet) in increments of 30 cm (1 foot). 1. Press the SP/SYS SETUP button repeatedly until "Distance Setup ?" appears. Press the SMART SCAN CONTROLLER. 2. "Left=" appears. Set the distance from the left front speaker. Press the SMART SCAN CONTROLLER. 3. "Center=" appears. Set the distance from the center speaker. Press the SMART SCAN CONTROLLER. 4. "Right=" appears. Set the distance from the Right front speaker. Press the SMART SCAN CONTROLLER. 5. "R-Sur=" appears. Set the distance from the Right surround speaker. Press the SMART SCAN CONTROLLER. 6. "L-Sur=" appears Set the distance from the left surround speaker. Press the SMART SCAN CONTROLLER. 7. "SW=" appears. Set the distance from the subwoofer. 8. Press the SMART SCAN CONTROLLER. The speaker distance setup has been completed. * Loudspeaker Position Time Synchronization is a registered trademark of Lucasfilm LTD. * Distance Setup * Left =3.6m/12ft Center =3.6m/12ft Right =3.6m/12ft (R-Sur =2.1m/ 7ft) • Using the on-screen display 1. Press the OSD MENU button. 2. Select "Speaker Setup" and then press the right edge of the ENTER/Cursor button. 3. Select "Distance Setup" and then press the right edge of the ENTER/Cursor button. You can now set the distance from each speaker. (When the cursor is on "Right," you can press the lower edge of the ENTER/Cursor button to display additional items.) Select a value that is closest to the actual distance. For each speaker, you can set a distance of 0.3 meter to 9.0 meters (or 1 foot to 30 feet) in increments of 30 cm (I foot). Left : Left front speaker Center : Center speaker Right : Right front speaker R-Sur : Right surround speaker L-Sur : Left surround speaker Subwoofer : Subwoofer 4. Press the center of the ENTER/Cursor button, or press the EXIT button, to exit the setup mode. 20
-
 1
1 -
2
-
3
-
4
-
5
-
6
-
7
-
8
-
9
-
10
-
11
-
12
-
13
-
14
-
 15
15 -
 16
16 -
 17
17 -
 18
18 -
 19
19 -
 20
20 -
 21
21 -
 22
22 -
 23
23 -
 24
24 -
 25
25 -
26
-
27
-
28
-
29
-
30
-
31
-
32
-
33
-
34
-
35
-
36
-
37
-
38
-
39
-
40
-
41
-
42
-
43
-
44
-
45
-
46
-
47
-
48
-
49
-
50
-
51
-
52
-
53
-
54
-
55
-
56
-
57
-
58
-
59
-
60
-
61
-
62
-
63
-
64
 |
 |
